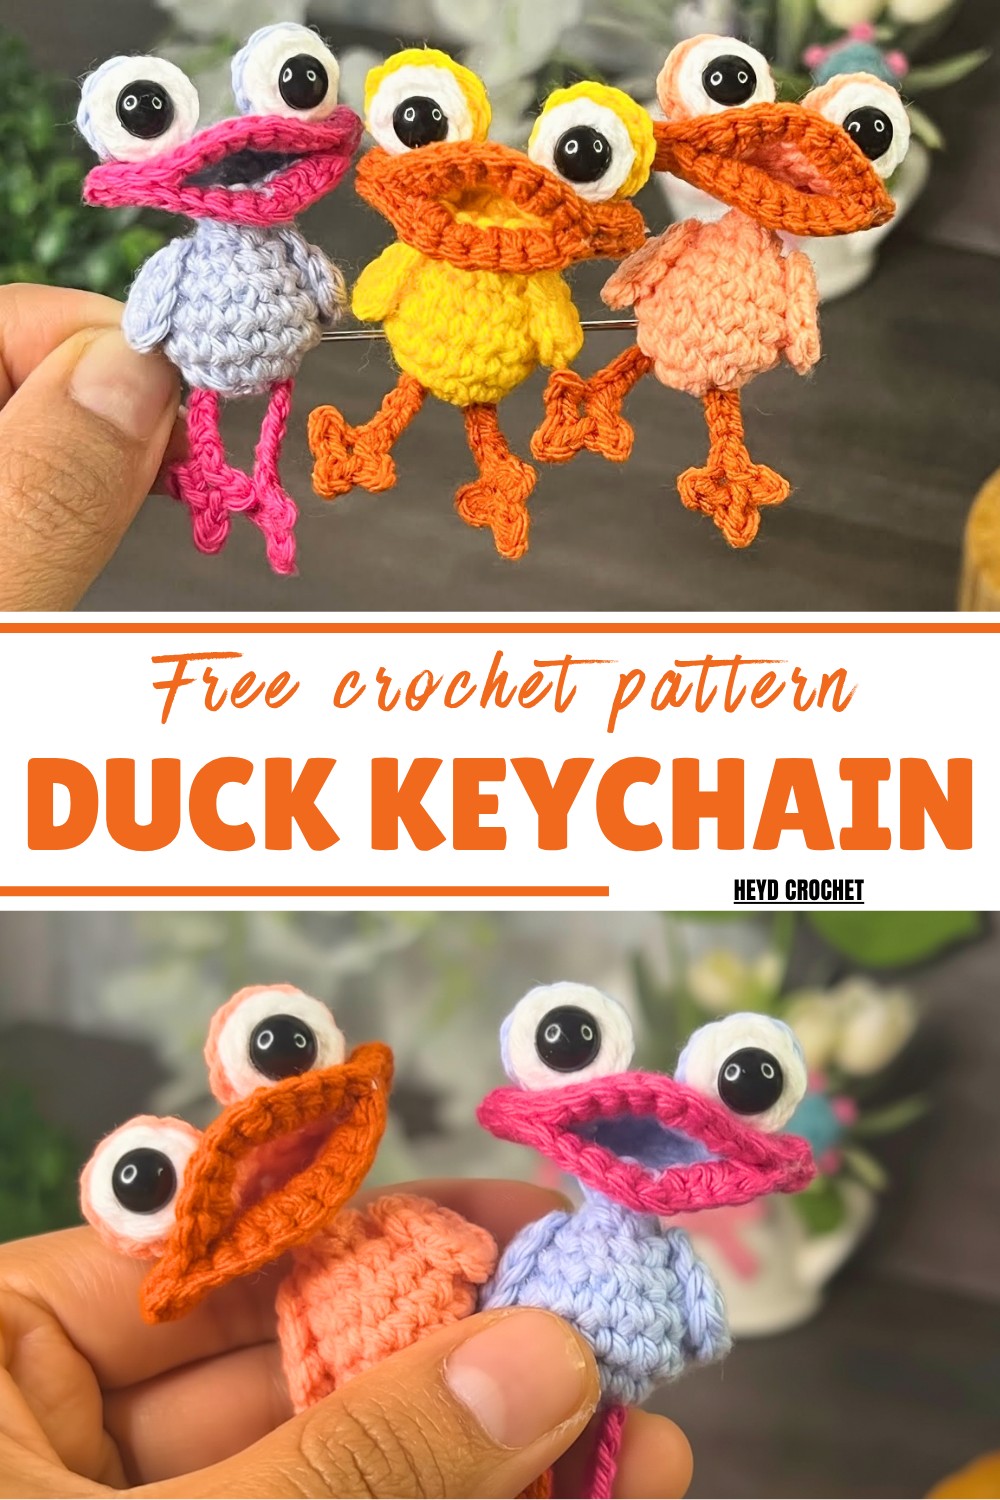
How to Free Crochet Duck Keychain Pattern To Upgrade Your Keys
Infuse charm into your accessories with a free crochet duck keychain pattern that’s simple to crochet, customizable, and perfect for gifting.
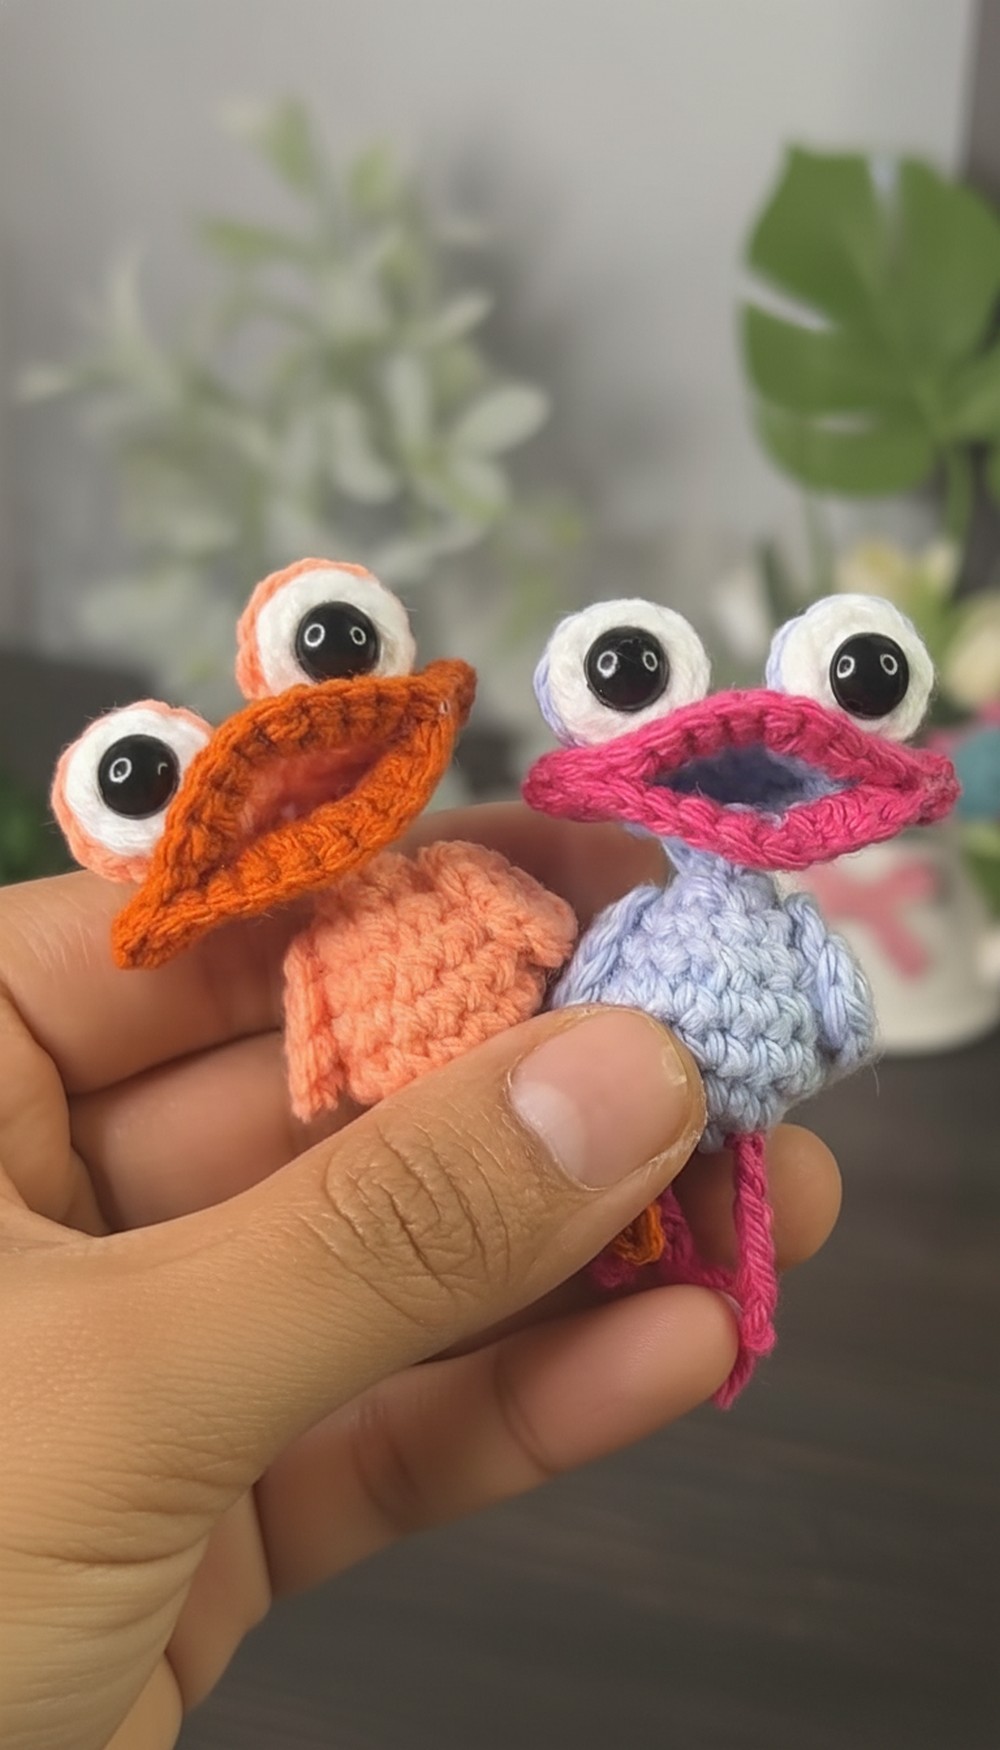
Bring a cheerful touch to your daily accessories with this adorable crochet duck keychain pattern! This tiny creation is perfect for brightening up keys, bags, or even hanging in your car as a charming decoration. It features thoughtful details like delicate wings, a playful beak, and tiny feet, giving it a unique, 3D style that looks both cute and stylish. This pattern is designed to be beginner-friendly while still offering intermediate crocheters a fun and rewarding project to enjoy.
Colorful Crochet Duck Keychain Pattern For Aesthetic Key Rings
With its compact pattern, the keychain is quick to make and easily customizable. You can experiment with different yarn colors to suit personal preferences or special occasions, and it’s a great way to use leftover yarn creatively. Whether you choose to keep it as a personal accessory or gift it to someone you care about, it adds an extra layer of charm to any collection.
This crochet duck keychain pattern isn’t just an accessory. It’s a thoughtful keepsake, a handmade gift, or even a product for crochet markets or fairs. Its lightweight portability and delightful pattern make it an ideal piece for spreading positivity and smiles wherever it goes.
Level of Difficulty:
Beginner to Intermediate. Basic skills in creating magic rings, single crochets, increases, and decreases are required.
Materials Required:
- Crochet hook: 1.75mm or 2mm
- Yarn: Two colors of yarn (yellow for the body and orange for the beak)
- Needle for sewing
- Stitch marker (optional)
- Filling: Polyester fiberfill (silicone stuffing)
- Safety eyes (7mm recommended)
Key Features
- Compact and portable design, perfect for accessories
- Amigurumi-style pattern for a 3D look
- Gentle color changes for added charm
- Can be customized for various preferences or occasions
Step-by-Step Crochet Duck Keychain Pattern
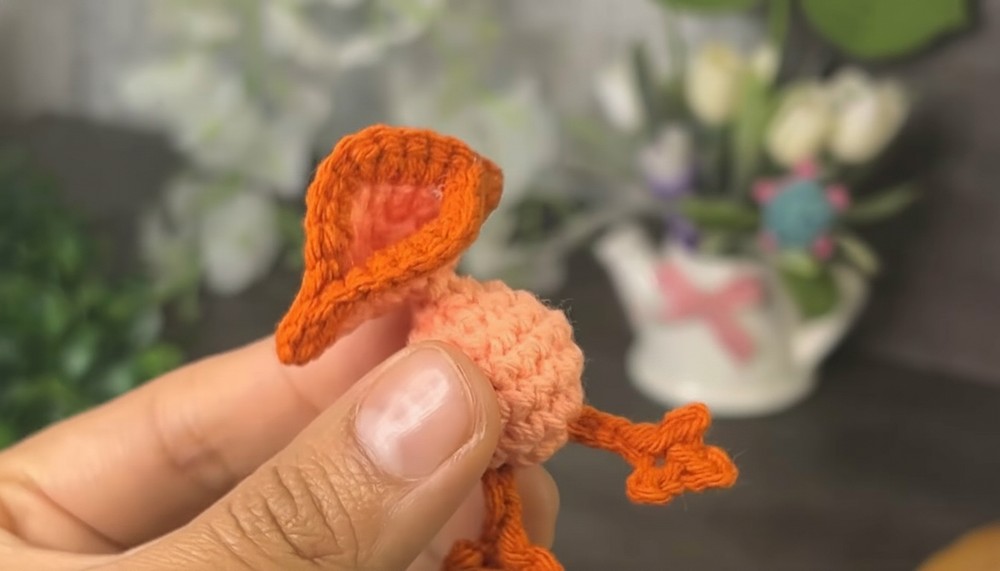
1. Begin With the Beak
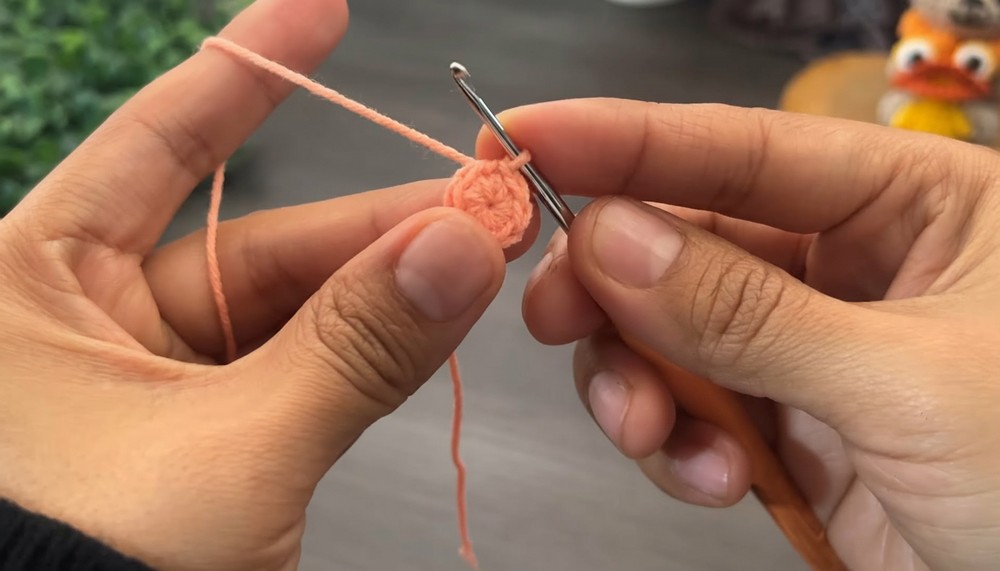
- Start by creating a magic ring. Inside the ring, chain one and crochet 8 single crochets (SC).
- Pull the tail to close the ring and join the last stitch with a slip stitch (SL ST) into the first stitch. You now have a completed round.
- Round 2: Chain 1. Work 2 single crochets in each stitch (increase). Continue until the end of the round to get 16 SC.
- Round 3: Chain 1. Work the sequence of 1 single crochet (SC), then an increase (2 SC in the next stitch). Repeat this pattern all around for 24 SC.
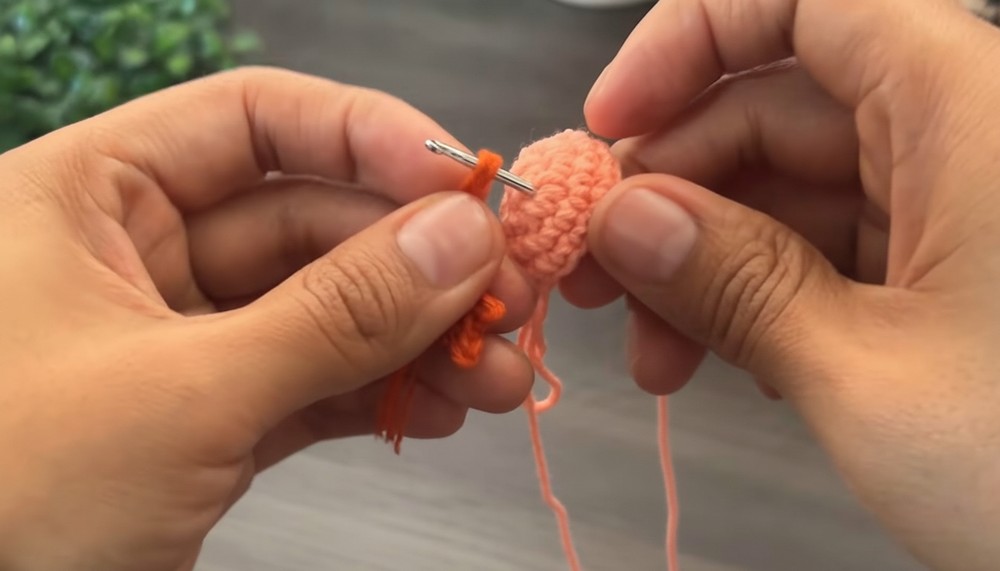
- Change yarn color to orange for the beak. Slip stitch to close the round and adjust the tension.

2. Shape the Beak for Definition
- Round 4: Chain 1. Crochet 2 single crochets, then an increase (2 SC in one stitch). Repeat this sequence all around while hiding yarn tails from the back. This creates a total of 32 SC.
- Cut the yarn and weave in the loose ends for a neat finish.
3. Crochet the Feet
- Chain 7 stitches.
- Row 1: Work a slip stitch in the first two chains. Then, chain 2.
- Work a slip stitch into the next chain to shape a “toe.”
- Repeat this process 3 times to create three toes.
- Cut the yarn, leaving a tail for weaving. Crochet a second foot using the same steps.

4. Start the Body
- Begin with a magic ring. Chain one and crochet 8 SC inside the ring. Close the ring with an SL ST.
- Round 2: Chain 1. Work 2 SC in each stitch for a total of 16 SC.
- Rounds 3-4: Crochet 16 SC with no increases to maintain shaping.
- Place the duck feet at the bottom of the body. Secure them by tying their loose tails into the inside of the body piece.
5. Shape the Body
- Round 5: Chain 1. Work 2 SC, then a decrease (invisible decrease if preferred). Repeat this pattern around.
- Round 6: Chain 1. Crochet 1 SC, then a decrease. Repeat for the entire round.
- Before closing the body, stuff it with fiberfill for definition.
- Final round: Work 4 decreases around to close the top of the body. Cut the yarn and weave in the ends.
6. Make the Wings
- Create a magic ring. Inside the ring, crochet 6 SC.
- Without joining, chain 2 and work a slip stitch into the second chain. Cut the yarn, leaving a tail for sewing.
- Pinch the wing slightly and sew it to the sides of the body. Repeat for the second wing.
7. Add Eyes
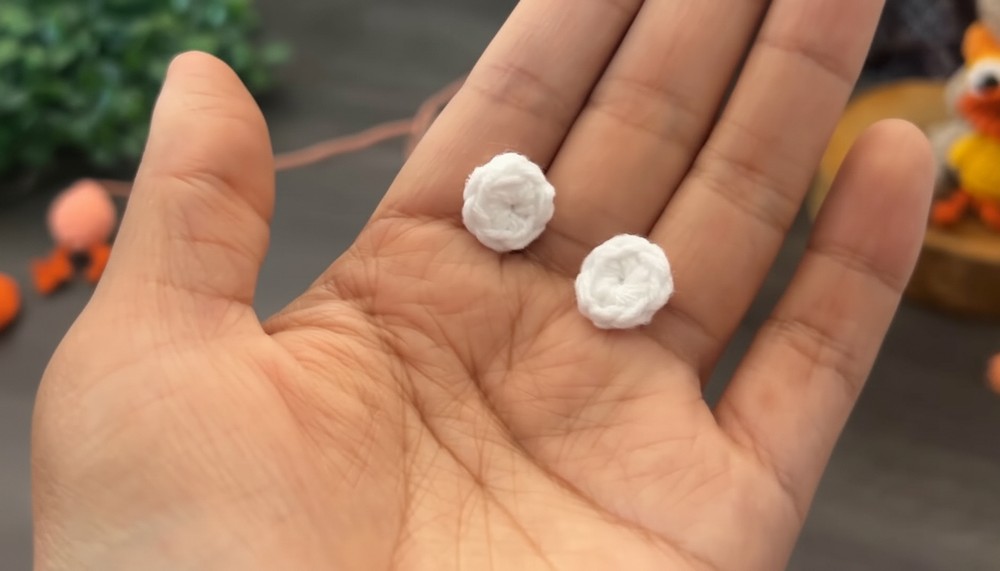
- Use safety eyes (7mm recommended). Attach them securely through the white eye patches (made using a magic ring of 6 SC).
- Sew the white patches to the duck’s head.
8. Assemble and Finish
- Sew all the small parts (beak, wings, and feet) onto the body.
- Attach a keyring or any other accessory hardware to turn the duck into a keychain or hanging charm.
Suggestions and Uses:
- This crochet duck is perfect as a keychain, car charm, or even a decor item.
- You can gift it as part of a handmade gift bundle for friends and family.
Tutor’s Tip:
When sewing on the small parts, use sewing pins to hold the pieces in place before stitching. This ensures a symmetrical and polished look.
Conclusion:
This crochet duck keychain pattern is a delightful project that balances creativity and practicality. With endless customization options, it’s a chance to showcase your skills while crocheting an adorable keepsake. Whether you’re a beginner or a seasoned crocheter, this pattern is bound to bring joy.