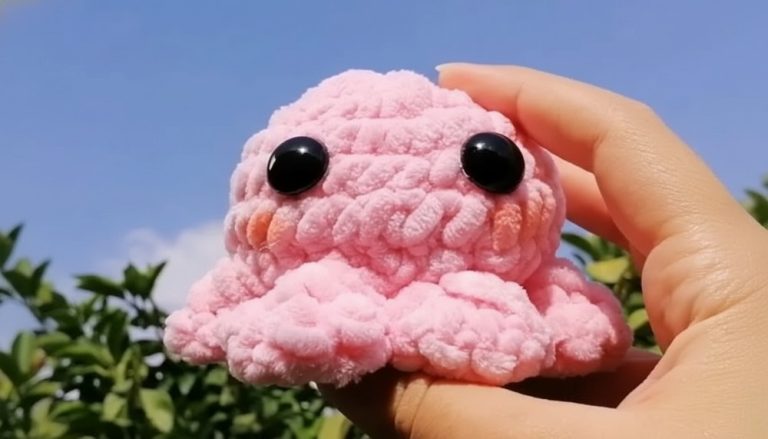
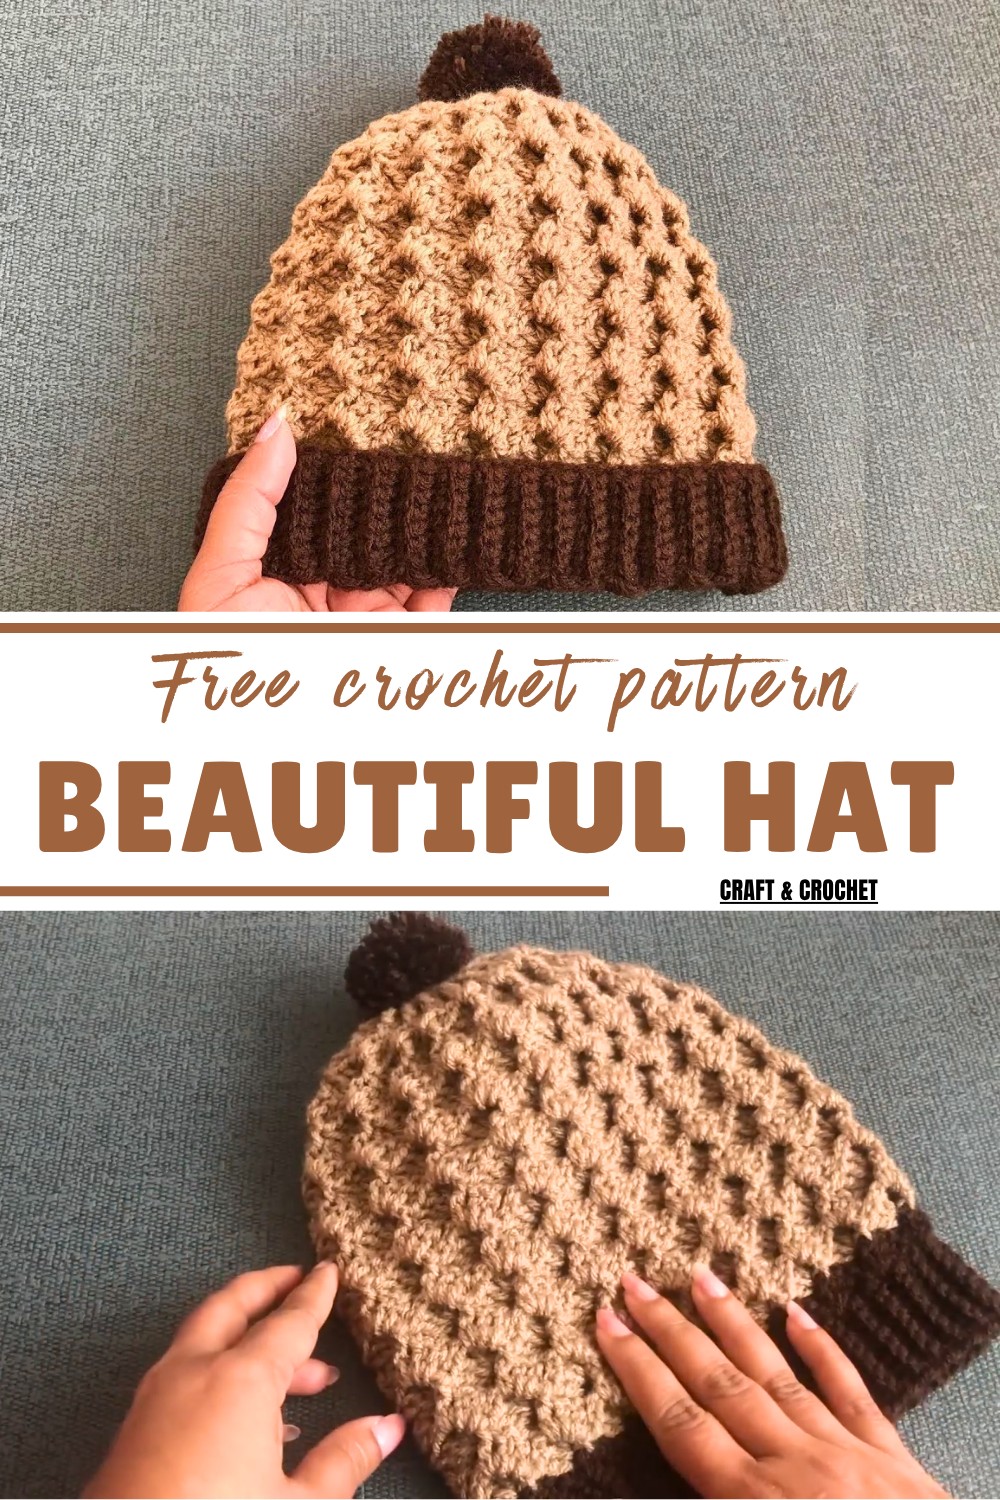
How to Warm Crochet Hat Pattern for Effortless Stitching
Say goodbye to store-bought hats with this Free Crochet Hat Pattern, simple modern designs for gifting or personal wear in any season.
Who doesn’t love the comfort of a handmade hat during chilly days? Especially when it’s stylish, cozy, and made with care. This free crochet pattern is your chance to bring warmth and creativity into your wardrobe or someone else’s life. Ideal for both beginners and seasoned crocheters, this pattern offers versatility with sizes ranging from baby to adult. It’s the perfect way to weave practicality with personal touches, making a thoughtful gift or your next go-to accessory.
Learn Cozy Crochet Hat Pattern for Newborns and Toddlers
With just a few basic materials and stitches, you can turn simple yarn into beautiful, snug hats that suit any season or occasion. The pattern’s easy-to-follow design ensures that even newcomers can confidently produce professional-looking results. Whether you choose soft neutrals for a classic look or vibrant colors for a pop of personality, the possibilities are endless.
Not only are these hats great for personal use, but they’re also wonderful for gifting, charity donations, or even setting up your small business. Comfort, cost-effectiveness, and a sense of accomplishment each time you wear or gift your handmade creation.

Step-by-Step Crochet Hat Pattern
Materials Needed
- Yarn:
- Dark brown double-knitting yarn for the ribbing and light brown yarn for the main body (or colors of your choice).
- Crochet Hook:
- A 4mm crochet hook (recommended size for the yarn used).
- Pom-Pom (Optional):
- A 7cm pom-pom for the hat top (matching or contrasting color).
- Yarn Needle:
- Used for stitching the hat seam together and securing the pom-pom.
Special Features
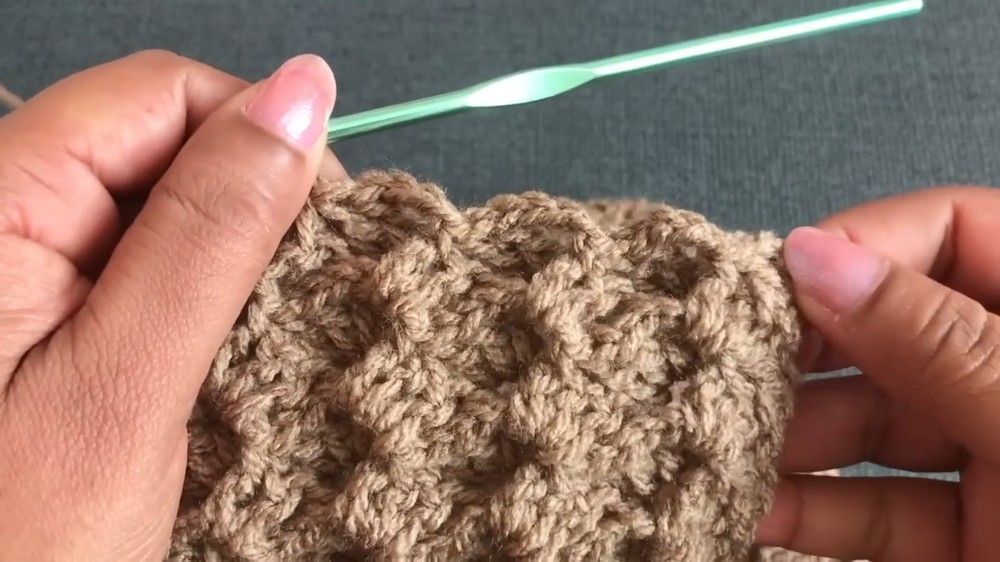
- Design:
The hat uses a ribbed stitch for the base, providing extra stretch and comfort. The body combines double crochet and peddle designs for texture. - Customization:
Sizes include small (74 rows), medium (78 rows), and large (82 rows). - Durability:
High-quality stitches ensure the hat retains its shape and lasts over time.
Pattern Instructions
Step 1: Making the Ribbed Base
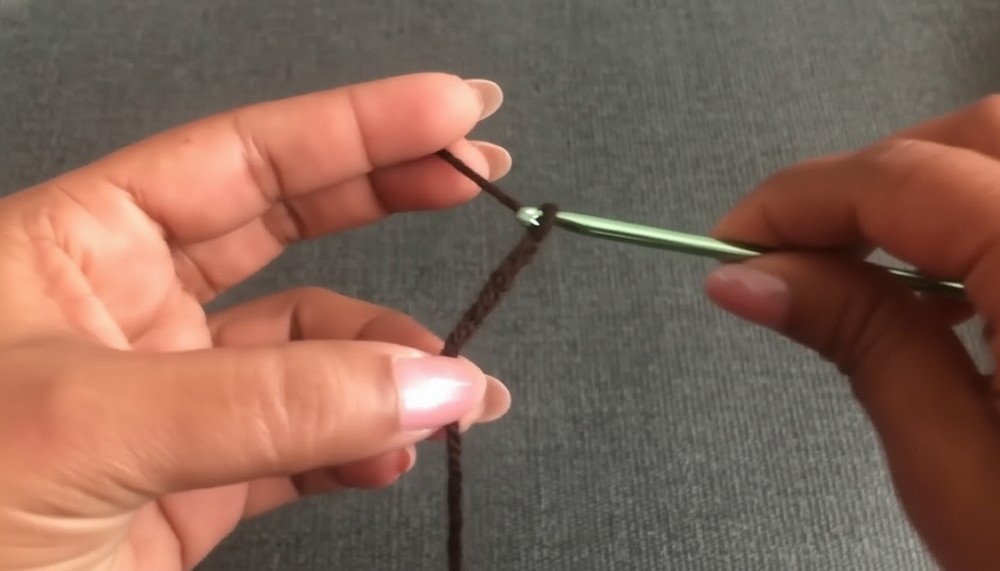
- Start with a Slip Knot and Chain 9:
Leave a long tail (to join seams later), make a slip knot, and chain 9. - Single Crochet in Back Loops:
Turn your work to the back loop of each chain. Skip the first chain and start single crocheting into the second chain.- You will complete 9 single crochets in total. Ensure accuracy after each row.
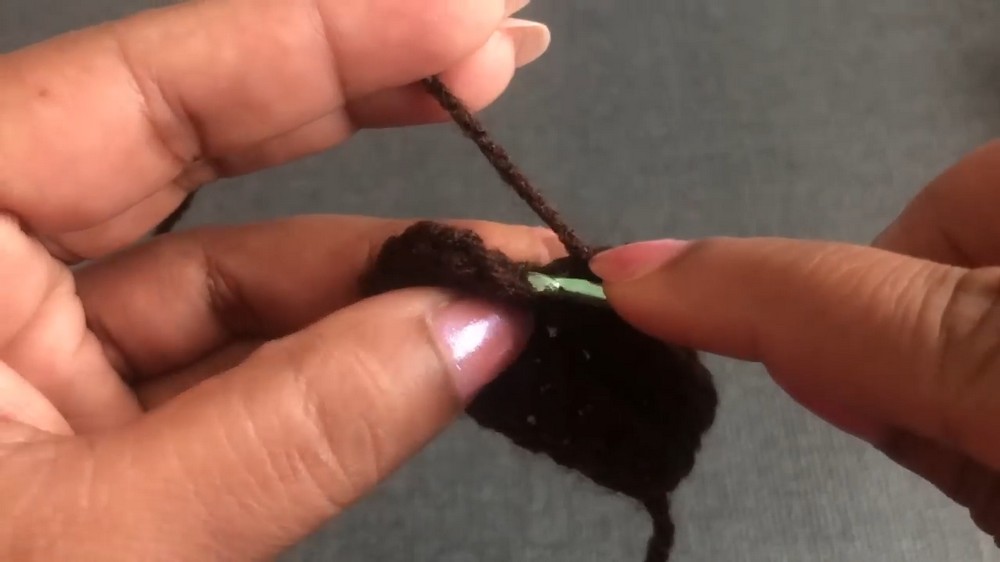
- Second Row:
Start with Chain 1, turn your work, and continue single crochet in back loops only across each stitch. - Repeat Rows:
Continue the ribbing pattern until you reach the required number of rows for the size:- Small: 74 rows.
- Medium: 78 rows.
- Large: 82 rows.
When finished, your ribbed base should measure:
- Small: 16 inches (40.6cm).
- Medium: 17 inches (43.2cm).
- Large: 20 inches (50.8cm).
Step 2: Creating the Body of the Hat
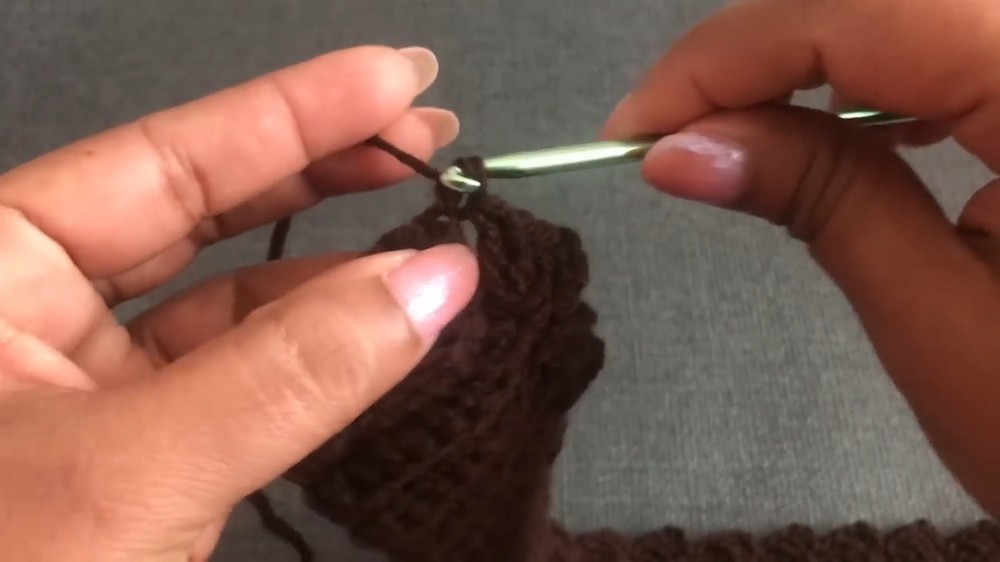
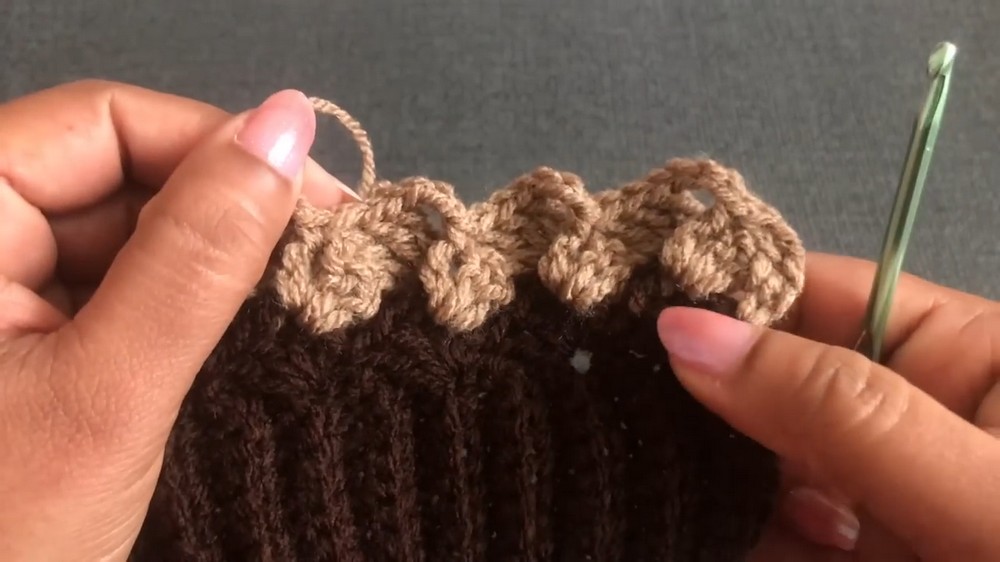
- First Round:
Join the edges of the ribbed base and start the first row of the hat body:- Chain 1, skip one row, and make 1 single crochet at the top of the next row.
- Chain 3, then crochet 3 double crochets in the same space. Skip a row and repeat the pattern.
- Adjusting Number of Peddles:
Based on the size:- Small: 18 peddles.
- Medium: 19 peddles.
- Large: 20 peddles.
- Subsequent Rounds:
Keep alternating between single crochets, chain 3, and 3 double crochets in chain spaces. As you continue, the hat gradually grows in height.- For all sizes, crochet 18 total rows.
3: Decreasing the Body (Top of the Hat)
- Round 19:
Transition to creating 2 double crochets in each chain space instead of 3. Follow the same skip row pattern. - Round 20:
Continue decreasing by making 2 double crochets in chain spaces and skipping the next row. - Final Round:
Use half-double crochets to stitch all chain spaces together.- Option 1: Beginners can finish each space individually and stitch with a needle later.
- Option 2: Advanced crafters can collect all loops on the hook and pull through to join.
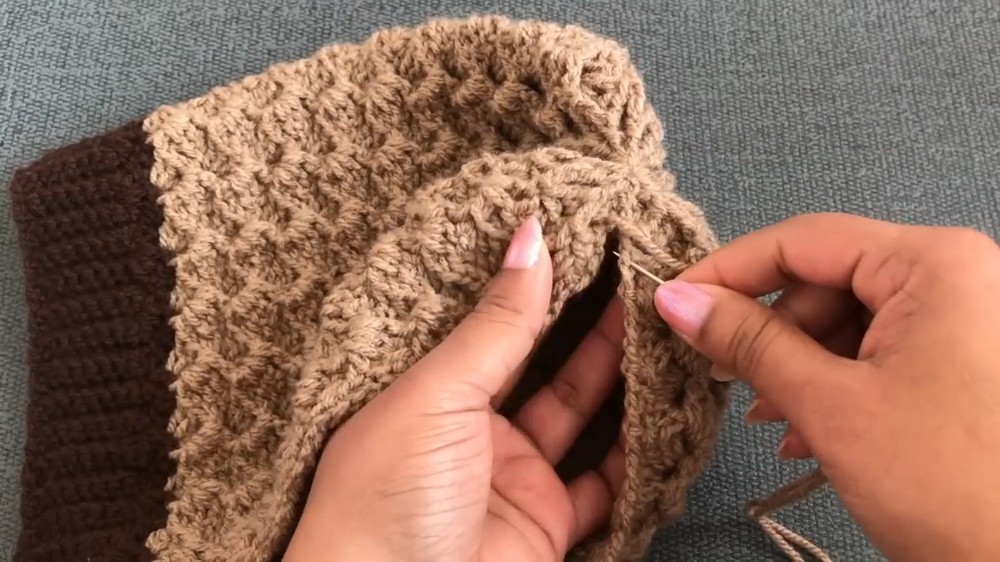
4: Joining and Securing
- Tightly Join Stitch Edges:
Use a yarn needle for neat seams. If needed, tie a knot at the top to prevent unraveling. - Clean Finish:
Ensure smooth stitches to avoid bulkiness by sewing only back loops.
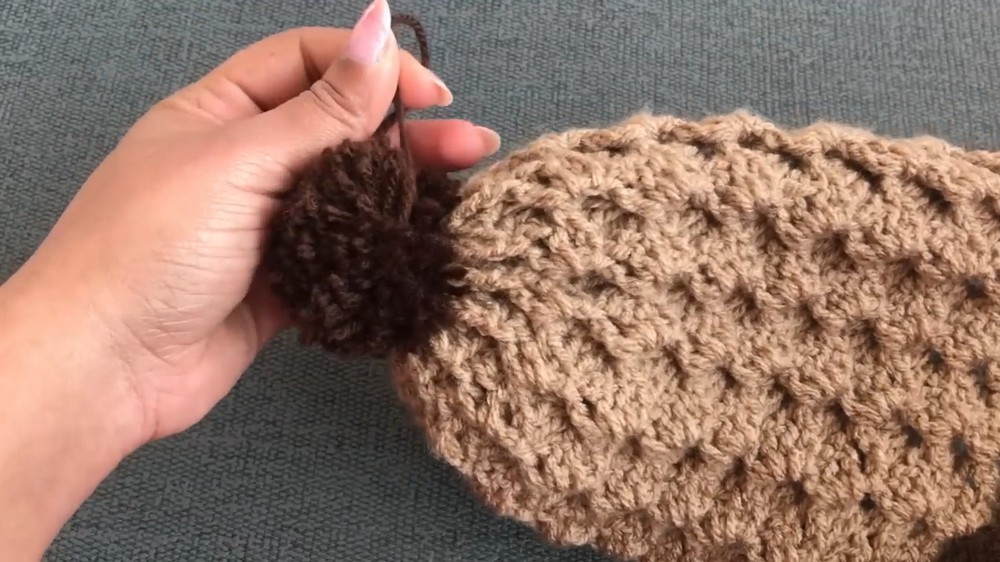
5: Adding the Pom-Pom (Optional)
- Prepare Pom-Pom:
Use a 7cm pom-pom matching or contrasting your hat colors. - Attach the Pom-Pom:
Pull both pom-pom yarn tails inside the hat and tie tightly with two knots. - Trim Yarn Tails to Match:
Cut the tails to blend with the pom-pom fluff for an even look.
Tutor Suggestions
- Difficulty Level:
Suitable for beginners, but finishing techniques (especially decreasing) may require patience. - Customizations:
- Experiment with different color combinations.
- Use bulkier yarn for added warmth or lightweight yarn for summer-friendly hats.
- Uses:
- Ideal gifts for friends and family.
- Perfect additions to craft fairs or donation projects.
Final Tip
For a professional look, block the hat before gifting or wearing it. Blocking helps the stitches settle and provides a polished finish.
Conclusion
With its stretchable ribbing, textured peddles, and cozy pom-pom top, this adult hat pattern brings together ease and style. Whether you’re crocheting it for personal use or as a thoughtful handmade gift, this project is sure to impress.