Easy Crochet Labubu Hairpin Pattern That Everyone Will Adore
Cute Crochet Labubu Hairpin Pattern Will Add Fun to Your Look
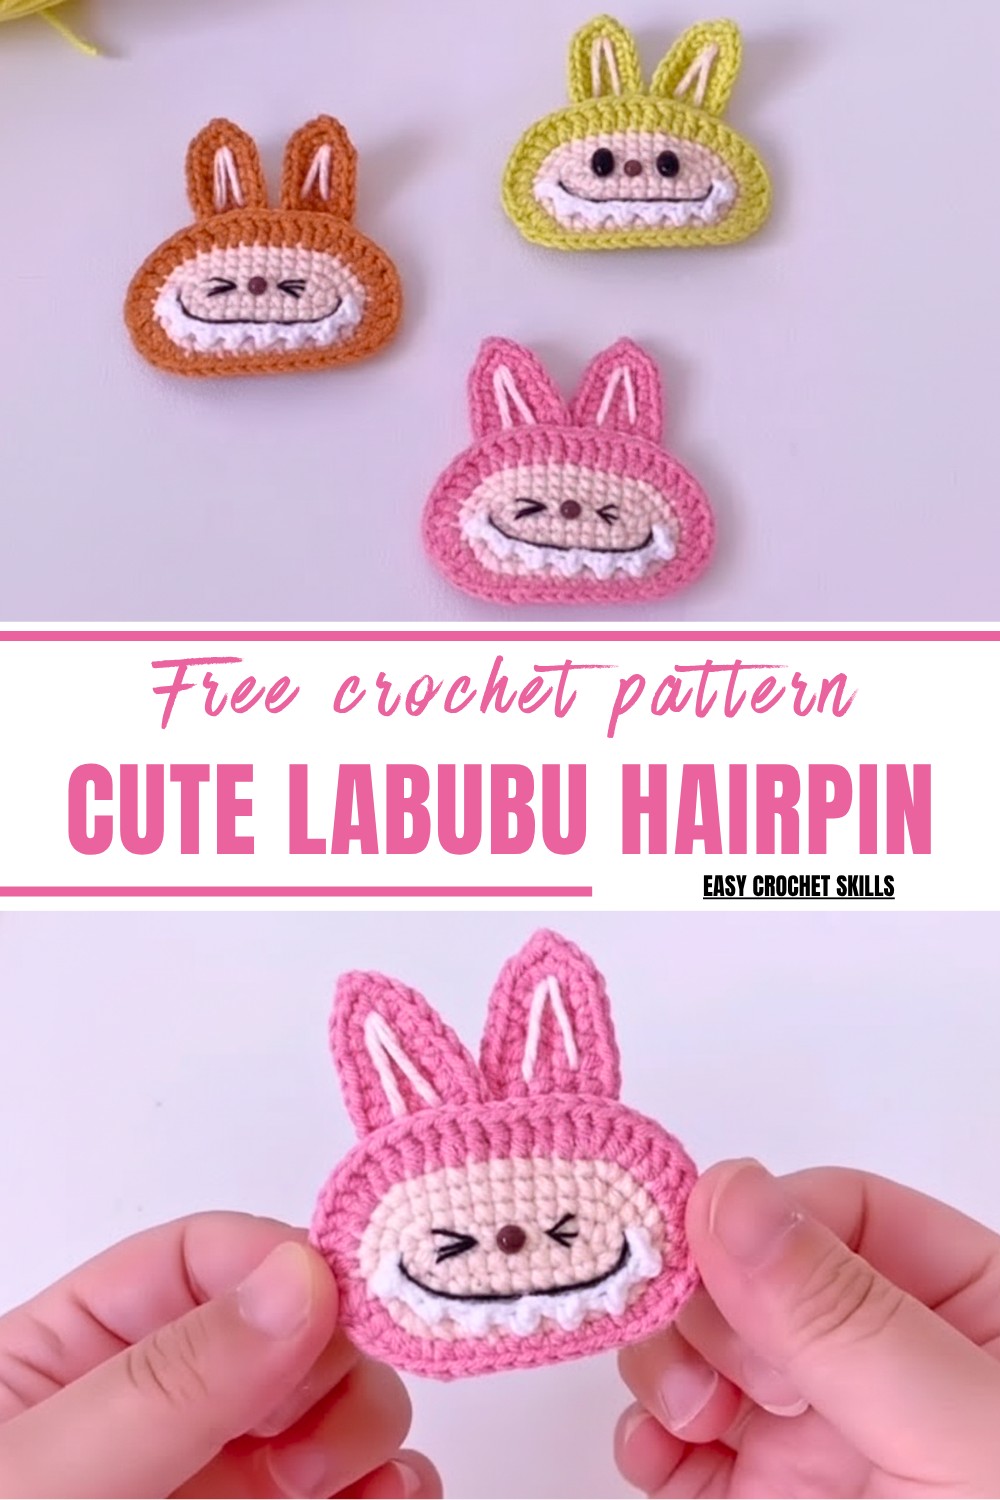
You can customize every detail—colors, expressions, and tiny features like teeth or blush—so each hairpin feels one of a kind. These cute pins work wonderfully as thoughtful handmade gifts, party favors, or fun accessories for kids and adults. They’re also a smart way to use leftover yarn while practicing basic techniques such as single crochet, increases, and simple shaping.
Beyond style, the hairpin is practical: it helps hold back bangs, decorates braids, or adds a focal point to buns and ponytails. In one compact project, you gain a useful accessory, learn new skills, and enjoy the satisfaction of finishing something adorable in very little time.
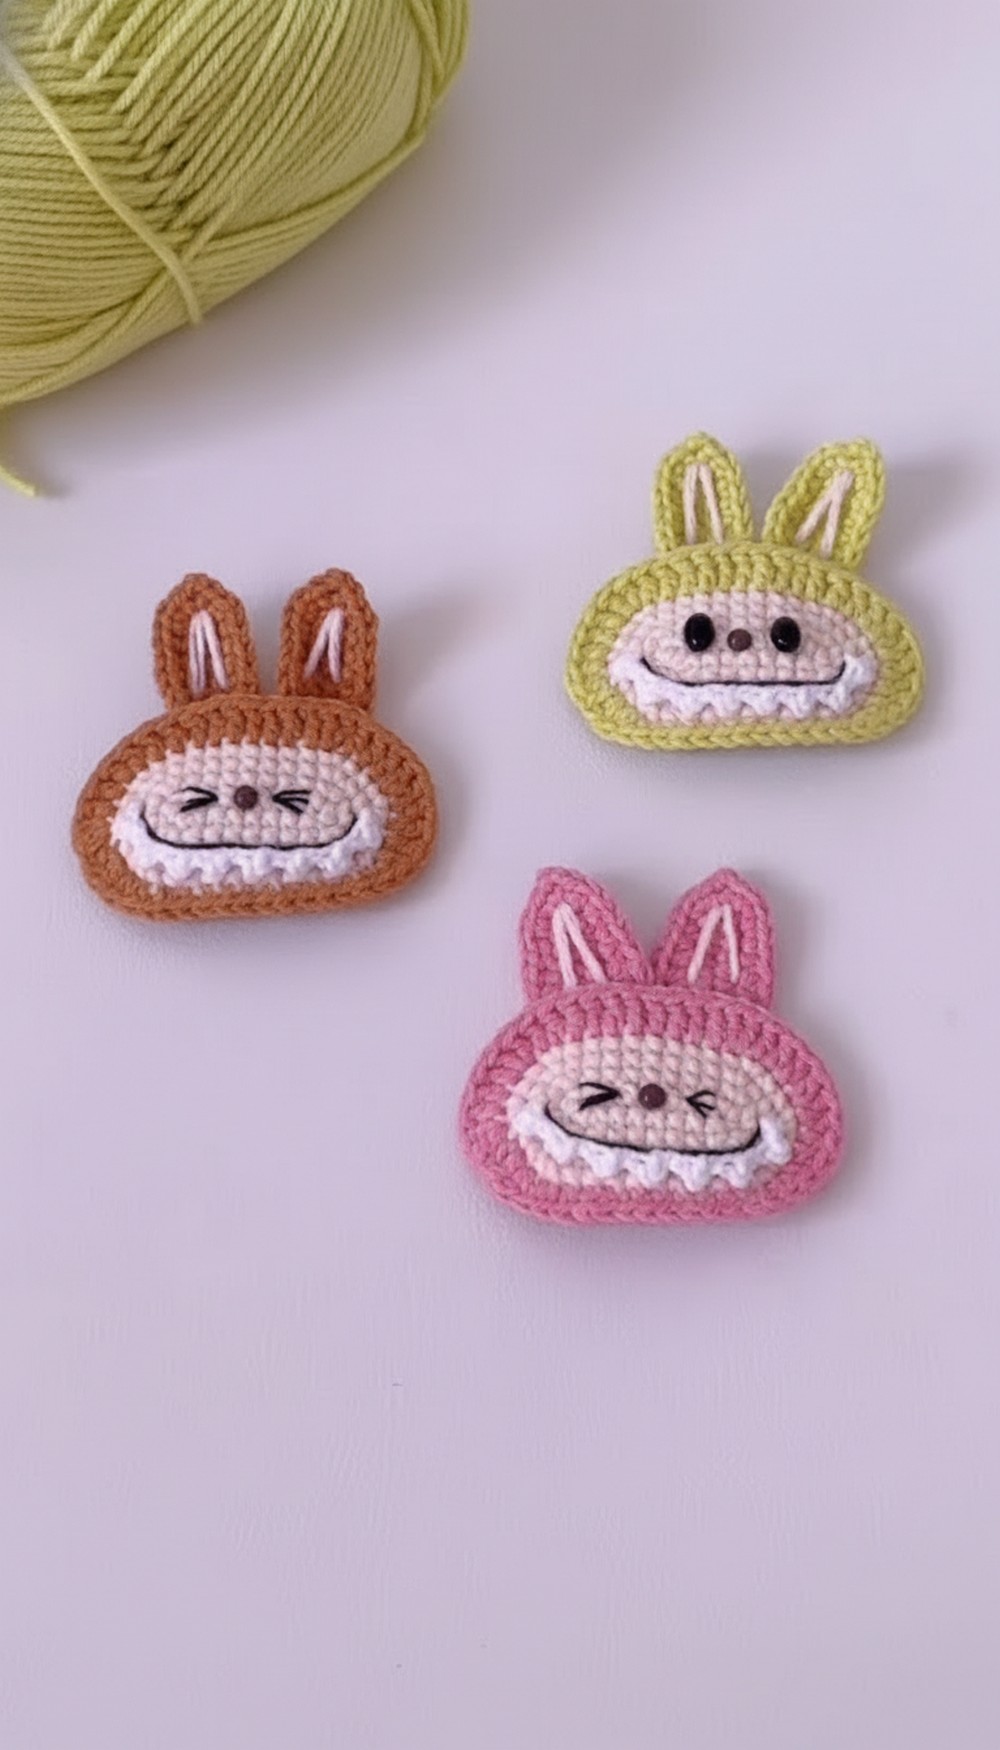
Special Features
- Playful and fun design with customizable facial expressions and details.
- Made with soft cotton yarn, making it lightweight yet durable.
- Easy to turn into unique hair accessories using a variety of clips or pins.
- Perfect for gifting, crafting with kids, or adding charm to your personal accessories.
Level of Difficulty
- Beginner-Friendly with Intermediate Features: Basics such as single crochet, slip stitch, and increases are required. More advanced techniques like adding facial details and seamless color changes are also taught in detail.
Step-by-Step Pattern
Materials Needed:
- 4 strands of cotton yarn in preferred colors.
- 2.0 mm crochet hook (or size suited for your yarn).
- 5 cm water drop clip (hairpin base).
- Small piece of cloth fabric for securing the yarn.
- 1.6 mm crochet hook for smaller details (teeth).
- Glue or adhesive for attaching eyes, teeth, and features.
- Stuffing to shape facial pieces, yarn needles for sewing.
Step 1: Crochet the Main Body
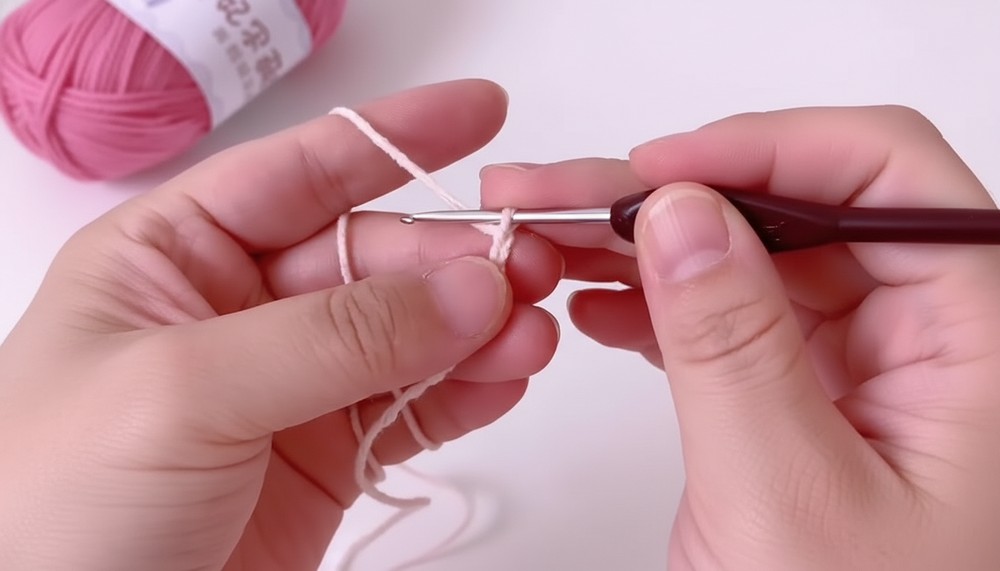
- Start with a Chain:
- Chain 10 stitches.
- Row 1:
- Insert the hook into the second-to-last stitch and crochet a single crochet (sc). Optional: mark the first sc for reference.
- Continue crocheting 7 single crochets.
- In the last chain stitch, crochet 3 single crochets to turn your work smoothly.
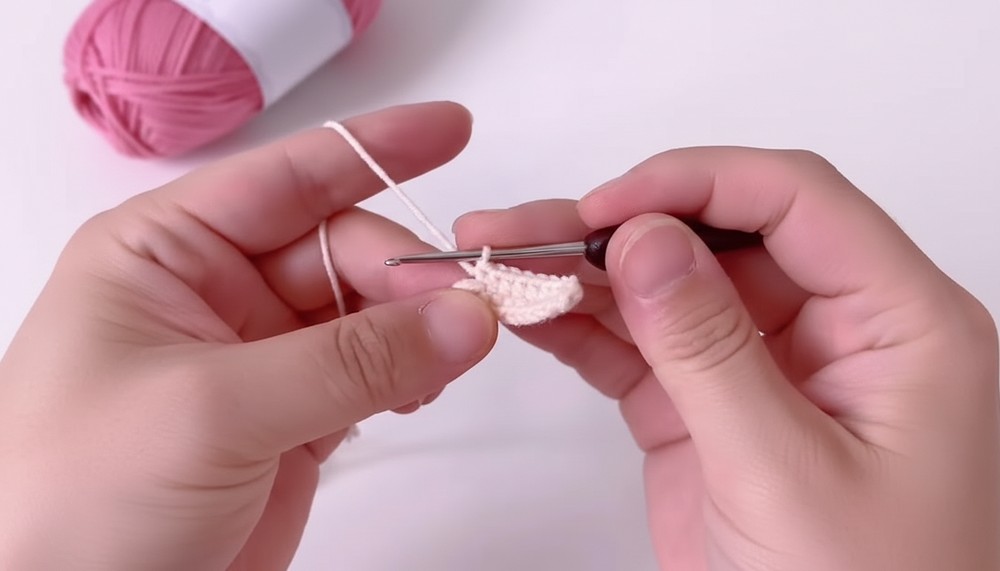
- Row 2 (Opposite side of chain base):
- Insert the hook into the half stitch of the chain and crochet 7 single crochets.
- In the very last stitch, make an increase (2 single crochets in the same stitch).
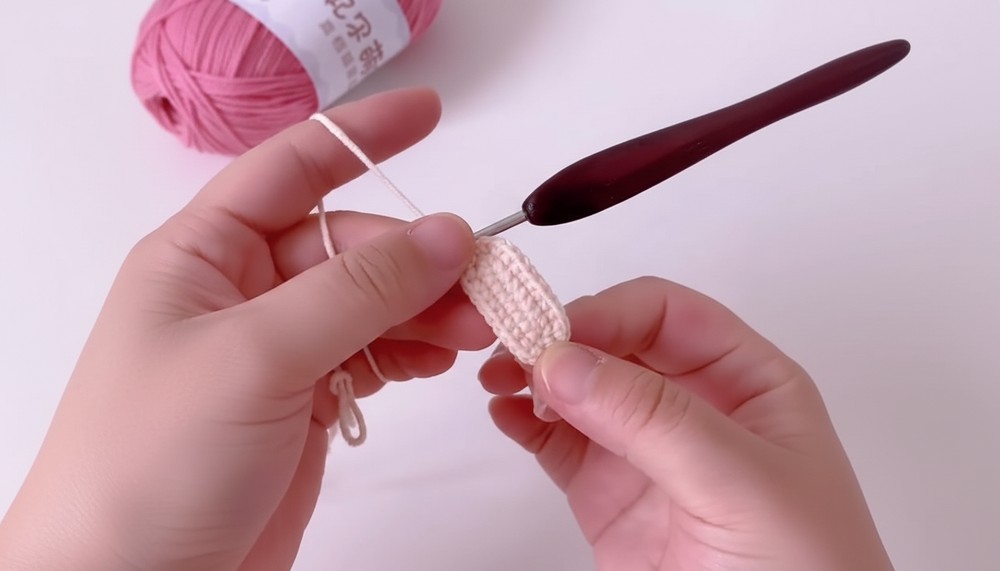
- Join the round with a slip stitch (sl st) into the first stitch.
2: Continue Crocheting the Rounds
- Round 2:
- Chain one stitch to stand up.
- Crochet the first stitch as a single crochet increase (2 sc in one stitch).
- Crochet 7 single crochets, then work 3 single crochet increases.
- Finish the round with 7 more single crochets, followed by 2 single crochet increases.
- Join the round with a sl st.
- Rounds 3 & 4:
- Follow the diagram or instructions for evenly working single crochets while maintaining the circular body shape.
- Start each round with a standing stitch.
3: Seamless Yarn Color Change
- After the last stitch of your current yarn color, pull the yarn slightly longer.
- Insert the hook through two stitches on the side where you’ll change the color.
- Pass the new yarn through and make a slip stitch to secure the change.
- Pull tightly to ensure a seamless color transition.
4: Crochet the Remaining Round (Round 5)
- Chain 2 stitches to start the round.
- Work 1 half double crochet (hdc) in the same stitch as the slip stitch.
- In the next stitch, crochet another half double crochet.
- In the third stitch, work a single crochet.
- Continue following the diagram or your pattern stitch-by-stitch to complete the texture of the round.
- To complete the last stitch of this round, do not finish with a slip stitch. Instead, chain one stitch and cut the yarn to make the space flatter.
5: Assemble the Hairpin
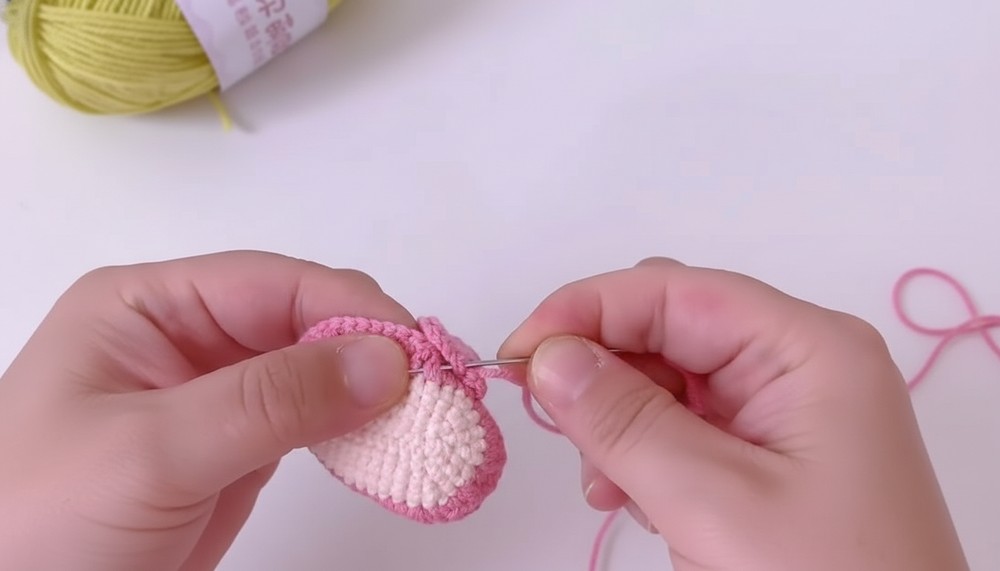
- Sew the Body Together:
- Arrange the pieces so that the row of double crochets is on top of the body.
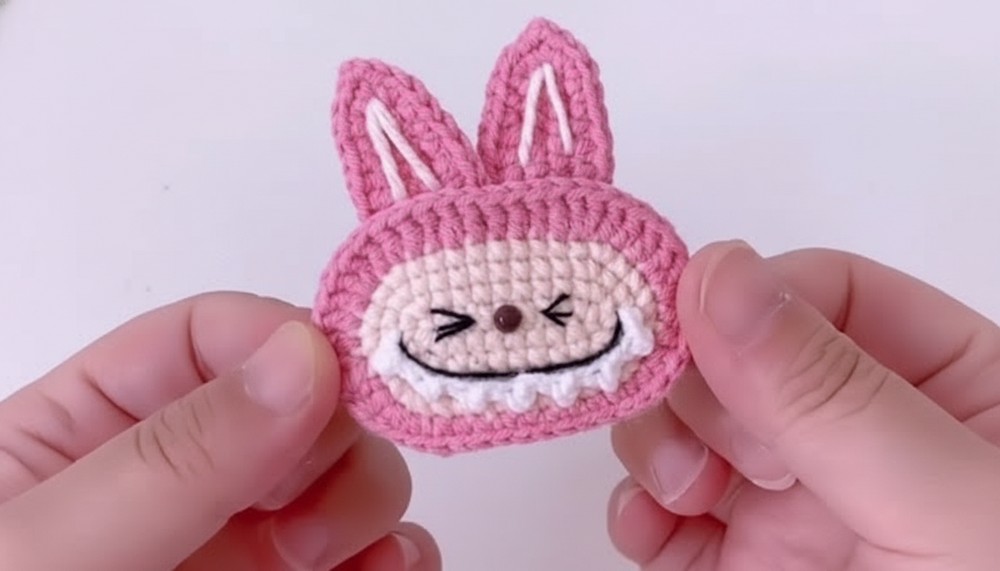
- Position the ears and sew them to the top of the body using a sewing needle or crochet hook. The ears should be sewn on the back of the single crochet row (red line) for proper positioning.
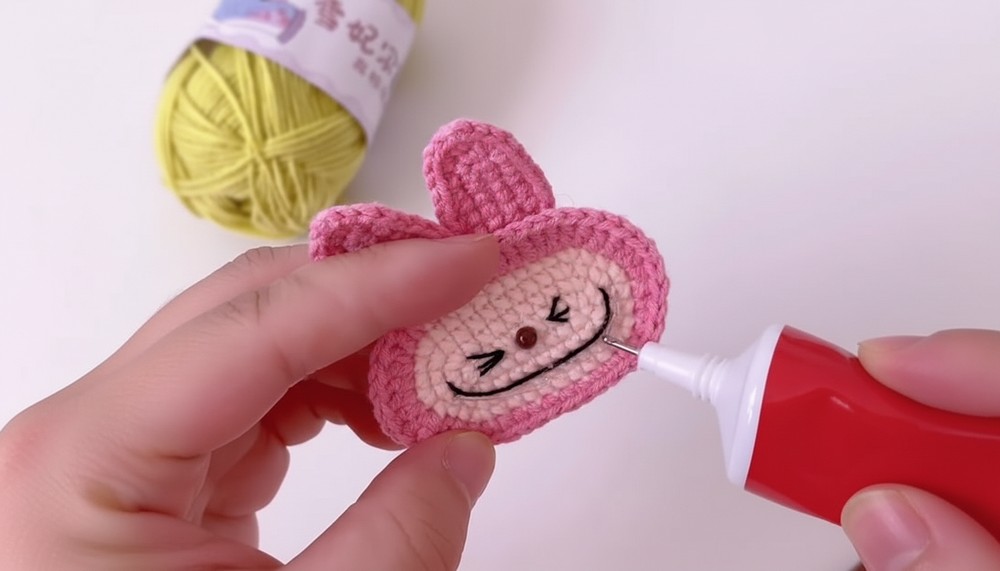
- Attach the Facial Details:
- Sew the eyes between Rounds 1 and 2, placing them symmetrically.
- For the mouth, thread the yarn through the middle of Rounds 2 and 3 using a curved stitch to form the outline of the mouth.
- Flash small grids or arcs on both sides for additional detail.
Step 6: Crochet the Teeth
- Using two strands of yarn and a 1.6 mm crochet hook, chain 2 stitches.
- Crochet a slip stitch into the first stitch.
- Chain 3 stitches, then slip stitch into the second-to-last stitch. Repeat this process 8–9 times to create rows of teeth.
- Apply glue around the mouth and attach the crochet teeth carefully.
Uses and Benefits
- Hair Accessories: Instantly elevate any hairstyle by adding quirky charm.
- Gifting: These make fun, thoughtful handmade gifts for friends and family.
- Personal Collection: Customize the colors and expressions for a unique accessory that speaks to your style.
Tutor’s Suggestions
- Use safety eyes for easy detailing, or draw on custom expressions.
- Beginners might want to mark certain stitches (like the first of every round) to stay organized.
- Lightly stuff the body if you’d like a more plush, padded look.
Pro Tip
Maintain even tension throughout your stitches for a polished, professional finish. Switching to a smaller hook for the details (like teeth) will give you finer, more delicate features for the design.
Conclusion
The Labubu hairpin is a cheerful and playful crochet project that lets your creativity shine. Its adorable design and practical use as a hair accessory make it a rewarding project for crocheters of all levels. With endless possibilities for customization, it’s not just an accessory—it’s a fun way to add personality to your style.