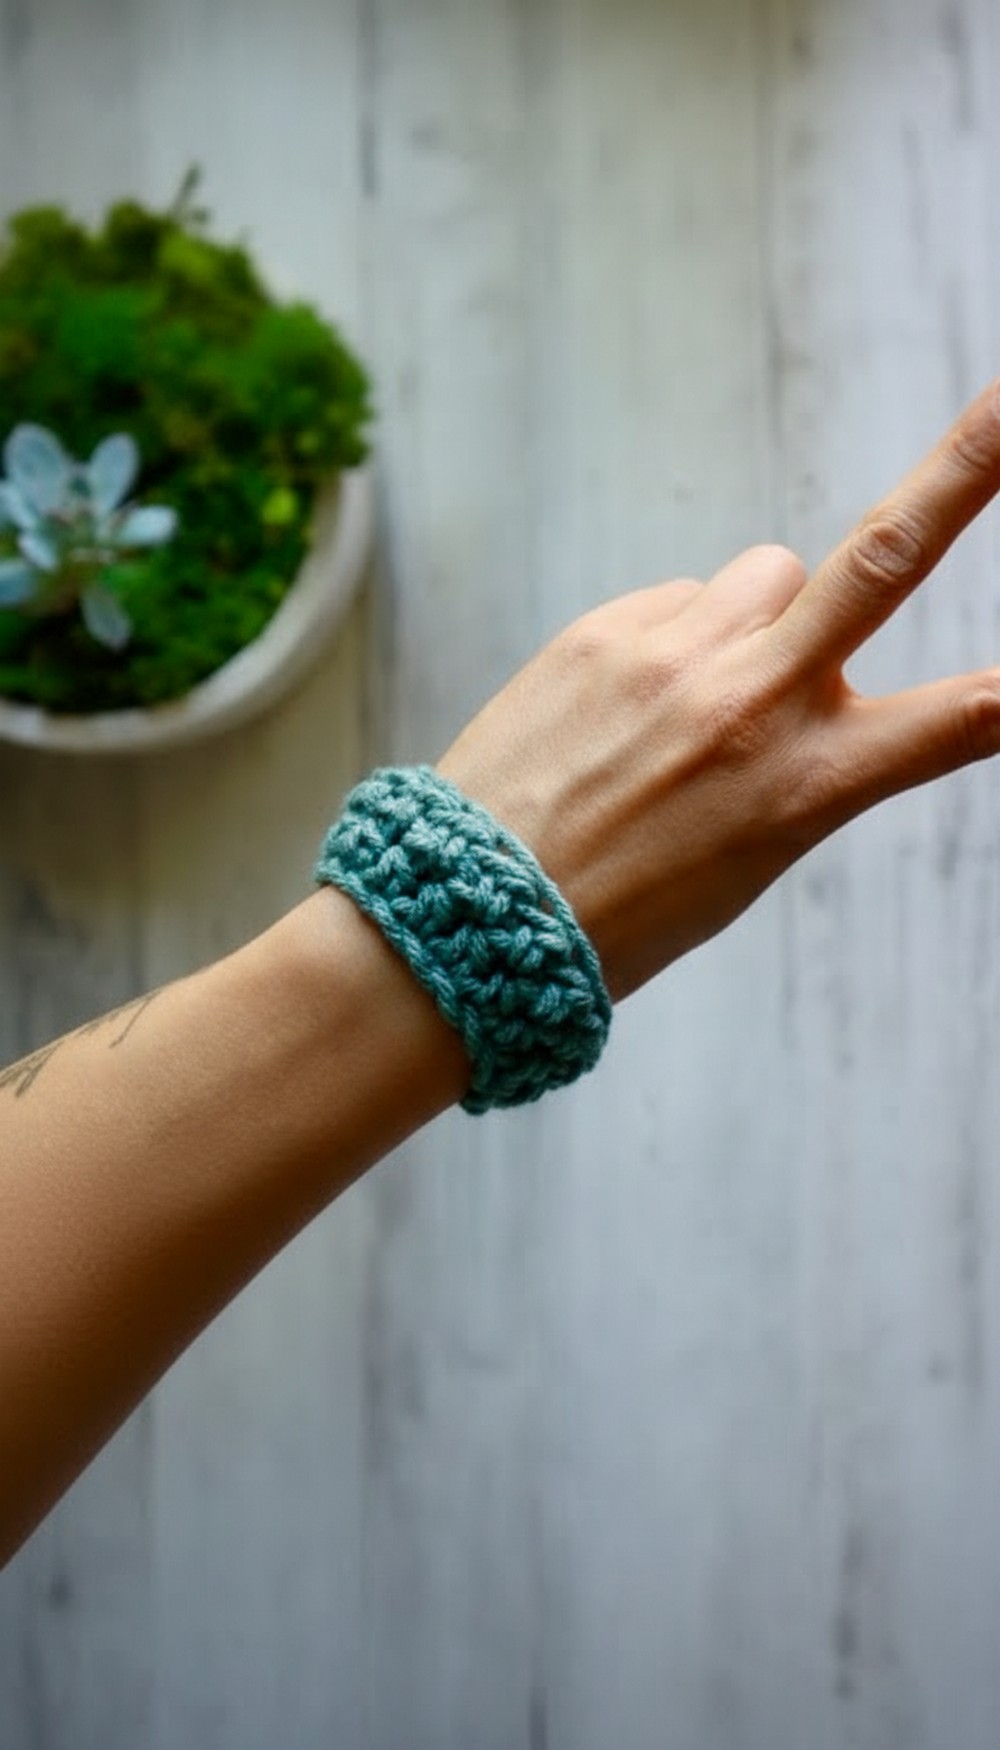
Easy-to-Follow Free Crochet Bracelet Pattern for Stylish Girls
Solve your style needs with a free crochet bracelet pattern to crochet fashionable, one-of-a-kind accessories anyone will love to wear.
Looking for a quick, enjoyable way to add style to your wardrobe or a thoughtful gift idea? A crochet bracelet pattern offers endless possibilities for crocheting trendy, lightweight accessories that are as versatile as they are personal. Whether you’re a seasoned crocheter or just getting started, this pattern is simple yet impactful, allowing you to experiment with colors, textures, and even add accents like beads for a more customized touch.
Budget-Friendly Crochet Bracelet Pattern for Beginners

Plus, crocheted bracelets are ideal for different occasions, from casual outfits to handmade gifts that carry a personal touch. They’re great for anyone who seeks a unique, handmade alternative to store-bought accessories. Perfect for on-the-go projects, this pattern is portable, quick to finish, and requires minimal materials, making it budget-friendly too.
Whether you want to improve your skills or crochet an accessory you truly love, this is the perfect chance to turn inspiration into reality. Grab your crochet hook, choose your favorite yarn, and step confidently into a hobby that combines functionality and creativity while letting your personal style shine.
Materials Needed
- Chunky yarn (Frances uses thick, lush yarn for easier visibility)
- Large crochet hook (size K recommended)
- Scissors
- Tapestry or darning needle
Step-by-Step Detailed Pattern
Foundation Chain
- Begin with a slip knot: Wrap the tail around your fingers, pull the working yarn under the loop, and tighten to form your slip knot.
- Tip: If slip knots are tricky, refer to Lesson 1 on Frances’ channel for detailed instructions.
- Chain according to wrist size: Measure the chain as it wraps semi-tightly around your wrist while leaving room for slight stretch.
- Frances uses 18 chains, but adjust based on your wrist size.
- As you chain, count out loud to keep track.

Half Double Crochet (HDC)
- Start in the second chain from the hook: The first chain doesn’t count, so locate the second chain for your initial stitch.
- Step-by-step HDC technique:
- Yarn over.
- Insert a hook into the chain.
- Yarn over again and pull through one loop. (You’ll now have 3 loops on your hook.)
- Yarn over once more and pull through all 3 loops to complete the stitch.
- Result: This forms your first half double crochet stitch.
- Continue down the row: Repeat the above steps for each chain until you reach the last chain at the end of the row.

Turning Your Work
- Chain 1 for height after completing the row.
- Turn your work: Flip your piece so the stitches face in the opposite direction.
- Begin working into the top loops of each stitch in the row.
- Repeat HDC across the new row: Insert under both loops of the stitch and complete the half double crochet as described earlier.
- Build additional rows as desired: You can stop after a couple of rows for a thin bracelet or add more rows for a wider band.


Finishing Off
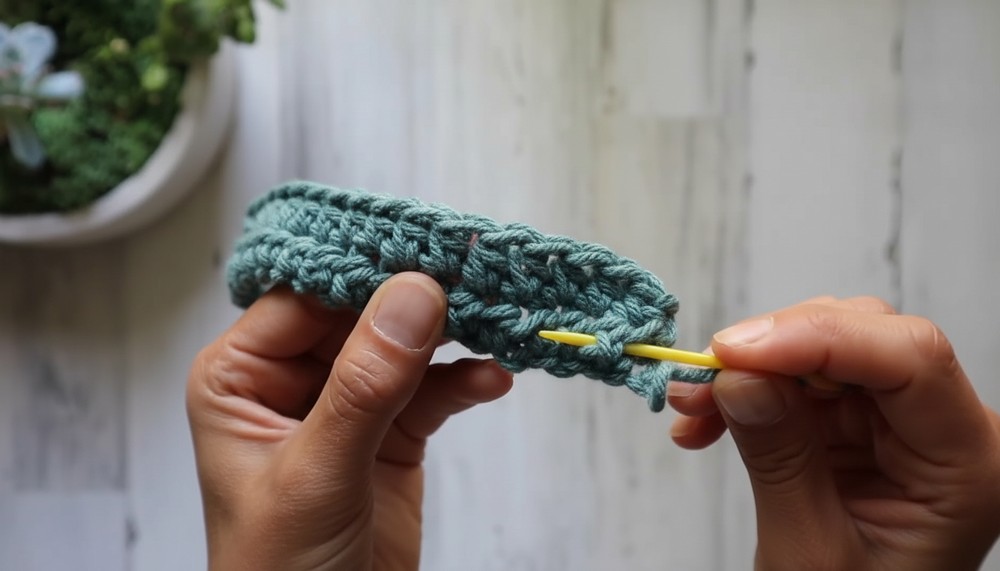
- Completing the last row: When you’ve reached your desired width, chain 1 and leave about 6 inches of yarn for weaving in the ends. Cut the yarn and pull it through to secure the knot.
- Weaving in ends: Use your tapestry needle to tuck the loose ends into the “wrong side” (inside) of your bracelet.
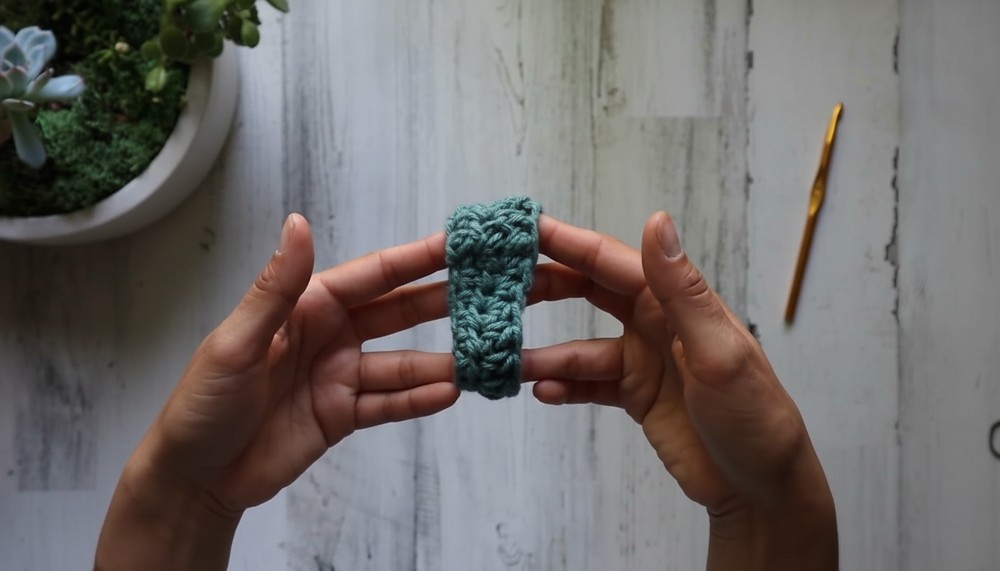
Stitching Together
- Fold the bracelet into a circular shape, aligning both ends.
- Use your tapestry needle to whip stitch the ends together:
- Insert through two loops on one side and align with two loops on the opposite side. Pull the yarn through.
- Continue stitching until securely joined.
- Create a final knot: On the inside, loop the thread to tie it securely. Trim excess yarn.
Special Features
- Difficulty Level: Beginner-friendly. Ideal for those new to crocheting or learning basic stitches.
- Customizable Size: Adjust the base chain count to fit your wrist.
- Versatility: The HDC technique can be applied to scarves, coasters, ornaments, and much more.
Tutor’s Suggestions
- Use contrasting yarn and hook sizes for easier visibility during practice.
- Keep your stitches slightly loose to make it easier to insert your hook.
- Frances reminds beginner crocheters that practice leads to improvement—don’t worry about imperfections when starting.
Uses
Not only is this bracelet stylish, but it makes a heartfelt gift or a practical swatch for practicing stitches. You can also repurpose the bracelet idea for decorative straps, headbands, or napkin rings.
Conclusion
This easy HDC bracelet tutorial combines learning the basics with crocheting something adorable by the end. Don’t forget to experiment with different yarn textures and colors to make each bracelet uniquely yours.
Crochet Tip
For beginners, tight stitches can be a challenge. Remember to keep your loops relaxed; the smoother the hook movement, the easier the process!