How to Elegant Crochet Bucket Hat Pattern for a Cute & Chic Look
Top off your outfit with this Free Crochet Bucket Hat Pattern, a stylish and versatile design that adds handmade charm to any look.
There’s nothing quite like the charm of a handmade bucket hat to brighten up your wardrobe. Perfect for keeping the sun off your face on warm days or adding a stylish touch to casual outfits, this crochet pattern brings both functionality and fashion to the forefront. Designed for crocheters of all skill levels, this project is a rewarding way to produce something practical, lightweight, and easy to wear. The pattern stands out with its breathable texture, making it an ideal choice for sunny outings, parks, or even gifting someone special.
The Perfect Crochet Bucket Hat Pattern for Everyone
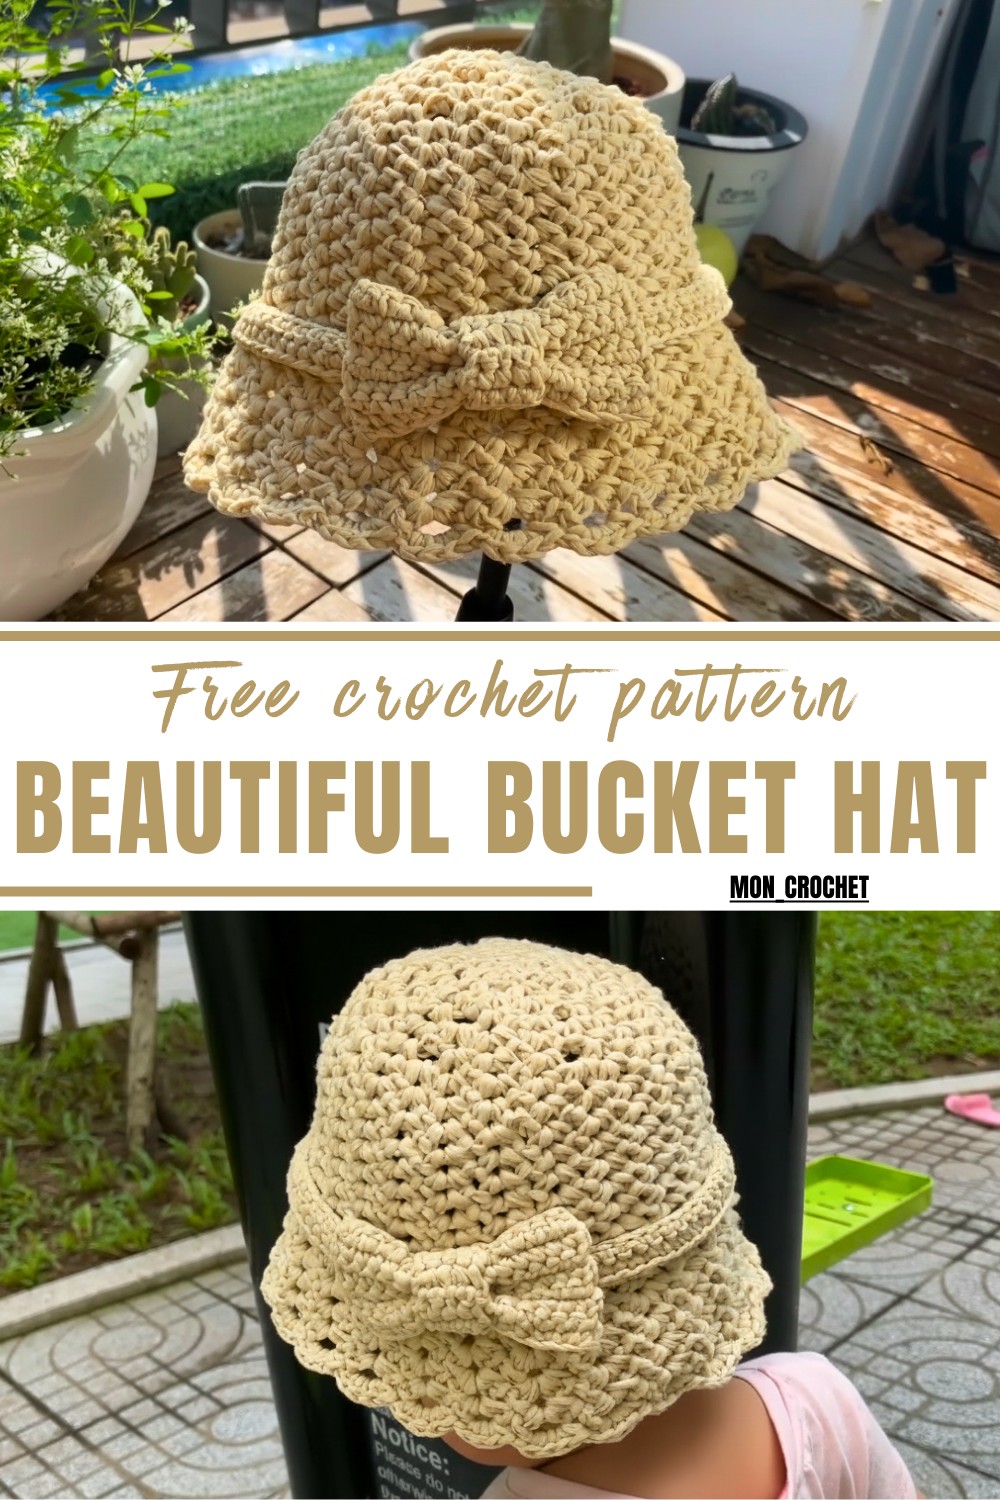
Using simple stitches and minimal materials, this hat pattern allows you to personalize the size, colors, and even yarn type to your preference. It’s also a great way to relax while working on something creative and useful. Lightweight yarn results in a comfy accessory, while the bucket hat style suits people of all ages.
Whether you’re looking for a summer-ready hat, a stylish topper for beach days, or a thoughtful handmade gift, this pattern offers endless opportunities. Affordable, trendy, and versatile, it’s a crochet project that fits seamlessly into any wardrobe. With every stitch, you’ll bring functionality and a touch of artistry to your everyday look.
Materials
- Yarn: Ari yarn (or a similar soft, lightweight yarn ideal for summer hats).
- Hook: 4.0mm crochet hook.
- Others: Measuring tape, scissors, and optional stitch markers.
Special Features
- Uses single crochet (sc) stitches for creating a dense yet flexible texture.
- Designed with a magic circle at the top for clean and seamless starts.
- Includes decorative bow and tie strings for extra charm.
- Features adjustable row progression, allowing you to customize based on your baby’s measurements.
- Lightweight and breathable, making it ideal for warm weather.
Skill Level
Beginner to Intermediate
While the stitches used in this hat are beginner-friendly (primarily single crochets and chain stitches), the gradual increases and the brim’s structure require some attention. If you’re new to crochet, practicing the magic circle and foundational stitches beforehand is recommended.
Step-by-Step Pattern
Crown of the Hat
- Start with the Magic Circle
- Create a magic circle and crochet 6 single crochet (sc) into the loop. Pull the circle tight to close.
- Row 2: Increase
- Chain (ch) 1. Work 2 single crochet into each stitch of the row (total: 12 sc).
- Row 3: Additional Increases
- Ch 1. 1 sc into the first stitch, 2 sc into the next stitch. Repeat for the entire row (18 sc).
- Row 4: Intermediate Round
- Work 1 sc into the first two stitches, 2 sc into the third stitch. Repeat for the row (24 sc).
- Continue Increasing to Desired Diameter
- For each subsequent row, increase by adding one more single stitch between the increases:
- Row 5: (3 sc, 2 sc in the next). Repeat (30 sc).
- Row 6: (4 sc, 2 sc in the next). Repeat (36 sc).
- Keep repeating increases until the crown matches the required diameter of the head measurement divided by 3.14. For a baby with a 47-48 cm head circumference, the diameter should measure approximately 15 cm.
- For each subsequent row, increase by adding one more single stitch between the increases:


Body of the Hat
- Building the Body
- From here, stop increasing and work 1 sc into every stitch around, for several rows, until the height of the body measures 15-16 cm, which corresponds to the distance from the baby’s crown to just above the ears.

Creating the Brim
- Row 1: Beginning the Brim
- Work 2 sc into each stitch around to create a slightly flared brim.
- Row 2-3: Continue the Brim
- For the next 2 rows, alternate between:
- 2 sc in one stitch, then 1 sc in the next.
- This increases the width and stiffness of the brim while maintaining its decorative edge.
- For the next 2 rows, alternate between:
- Final Row of the Brim
- Crochet 5 single crochet stitches into each stitch to create a scalloped, decorative edge.


Adding the Bow and Tie Strings
- Crocheting the Bow
- Work entirely in simple rows of single crochet, forming a rectangular shape (optional size: 8 cm x 4 cm). Fold into a bow shape and secure with stitches or glue.
- Tie Strings
- Use basic chains and single crochet to craft long, thin cords to attach the bow or decorate the hat.

Suggestions by the Tutor
- Use light-colored yarn for a fresh, summer-friendly look.
- Measure the hat frequently while you crochet to ensure a perfect fit for the baby.
- The design allows flexibility, so you can stop adding rows or add more rows to adjust the size for older children.
Uses
- A quick, thoughtful, handmade gift for babies or toddlers.
- A stylish and breathable head cover for summer outings.
- A customizable project—you can experiment with different bow designs or embellishments.
Conclusion
This crochet summer hat pattern is a versatile and charming project suitable for beginners ready to explore more structured designs. With its lightweight design, it provides stylish and functional sun protection for babies. The detailed instructions make this pattern achievable and fun.
Pro Tip
To keep your edges neat and avoid visible joins, always use a slip stitch (sl st) to finish a round and start the next with a fresh chain stitch. This technique prevents uneven starting points and ensures a polished look for the hat!