How to Free Crochet a Potli Bag Pattern That Matches Any Outfit
Free Crochet Potli Bag Pattern You’ll Want to Try Now

One of the best things about this pattern is its simplicity, making it an excellent project for beginners while still offering plenty for experienced crocheters through creative embellishments. Whether you want an elegant bag for traditional events or a practical pouch for daily errands, it ticks all the right boxes. Crochet potli bag pattern is compact yet spacious enough for small essentials like keys, jewelry, or makeup.
Plus, the nature of crochet ensures durability, letting you enjoy it for years to come. Take your skills to the next level by adding delicate floral details, playful tassels, or mixing bold and soft colors. This project isn’t just satisfying to complete; it’s also a beautiful way to express your personality through handmade designs that bring joy to the user and those who see it.
Materials Needed
- Yarn: Three different colors (e.g., green, primary, and accent color)
- Crochet Hook
- Scissors
- Tapestry Needle
Level of Difficulty
Beginner to Intermediate – This pattern includes basic stitches like magic ring, single crochet, and double crochet, making it beginner-friendly. However, attention to detail is essential for the flower embellishments, making it a slight upgrade for beginners who want to improve their skills.
Steps to Crochet Flower Potli Bag
Step 1: Foundation (The Base)
- Start with a magic ring.
- Chain 2.
- Work 12 double crochet (DC) into the magic ring.
- Join with a slip stitch (SS) into the first chain.
- Pull the tail to tighten the magic ring.


2: Expanding the Base
- Begin the next round with 2 chains.
- For the round, work 2 double crochets in each stitch from the previous round. This means increasing in every stitch.
- Complete the round with a slip stitch.
3: Continue Increasing
- Start with 2 chains.
- Alternate the pattern: In the next stitch, work 1 DC, and in the following stitch, work 2 DC (increase). Repeat this for the entire round.
- Complete the round with a slip stitch.
Step 4: Shaping the Base
- Continue the same pattern in subsequent rounds:
- Round 4: Work 1 DC, 1 DC, then 2 DC in each set (i.e., increase every third stitch).
- Round 5: Work 1 DC into three stitches, then 2 DC into the fourth stitch.
- End each round with a slip stitch to close. By now, you should have a flat circular base with 48 stitches in Round 4 and 60 stitches in Round 5.

5: Creating the Body
- Start with 2 chains as the beginning of the next round.
- Work 1 DC in each stitch around without any increases.
- For the edge design: After every 3 DC, skip a chain, make 1 chain, and continue the pattern.
- Repeat this pattern to build the height of the potli bag for 14 rounds.

Step 6: Adding Floral Details
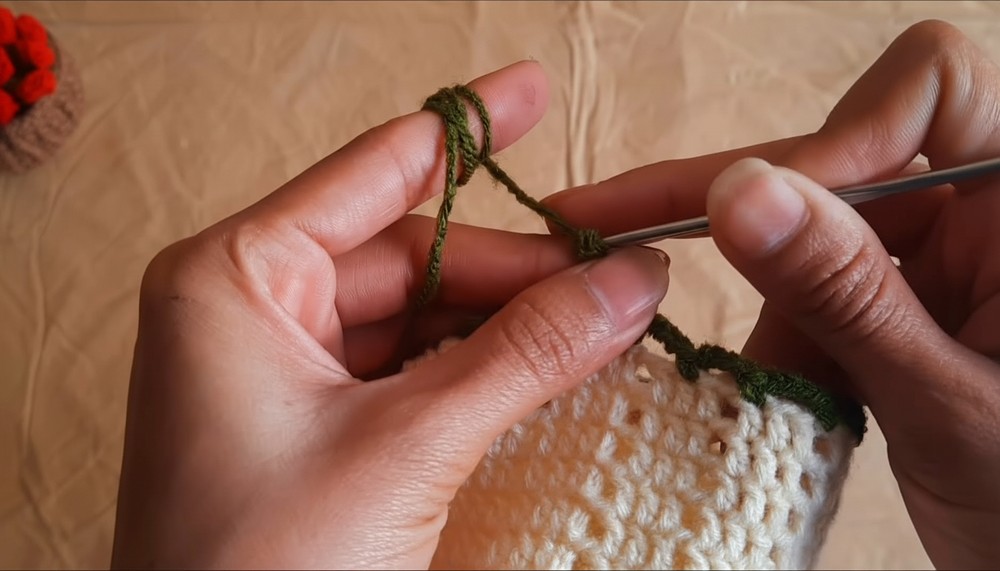
- Switch to the green yarn. Start by creating single crochets around the edge.
- Make 4 chains, skip 2 stitches, and work into the third with a single crochet. Repeat around the round.
- In the next round, make 3 chains, slip stitch into the 4-chain space, and repeat. This creates the base loops for the flowers.
- Create the flowers:
- Make 12 chains with the primary color.
- Skip 2 chains and work 3 DC in the same stitch three times.
- Work this pattern in the loops to form flower petals.
- Stitch each flower into the green loops, leaving one space empty between attached flowers.


Step 7: Adding the Drawstring
- Using green yarn, create 80 chains for the drawstring.
- Weave the drawstring into the single crochet base (insert into alternating spaces).
- Attach small flowers at the ends of the drawstring for a decorative effect.


Special Features & Uses
- Features: The floral embellishments and intricate base design add elegance and charm to this potli bag.
- Uses: Perfect for gifting during weddings, family functions, or festivals. Can also be used as a coin pouch or a mini accessory bag.
Tutor’s Suggestions
- Use vibrant or pastel yarn colors for a trendy finish.
- Count stitches carefully to maintain symmetry in the pattern.
- Beginners should practice a small flower before attaching the final ones.
Tip for Best Results
- Tighten the magic ring properly to avoid gaps in the base. If flowers feel loose while stitching, secure them with extra slip stitches for durability.
Conclusion
This crochet flower potli bag is not just an accessory but a piece of art you can proudly carry or gift. The colorful floral features stand out, giving it a unique, lively touch. Whether it’s for traditional occasions or just to add some handmade style to your day, this potli bag is sure to turn heads.