How to Free Crochet Baby Dinosaur Amigurumi Pattern You’ll Love
Add charm to your crochet collection with this adorable free baby dinosaur amigurumi pattern; customizable, fun, and beginner-friendly.
Who could resist the charm of a tiny, handmade baby dinosaur? Whether it’s a thoughtful birthday gift, an adorable nursery decoration, or a relaxing project for crochet enthusiasts, this baby dinosaur amigurumi pattern offers something special for everyone. Designed with simplicity in mind, this pattern is ideal for both beginners and experienced crocheters looking for a rewarding project. Its small size makes it perfect for little hands or as a cute collectible that fits into any space.
Crochet a Baby Dinosaur Amigurumi That’s Perfect for All Ages
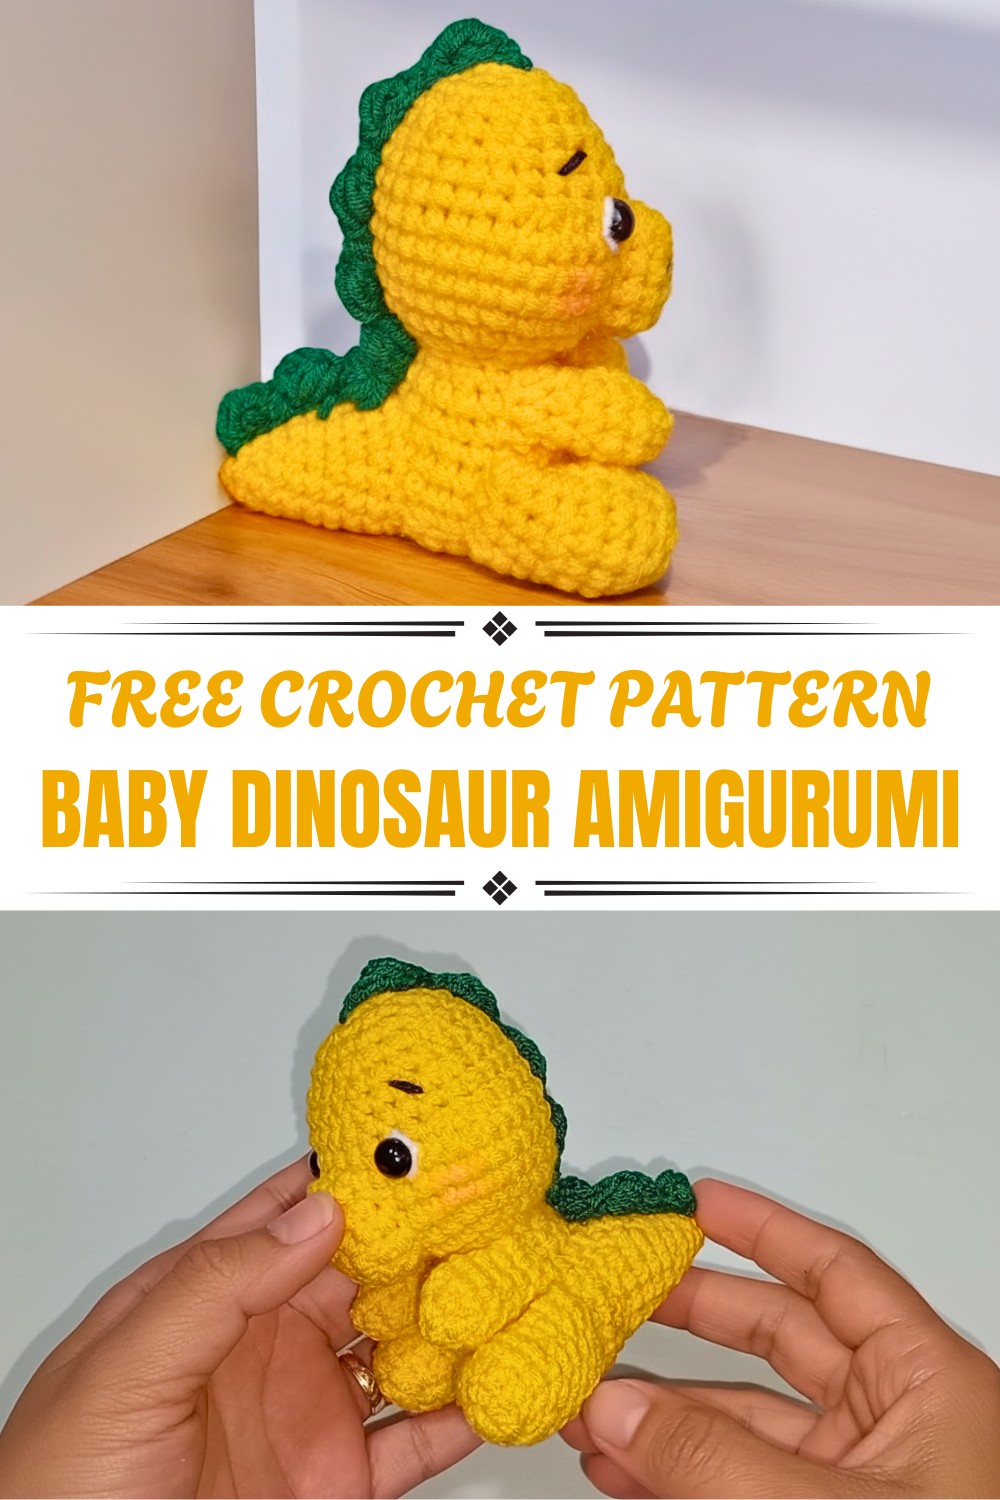
Using just a few materials like yarn, stuffing, and a crochet hook, this pattern comes to life quickly with minimal effort. The finished toy is soft, durable, and customizable, allowing you to play with colors to reflect your personal style or match a specific theme. Unique back spikes and a chubby-cheeked pattern add character, while optional embroidery details can make it even more expressive.
Beyond its appeal as a project, this pattern has practical uses too. It’s a heartfelt handmade gift, a whimsical addition to children’s playrooms, or a decorative piece to brighten your shelves. Plus, the process itself is an enjoyable way to relax and improve your crochet skills. This charming dinosaur pattern is sure to bring joy to anyone who holds it.
Special Features
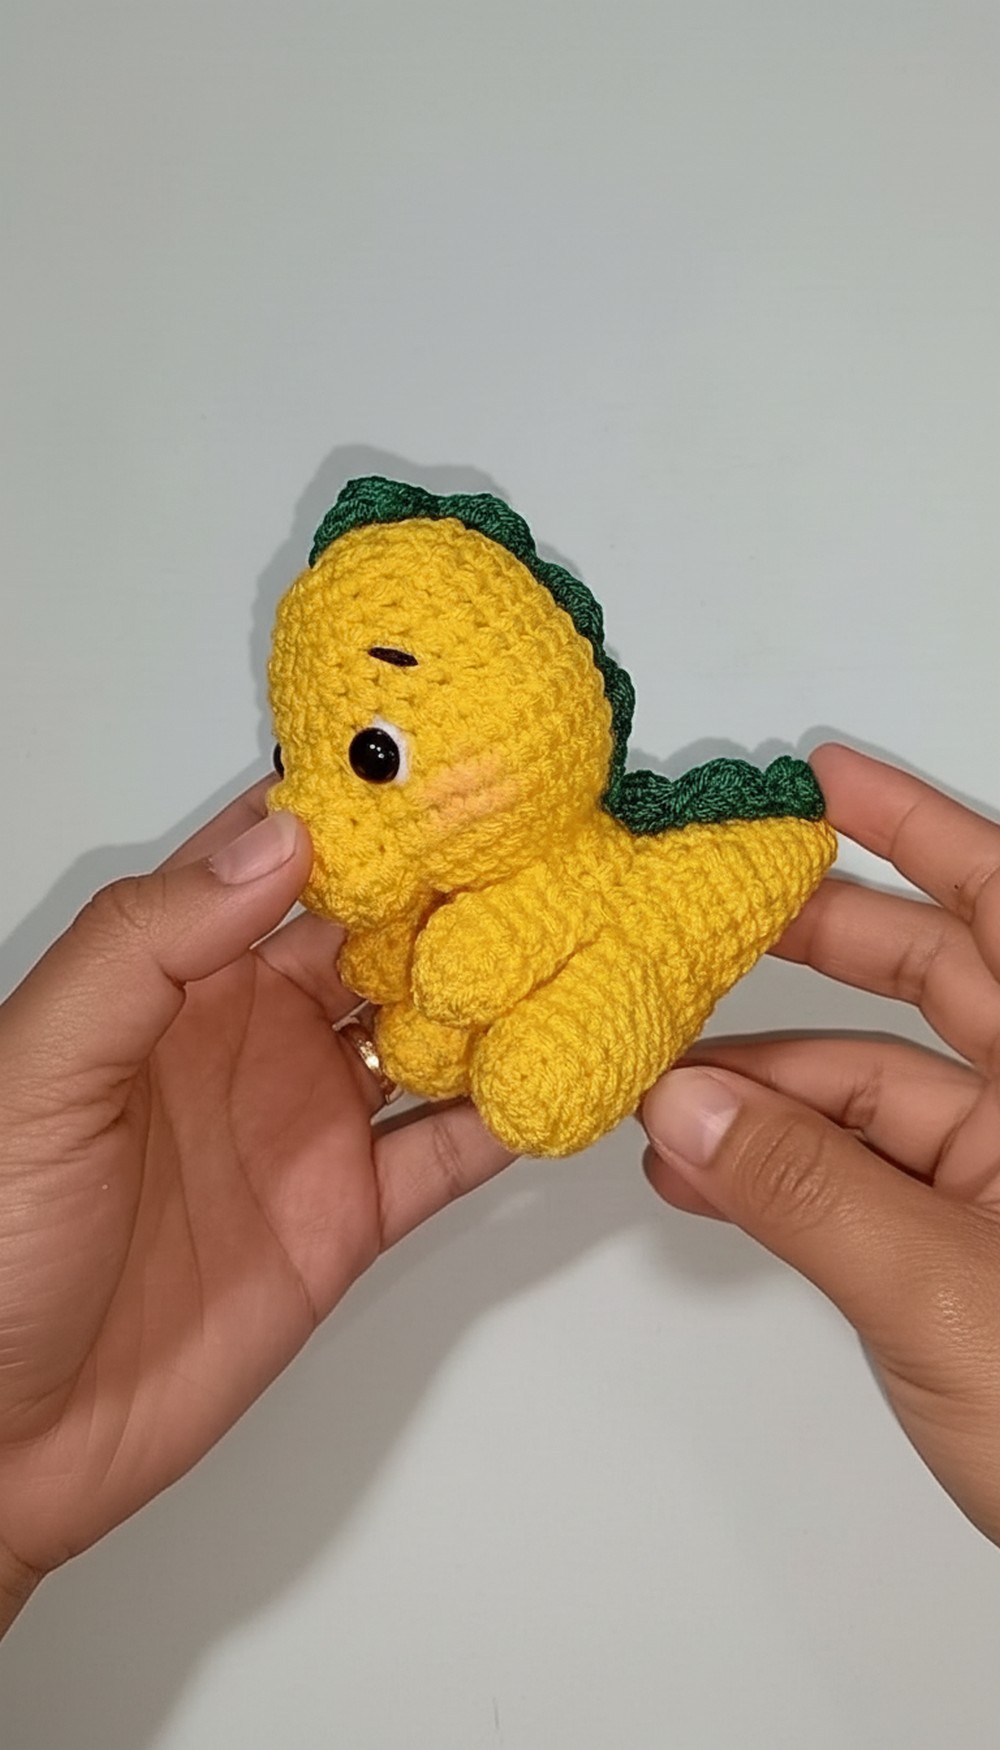
- Seamless body and head: Crafted as a single piece for a polished and neat look.
- Chubby cheeks: Strategic increases and decreases give the dino a baby-like charm.
- Dimensional back spikes: Puff stitches create a spiky yet soft ridge for added character.
- Customizable parts: Make the dino in any color and personalize it with details.
- Optional face embroidery: Add eyebrows, a snout, or eye shines for extra personality.
Difficulty Level
Beginner-Friendly to Intermediate
The pattern introduces various techniques like the magic ring, increases and decreases, and back loop only stitches. Precise sewing and finishing steps will help refine your amigurumi-making skills.
Materials List
- Yarn (worsted or DK weight):
- Main color: For the dino’s body (e.g., yellow).
- Contrast color: For back spikes (e.g., strong green).
- Small amounts of white (eye shine) and black (snout embroidery).
- Crochet Hook: 2.5 mm
- Safety Eyes: 8 mm
- Stuffing: Polyester fiberfill
- Yarn Needle: For sewing and embroidery
- Scissors
- Stitch Marker: To mark rounds
Crochet Pattern: Baby Dinosaur
Body and Head
The body and head are worked in one continuous piece. Stuff the body as you go.
Body Section
R1: Make a magic ring (MR), and crochet 6 sc into the ring. (6 sts)
R2: Make 6 increases (inc) – 2 sc in each st around. (12 sts)
R3: (1 sc, 1 inc) 6 times. (18 sts)
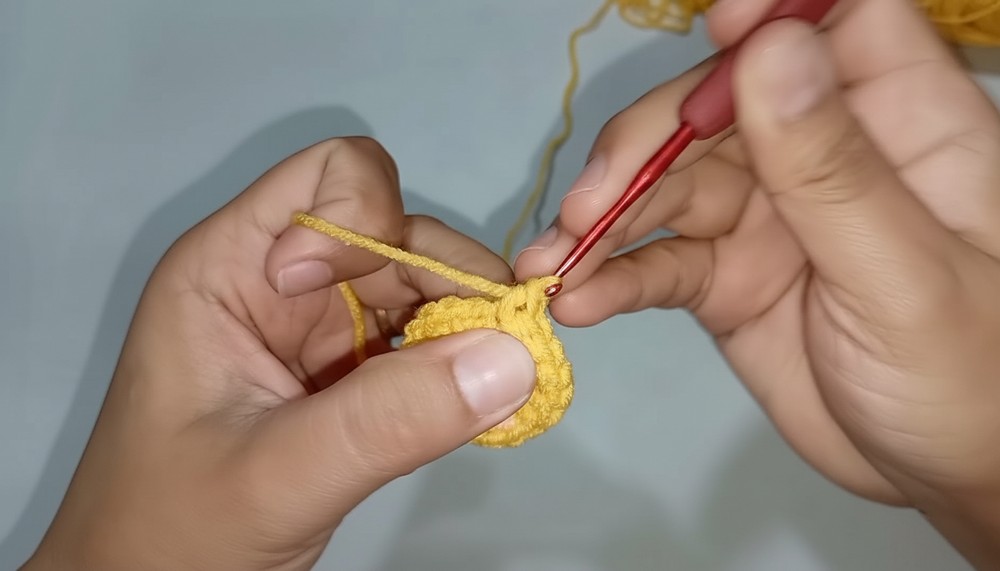
R4: (2 sc, 1 inc) 6 times. (24 sts)
R5 (BLO): Work 24 sc in back loop only. (24 sts)
R6–R7: Work 24 sc for 2 rounds (24 sts).
R8: (2 sc, 1 dec) 6 times. (18 sts)
R9–R10: Work 18 sc for 2 rounds (18 sts).
R11: (1 sc, 1 dec) 6 times. (12 sts)
R12: Work 12 sc. (12 sts)
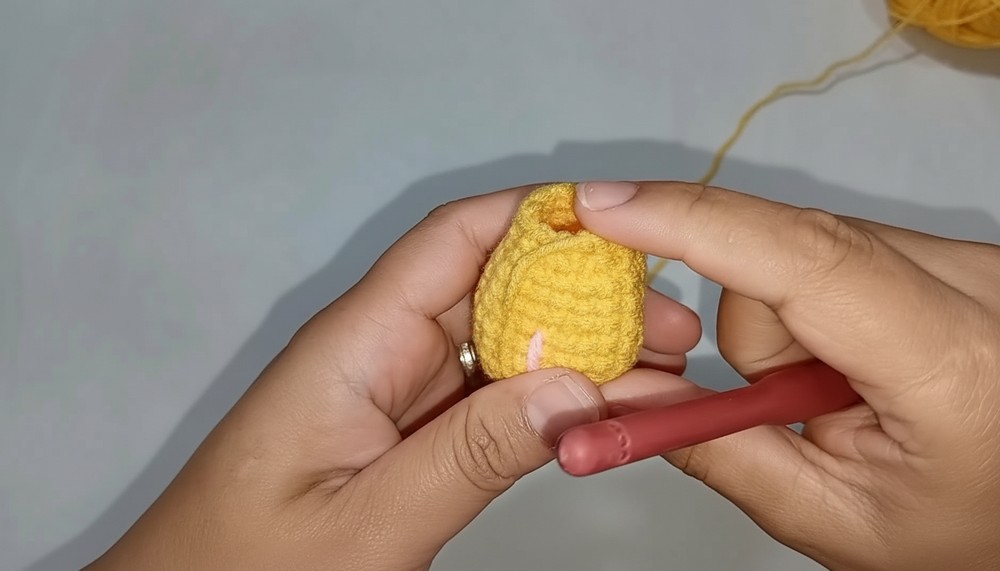
Stuff the body. Continue directly into the head without fastening off.
Head Section
R13: Make 12 increases (inc) – 2 sc in each st around. (24 sts)
R14: (3 sc, 1 inc) 6 times. (30 sts)
R15 (shaping cheeks):
- Work 7 sc, 3 inc, 10 sc, 3 inc, 7 sc. (36 sts)
R16–R18: Work 36 sc for 3 rounds. (36 sts)
R19 (closing cheeks):
- Work 7 sc, 3 dec, 10 sc, 3 dec, 7 sc. (30 sts)
R20: Work 30 sc. (30 sts)
R21: (3 sc, 1 dec) 6 times. (24 sts)
R22: Work 24 sc. (24 sts)
R23: (2 sc, 1 dec) 6 times. (18 sts)
R24: Work 18 sc. (18 sts)

Placement of Safety Eyes
- Insert safety eyes at Round 18, with 8 stitches between them.
- Center them evenly on the head. Secure tightly and begin stuffing the head fully.
Final Rounds to Close
R25: (1 sc, 1 dec) 6 times. (12 sts)
R26: Make 6 decreases. (6 sts)
- Use a tapestry needle to pick up the front loops of the remaining stitches, pull tight to close, and secure.
- Weave in the yarn tail.
Legs (Make 2)
R1: MR, 6 sc. (6 sts)
R2: 6 inc. (12 sts)
Round 3 (BLO): Work 12 sc in back loop only.
Round 4–R5: Work 12 sc for 2 rounds (12 sts).

Round 6: (2 sc, 1 dec) 3 times. (9 sts)
R7–R8: Work 9 sc for 2 rounds. (9 sts)
Stuff lightly, keeping most of the filling in the bottom half. Flatten the leg for sewing.
R9 (closing): Work 4 sc across both layers to close the open end.
Repeat for the second leg.
Arms (Make 2)
R1: MR, 6 sc. (6 sts)
R2: (1 sc, 1 inc) 3 times. (9 sts)
R3–R4: Work 9 sc for 2 rounds. (9 sts)
R5: (1 sc, 1 dec) 3 times. (6 sts)
R6: Work 6 sc. (6 sts)
Flatten the arm for sewing. Work 3 sc across both layers to close the open end.
Repeat for the second arm.
Tail
R1: MR, 4 sc. (4 sts)
R2: (1 sc, 1 inc) 2 times. (6 sts)
R3: (2 sc, 1 inc) 2 times. (8 sts)
R4: (3 sc, 1 inc) 2 times. (10 sts)
R5: (4 sc, 1 inc) 2 times. (12 sts)
R6: Work 12 sc. (12 sts)
R7: (3 sc, 1 inc) 3 times. (15 sts)
R8: Work 15 sc. (15 sts)
R9: (4 sc, 1 inc) 3 times. (18 sts)
Finish with a sl st, leaving a long tail to sew.
Back Spikes
With contrast color:
- ch 34.
- Skip 2 ch, (begin puff stitch in next st, close, 1 sc, skip 2 ch, sl st in next ch). Repeat till the end – you’ll have 8 puff peaks.
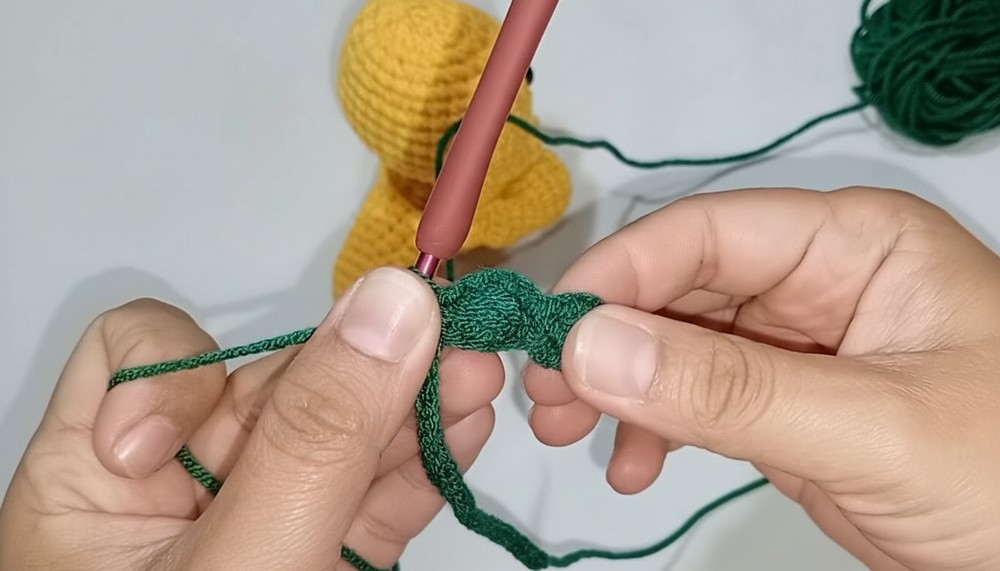
Attach the spikes along the back, with 5 on the head and 3 on the tail.
Snout
R1: MR, 7 sc. (7 sts)
R2: 7 inc. (14 sts)
R3–R4: Work 14 sc for 2 rounds.
Finish with a sl st, leaving a long tail to sew.
Sew it centered between the safety eyes at Round 18. Lightly stuff before sewing if desired.
Assembly
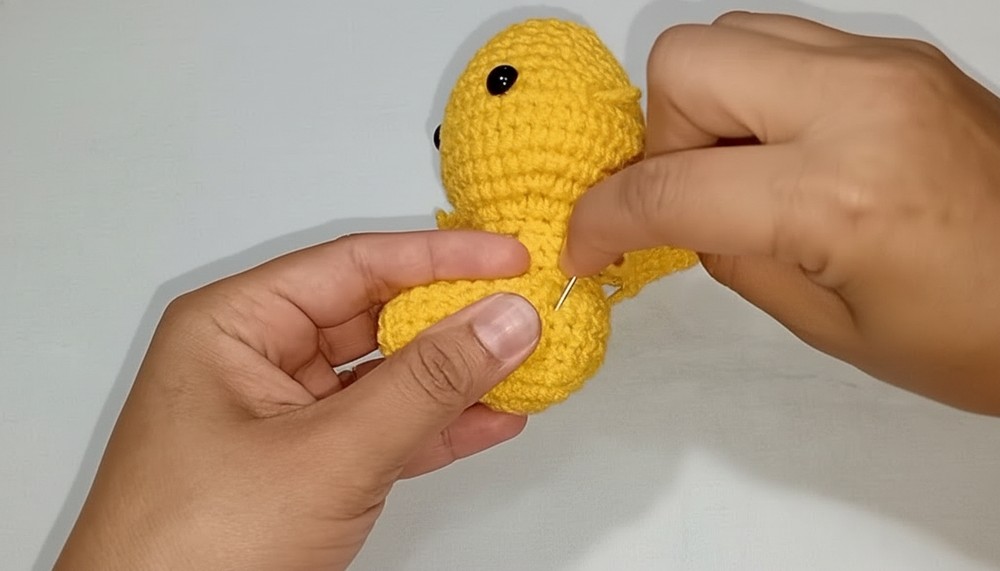
- Attach legs just under the body, angling them outward.
- Sew arms slightly above the legs, angling inward for a baby posture.
- Center the tail on the back, starting around Round 2 of the body.
- Attach snout and embroider nostrils and eyebrows for personality.
- Add optional white eye shines for a cute effect.

Conclusion
Your baby dinosaur amigurumi is complete! This delightful toy makes a wonderful gift and is perfect for practice or presentation.
Tip
When sewing pieces together, use small stitches and take your time to ensure a neat finish. Always weave in yarn tails securely to prevent loose threads. Don’t be afraid to customize! Mix up colors and add embroidery to make your dinosaur truly one-of-a-kind.