How to Crochet Sunflower Pattern to Add a Touch of Summer
Brighten your day with the Free Crochet Sunflower Pattern that is quick, beginner-friendly, and ideal for unique gifts or decorative flair.
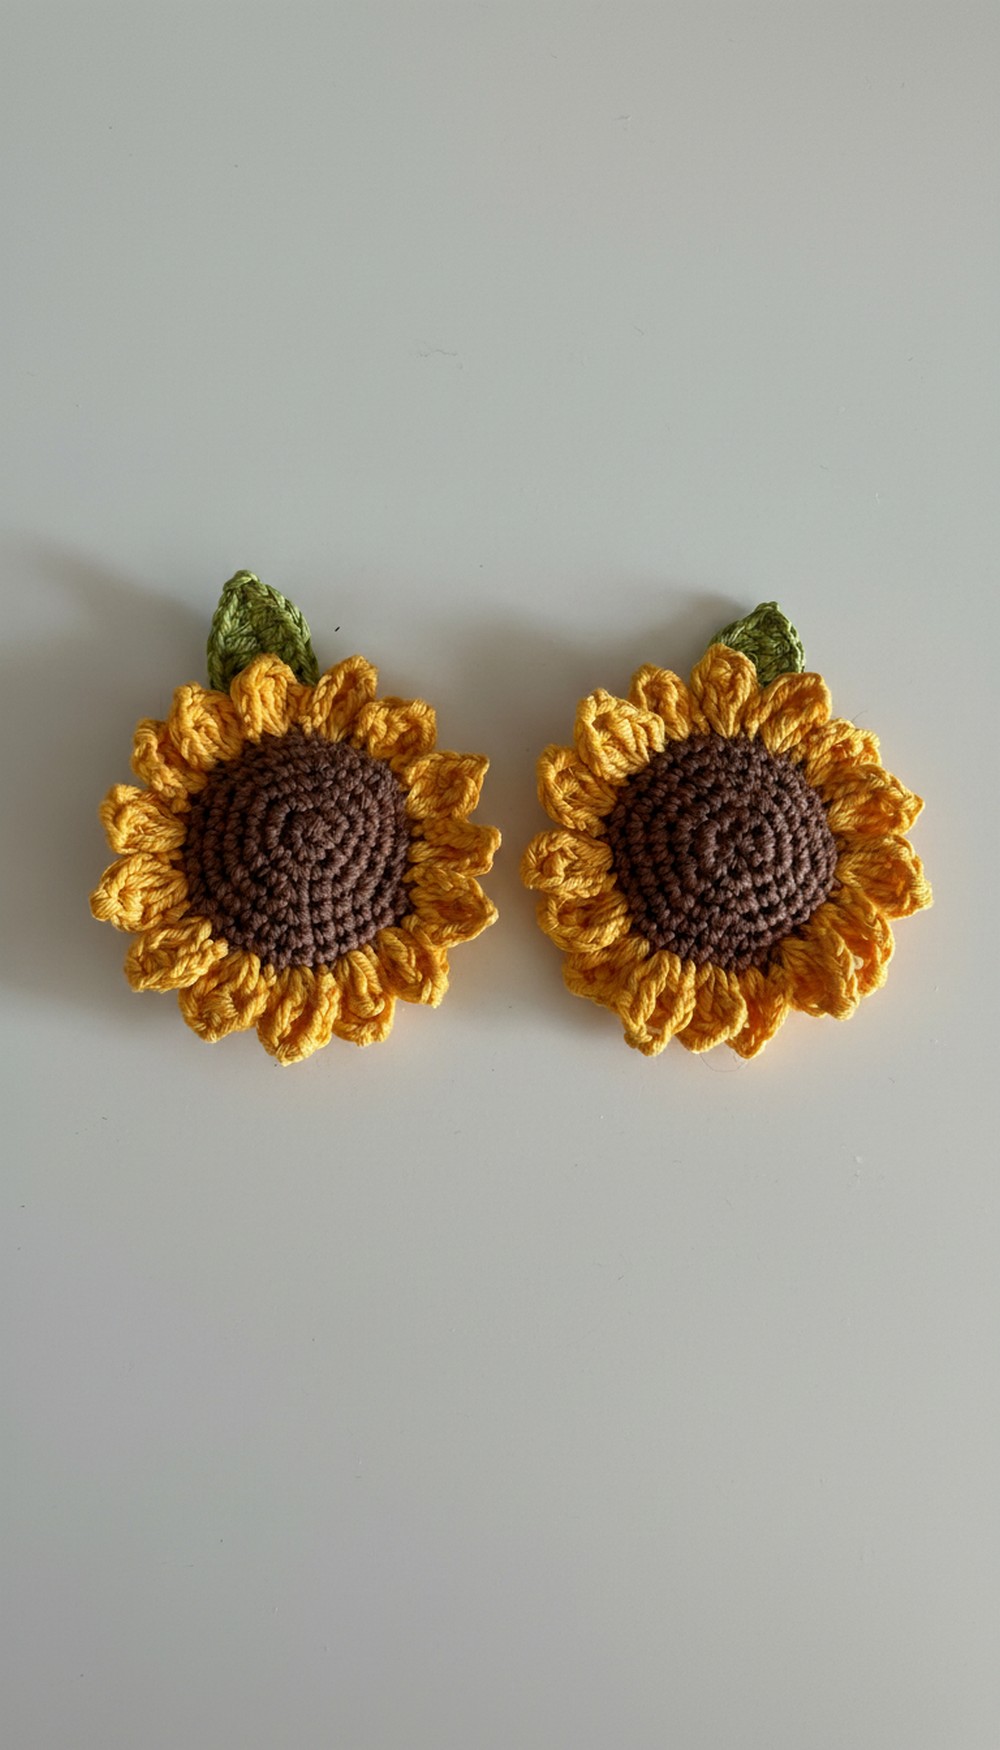
Who would have thought a touch of yarn could brighten your day? A sunflower pattern offers warmth, charm, and a pop of cheeriness to any accessory or project. Whether you’re looking to embellish a bag, turn it into a brooch, or simply use it as decoration, this crochet pattern brings versatility at its finest. The textured petals and bold center replicate the beauty of nature, making it a delightful addition to your crochet collection.
Free Crochet Sunflower Pattern to Brighten Your Creations

What makes this pattern so beneficial is its beginner-friendly approach paired with professional results. The pattern introduces a satisfying no-sewing assembly (except for an optional detail), saving effort while delivering seamless beauty. A small amount of stuffing adds dimension to the center, giving it a 3D effect that truly stands out.
Its cheerful appearance makes it an excellent gift, while its practicality ensures functionality. Perfect for seasonal projects or year-round decor, this pattern is the type of crochet project that’s as enjoyable to make as it is to showcase. Full of charm and utility, it’s the perfect idea to brighten your crocheting collection and your day.
Special Features
- Skill Level: Beginner-friendly with some intermediate stitches.
- Tools and Materials Needed:
- Saffron yarn or any soft and easy-to-use yarn.
- 2.5 mm crochet hook.
- A small amount of stuffing (for the center).
- Yarn needle (for weaving ends and optional small sewing).
- Stitch marker.
- Uses: Ideal for brooches, bag accessories, or decorative pieces.
- Tutor’s Suggestions: Customize your sunflower by adding a stem or leaf, or leave it as is for simplicity.
Crochet Sunflower Pattern
1. Materials Preparation
Gather your materials: saffron yarn (or preferred colors), a 2.5 mm hook, small stuffing, a needle for weaving ends, and a stitch marker.
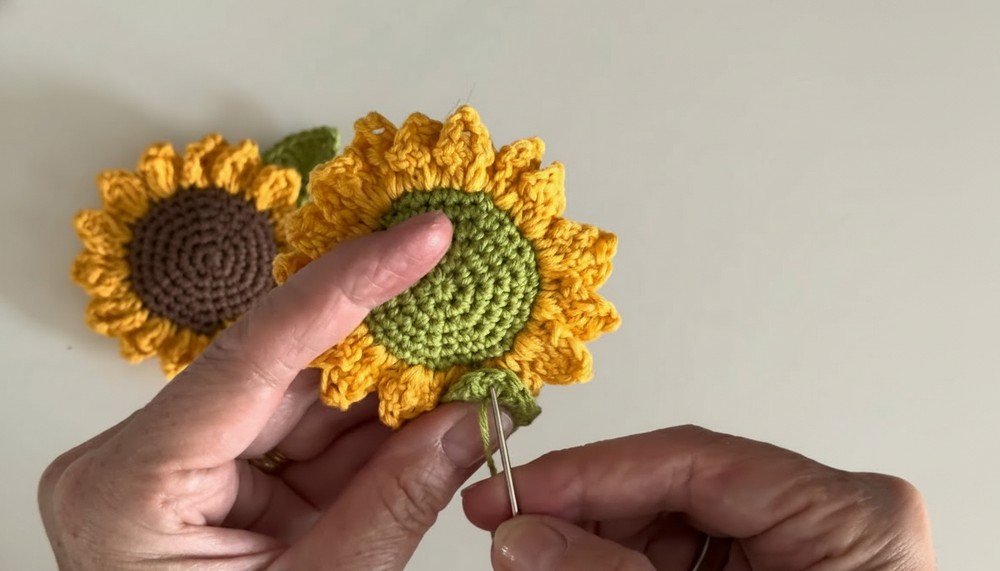
2. Creating the Brown Center (Front)
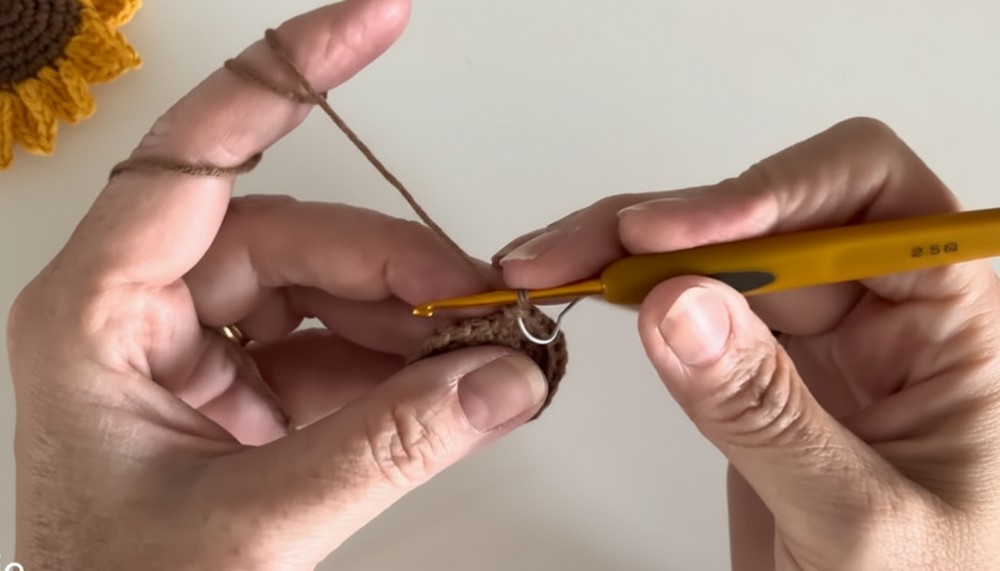
- Magic Circle: Create a magic circle by wrapping your yarn around your finger in an “X” shape. Pull the tail through to create a loop.
- Round 1 (R1): Inside the magic circle, crochet 6 single crochets (sc). Place a stitch marker in the last stitch to mark the end of the round. Pull the tail to tighten the loop.
- Round 2 (R2): Do an increase (2 sc in each stitch) around the circle. You now have 12 stitches in total.
- Round 3 (R3): Work in a pattern of 1 single crochet (1 sc) in one stitch, followed by 2 sc in the next stitch. Repeat around to end with 18 stitches.
- Round 4 (R4): Crochet 2 sc, then increase (2 sc in one stitch). Repeat to finish with 24 stitches.
- Round 5 (R5): Crochet 3 sc, then increase. Repeat to end with 30 stitches.
- Round 6 (R6): Work 1 sc in each stitch around for 30 stitches to complete. Slip stitch into the next stitch, then fasten off and cut your yarn. Weave in the ends.

3. Creating the Green Back
Follow the same steps (R1 through R6) as the brown center to create the backpiece of the sunflower. Use green yarn instead.
4. Joining the Center Pieces
- Place the brown front and green back pieces back-to-back. Align the stitches.
- Attach your yarn through both loops of the stitches from both pieces. Begin working around to join them together.
- Before completely closing, insert a small amount of stuffing into the center to give it a 3D effect.

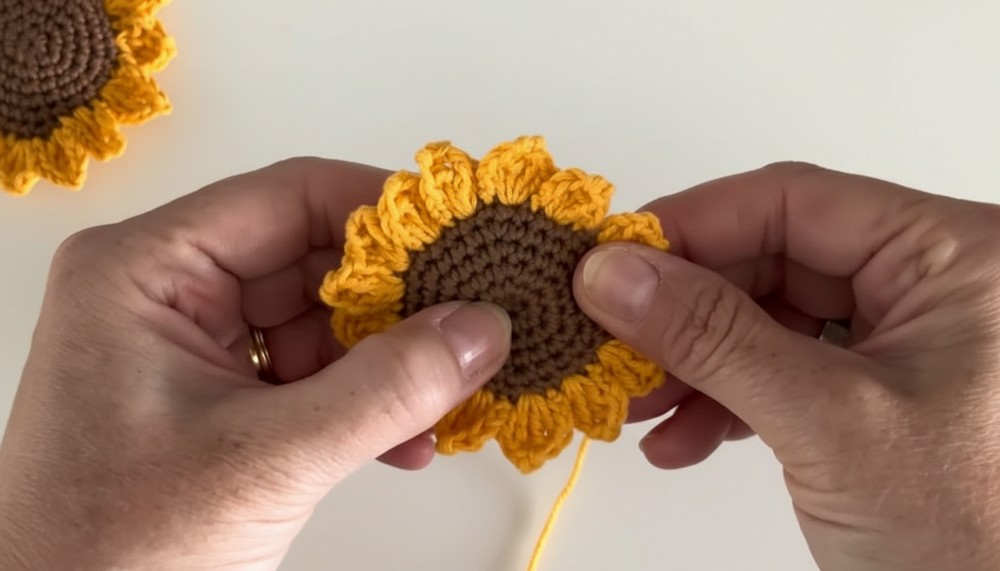
5. Working the Petals
- Attach your yarn to the outer edge of the joined center.
- Petal Pattern (worked in one stitch):
- Chain 2 (ch 2).
- Double Crochet (dc).
- Treble Crochet (tr).
- Create a Picot Stitch: Chain 2 (ch 2), slip stitch (sl st) into the first chain.
- Treble Crochet (tr) (worked in reverse).
- Double Crochet (dc).
- Chain 2 (ch 2) and slip stitch (sl st) into the next stitch.
- Repeat the above petal pattern all the way around the sunflower.
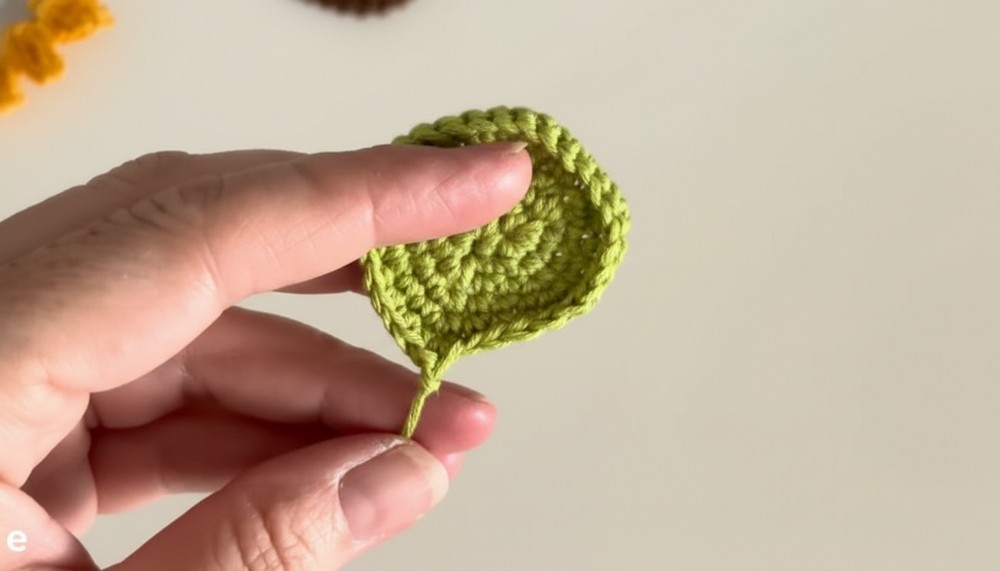
6. Optional: Adding a Leaf
- Chain 10 (ch 10).
- In the second chain from the hook, slip stitch (sl st) into the stitch.
- In the next stitch, single crochet (sc).
- In the next five stitches, work double crochets (dc).
- In the next stitch, work an increase (2 dc in the same stitch).
- In the final stitch, work 4 double crochets (4 dc)—this naturally curves the leaf around the end of the row.
- Continue working back along the opposite side:
- Increase (2 dc in the same stitch) in the first stitch on the return row.
- Work 5 double crochets (dc), followed by 1 single crochet (sc) in the last stitch.
- Slip stitch (sl st) into the starting point and fasten off. Weave in the ends.
- Sew the leaf in place on the back of the sunflower, positioning it as desired.
Conclusion
Your gorgeous sunflower is now complete! With its vibrant pattern and 3D texture, it’s perfect for brightening up any accessory. Attach it to a pin for a brooch, sew it onto a bag, or use it as a standalone piece to complement other crochet projects.
Pro Tip
While working on the petals, keep the tension loose to prevent stiffness, ensuring your sunflower has a soft, natural look.