Stylish Free Crochet Crossbody Bag Pattern You’ll Love to Wear
Clarify your accessory needs with this Free Crochet Crossbody Bag Pattern for a stylish, hands-free bag that’s easy to follow and functional.
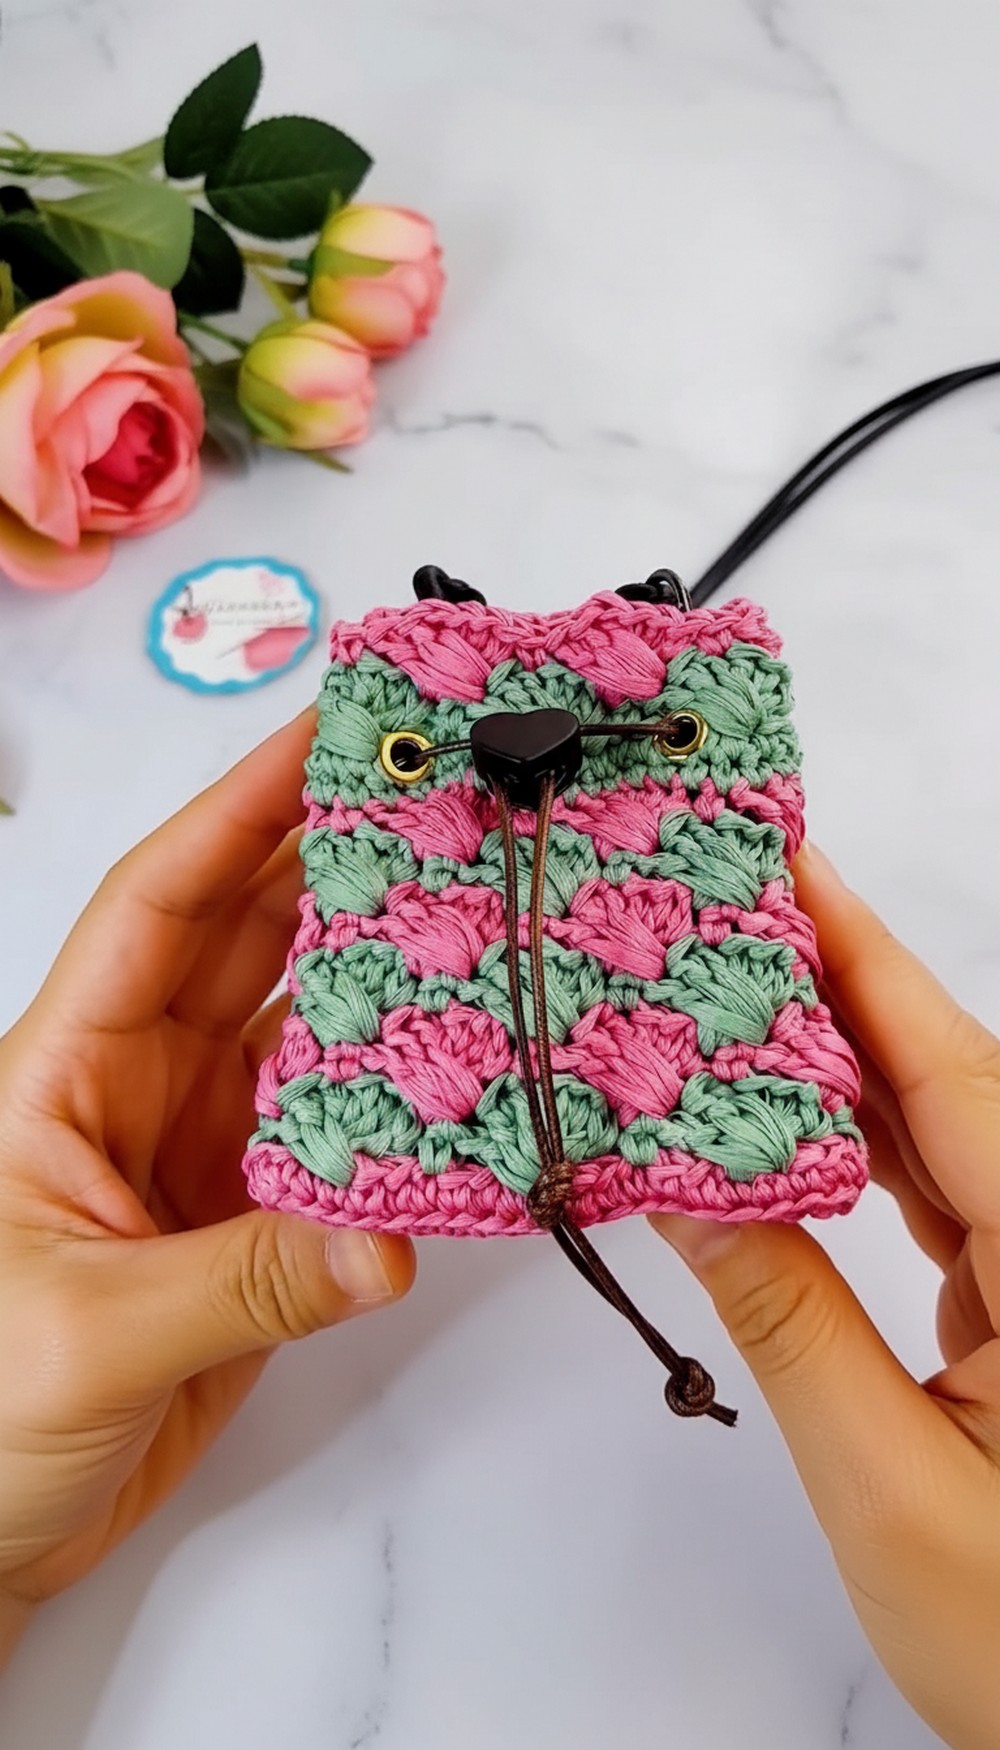
Crocheting your own bag is a rewarding way to combine style, practicality, and creativity into a single project. This mini crossbody bag pattern is perfect for those who love accessories that are both functional and fashionable. Whether you need a compact bag for running errands, carrying daily essentials, or adding a handmade touch to your outfit, this pattern makes it possible. Lightweight yet sturdy, it’s designed to stay durable with the use of raffia cotton yarn, giving it a modern, textured look while remaining eco-friendly.
Trendy, Lightweight, and Easy Crochet Crossbody Bag Pattern
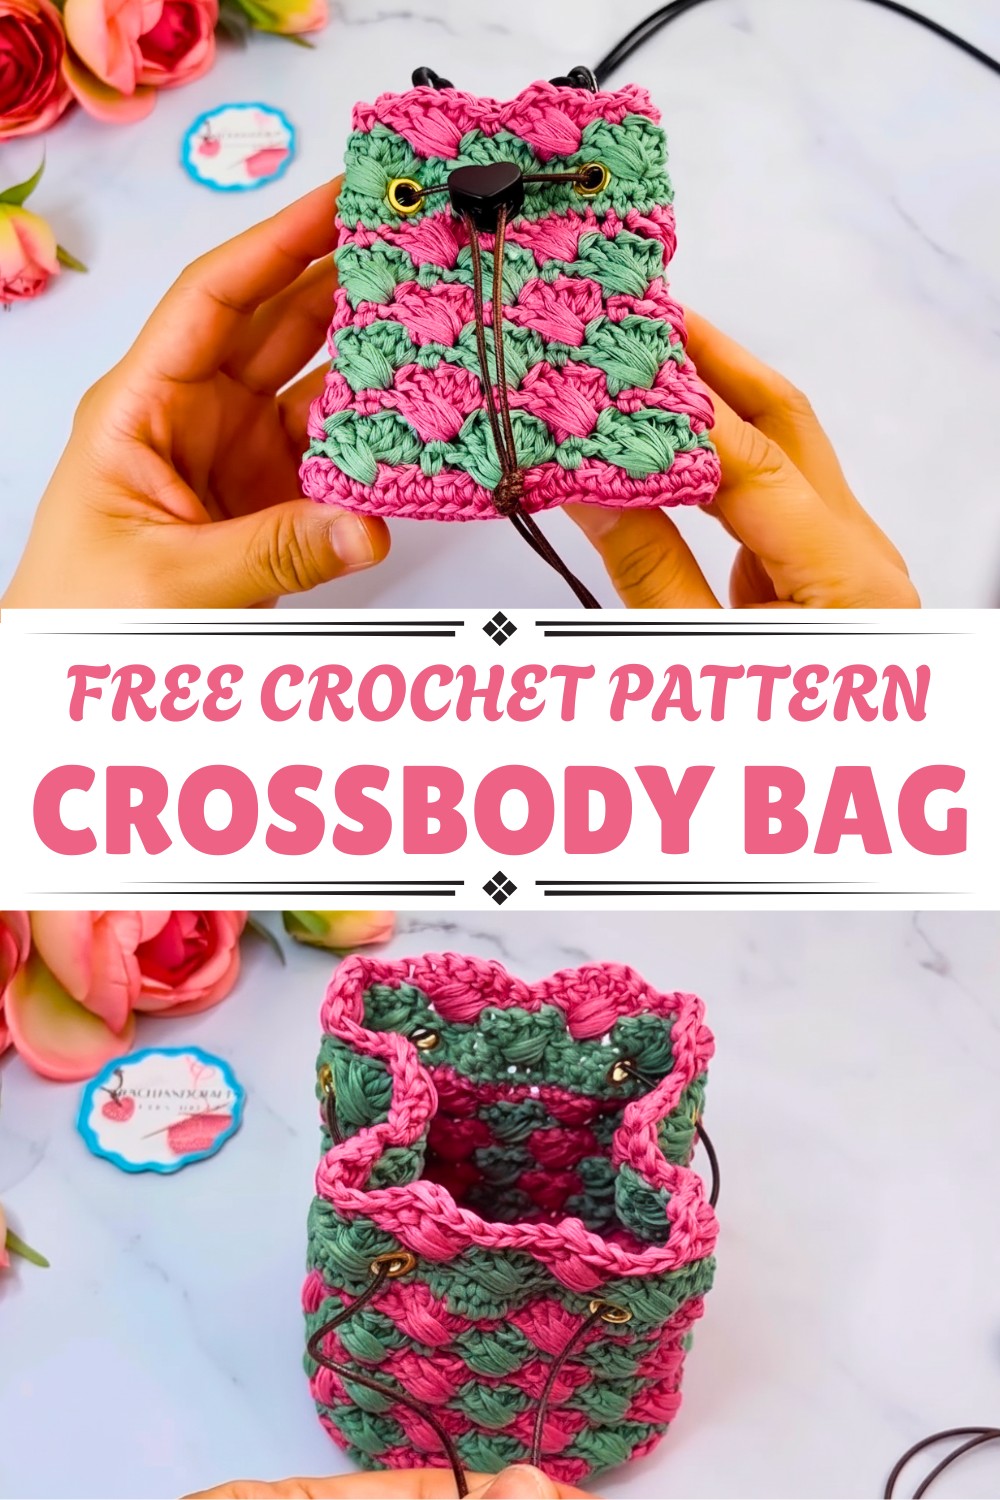
Adding special details like a cross double crochet pattern and alternating colors makes the final product stand out, giving it a chic and contemporary charm. The bag’s adjustable features, such as a drawstring or custom strap length, allow you to personalize it according to your lifestyle. Aside from being a stylish addition to your wardrobe, the process itself is meditative and a fantastic creative outlet for beginners and experienced crocheters alike.
Its compact and hands-free pattern makes it suitable for everything—from casual outings to summer festivals, keeping your essentials secure without compromising comfort. By completing this project, you’ll have not just a handmade piece but also something practical, trendy, and reflective of your own personal touch.
Pattern Details:
- Skill Level: Beginner to Intermediate
- Special Features: Durable structure with raffia cotton yarn, cross double crochet pattern, optional drawstring, and alternating color sections.
- Usage: Perfect for daily essentials, this bag is practical, lightweight, and stylish.
- Materials Needed: Two strands of raffia cotton yarn, grommet eyelets, drawstring, spring cord lock, crochet hook, scissors, and stitch markers.
Step-by-Step Pattern
Foundation and Base (Rounds 1-2)
Step 1: Slip Knot & Foundation Chain
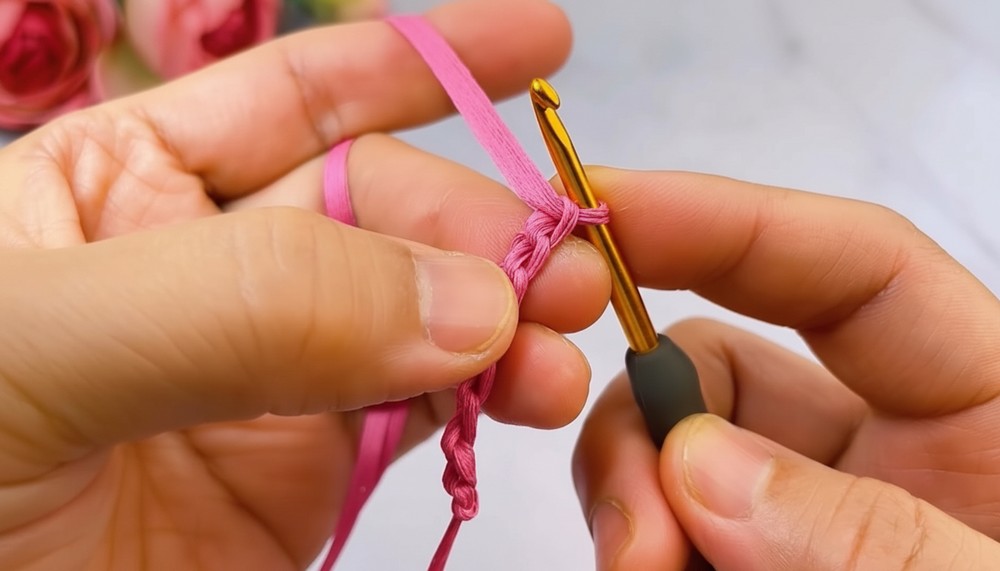
- Make a slip knot and start by chaining 7 to form the foundation of the bag.
- Turn over the chain. Begin crocheting in the second back bump from the hook.
2: First Round of Single Crochets
- Work 1 single crochet (SC) in the second back bump and in each of the next 4 back bumps.
- In the last back bump, make 3 single crochets (SC), creating a rounded edge.
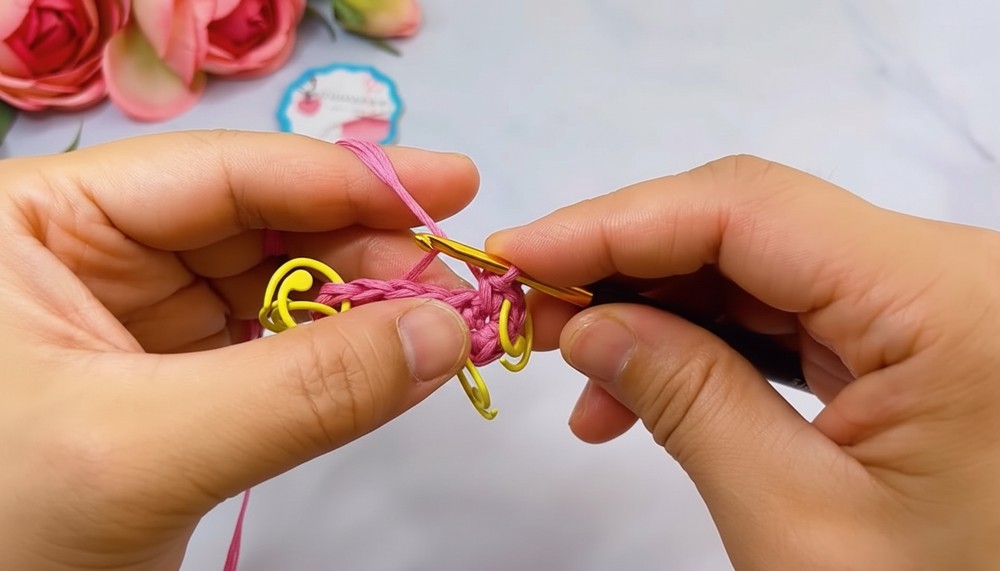
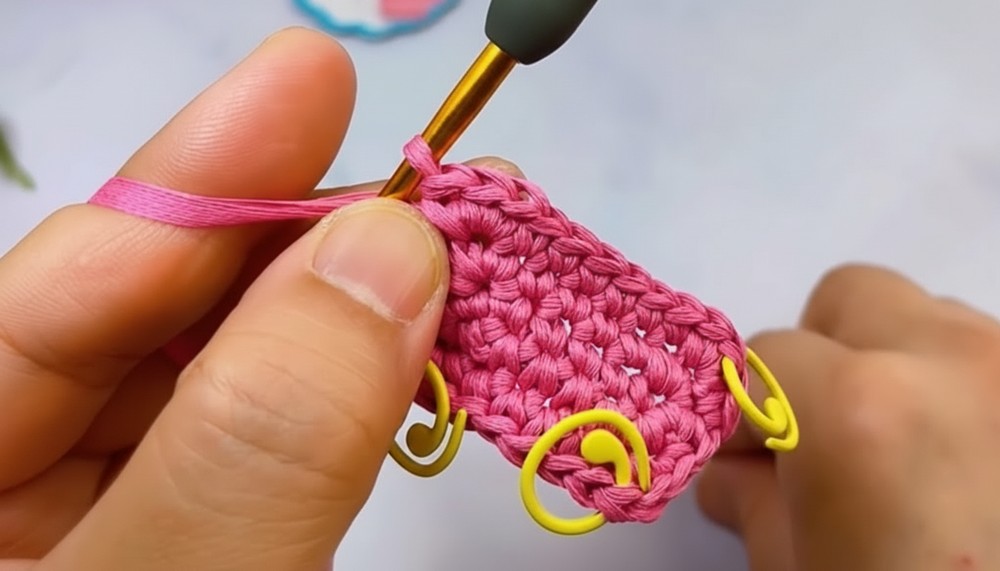
- Tutor’s Suggestion: Use stitch markers to mark the first and third stitch of these 3 single crochets to track increases easily.
3: Complete the Bottom Oval
- Rotate to the opposite side of the chain foundation. Work 1 SC in each of the next 4 stitches along the other side.
- In the last stitch, make 2 single crochets (SC), then mark the first stitch of these with a stitch marker.
4: Fasten Off and Begin Round 2
- Join the round with a slip stitch (SS) in the first stitch.
- Chain 1 and begin Round 2.
Building the Base (Rounds 3-8)
Step 5: Increasing the Base
- In stitches marked with stitch markers (increase points), work 3 SCs and always replace the marker in the middle stitch of these increases.
- Continue working 1 SC in all other stitches between markers. Make sure each increase is positioned symmetrically and evenly.
6: Growing the Base
- Repeat the process for Rounds 3 to 8 while continuing to track increases.
- By Round 8, the base of the mini crossbody bag is completed and sturdy.
Building the Walls (Rounds 9-17)
Step 7: Transitioning to the Walls
- Chain 1 and begin Round 9 by working 1 SC in the back loops only (BLO) of each stitch. This creates a ridge effect separating the base from the walls of the bag.
8: Switching to New Yarn Colors
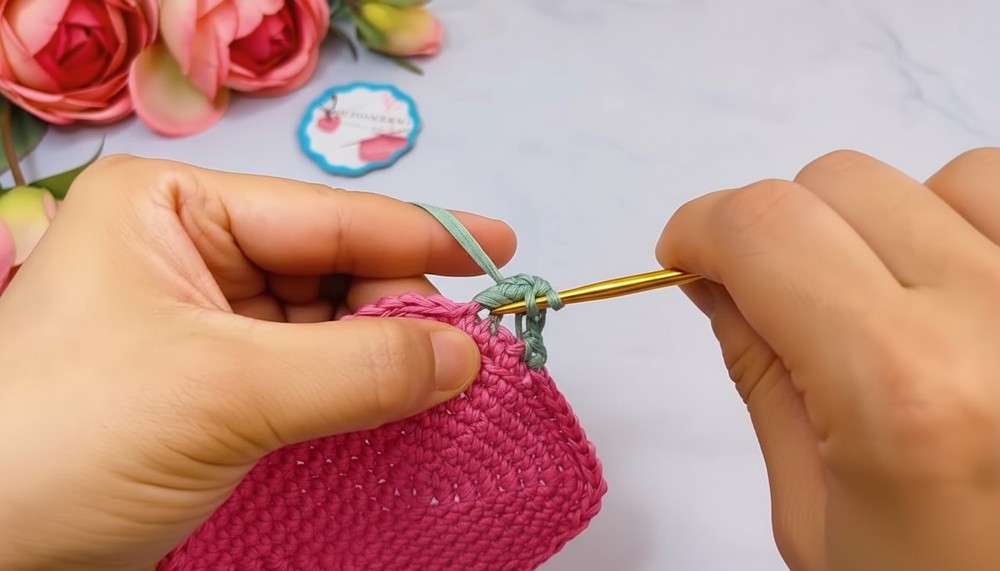
- At the end of Round 9, switch to a new yarn color as desired.
- Secure the new yarn, join with a slip stitch, and proceed with decorative wall rounds.
Decorative Pattern: Cross Double Crochet (Rounds 10-15)
Step 9: Cross Double Crochet Pattern
- Begin by working 1 single crochet (SC) in the first stitch.
- To create a cross double crochet (XDC) pattern:
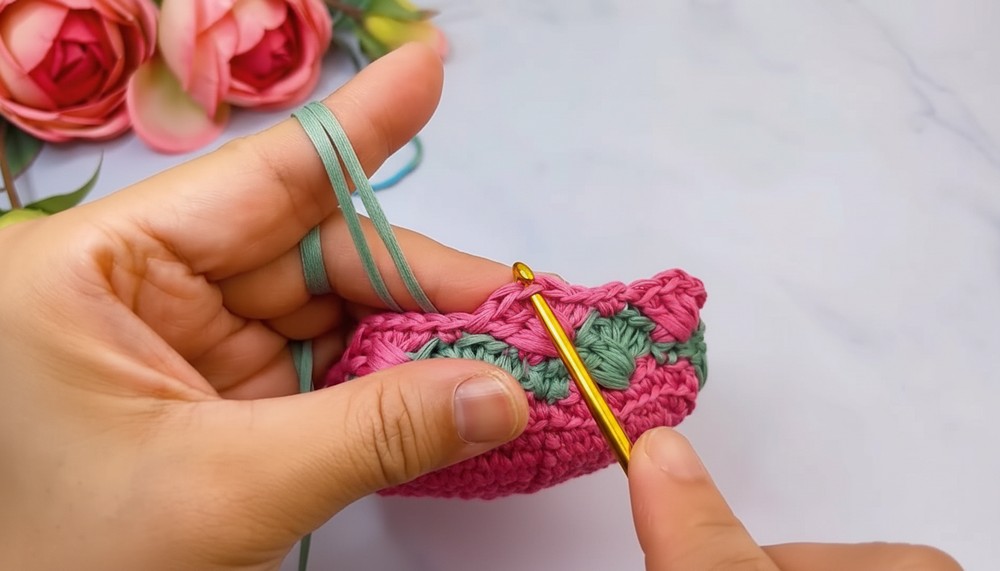
- Skip 3 stitches, work 3 double crochets (DC) in the fifth stitch.
- Go back to the skipped third stitch and work 3 DCs.
- Skip 2 stitches and make 1 SC.
- Repeat this pattern across the round until complete. Fasten off with a slip stitch and cut the yarn. Secure ends by weaving them.
Step 10: Alternating Colors & Patterns
- For Rounds 11–15, alternate two yarn colors to accentuate the cross pattern.
- Each round involves forming the XDCs as detailed above. Continuously weave in ends and secure transitions neatly for a polished look.
Finishing the Main Body (Rounds 16-19)
Step 11: Simple Single Crochets
- For Rounds 16–17, work 70 single crochets (SC) in each round to build the bag’s height. Ensure the edges remain even.
12: Completing the Decorative Section
- Repeat the XDC pattern one last time in Round 19 for a cohesive design.
Adding Hardware & Final Touches
Step 13: Grommet Eyelets
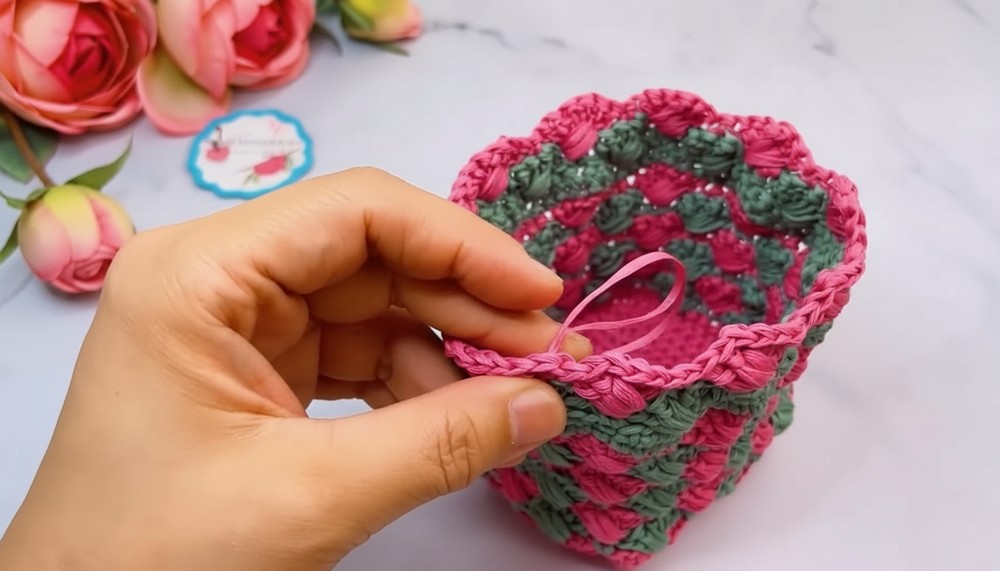
- Install grommet eyelets evenly along the bag opening to allow for the drawstring.
- Tutor’s Suggestion: Use a grommet tool for precise placement and a polished look.
14: Attach the Drawstring
- Insert a drawstring through the grommets and secure with a spring cord lock for a functional closure.
Conclusion
Congratulations! You’ve completed your stylish mini crossbody bag. This lightweight accessory is perfect for everyday essentials and features a trendy, textured design with customizable color accents. Whether for personal use or as a gift, this mini crossbody bag is a chic, handmade addition to any wardrobe.
Pro Tip
For added durability, line the inside of the bag with fabric using a simple hand-stitching technique. This prevents stretching and helps maintain its shape over time.