Step-by-Step Crochet Keychain Pattern to Add Style to Your Keys
Quick & Fun Crochet Keychain Pattern for a Pop of Personality

This project is beginner-friendly but offers enough versatility for seasoned crocheters to experiment with colors and textures. By using a few basic stitches and minimal materials, it’s quick to complete while still delivering a professional and polished finish.
Whether it’s about keeping your keys more organized, crocheting custom gifts for friends and family, or simply bringing a touch of joy to your day, this keychain pattern offers endless possibilities.
Materials Needed
- Yarn: Three different colors of yarn (recommended: 100% cotton).
- Hook: 3mm crochet hook.
- Needle: Tapestry needle for stitching.
- Polyfill stuffing: For filling the ball.
- Scissors.
Difficulty Level
- Beginner to Intermediate: The stitches are basic (single crochet and chaining), but precision in assembly is essential.
Special Features
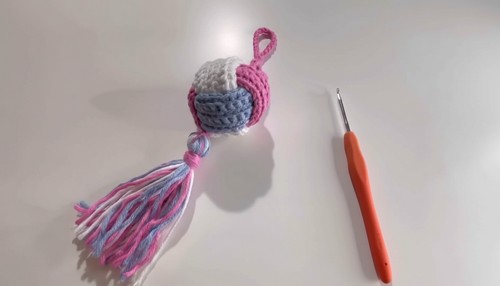
- Includes a multi-purpose crochet ball that can be used as a decoration or a keychain.
- Three-color customization for added color combination possibilities.
- Optional tassel at the base to add flair and visual interest.
- Compact and lightweight design, making it great for day-to-day use.
Step-by-Step Pattern
Part 1: Crochet Ball
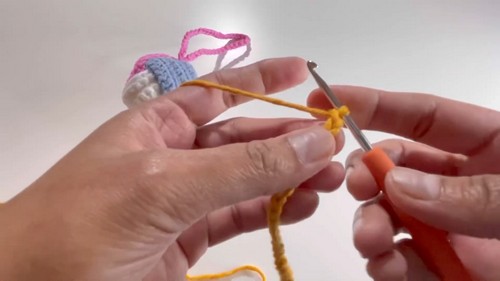
Step 1: Foundation
- Create a slip knot with yarn color 1.
- Chain 29 (29 CH).
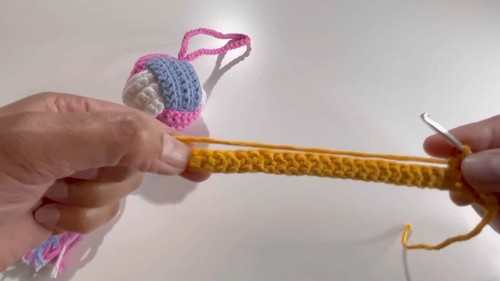
2: First Row (Single Crochet)
- Insert your hook into the second chain from the hook.
- Single Crochet (SC) into each chain.
- You’ll end up with 28 SCs for Row 1.
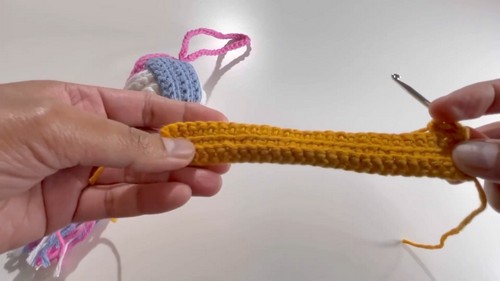
3: Back Loop Row (Second Row)
- Chain 1 (CH 1) and turn your work.
- Work single crochet into back loops only (SC BLO) in all 28 stitches.
Step 4: Front Loop Row (Third Row)
- Chain 1 (CH 1) and turn your work.
- Work single crochet into front loops only (SC FLO) in all 28 stitches.
5: Repeat Rows for Texture
- Repeat Row 2 (SC BLO) for Row 4.
- Repeat Row 3 (SC FLO) for Row 5.
- Work Row 6 as SC BLO (Back Loop Only).
At the end of Row 6, your work will consist of textured rows alternating between back loop and front loop single crochet.
Step 6: Finish Off and Attach
- Pull your yarn long, cut it, and secure your last stitch.
- Fold your piece in half, ensuring the textured side is facing outward. Stitch the two edges together using a needle and yarn, leaving the other side open.
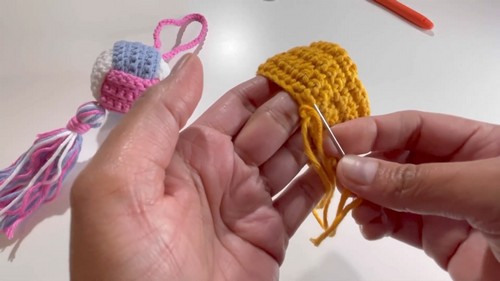
Step 7: Repeat for Two Additional Colors
- Crochet the same pattern for two other colors (exact same dimensions).
- Attach and stitch the edges for the first two colors, but leave the third color open for later.
Part 2: Assembly
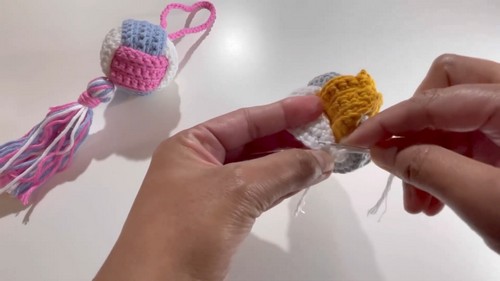
Step 1: Assemble the Layers
- Take the first crocheted ball and stitch it into a loop shape.
- Insert the second ball into the first ball like a chain link.
- Take the third open ball and weave it around the other two balls by inserting it inside one loop and pulling it through to secure the knot form.
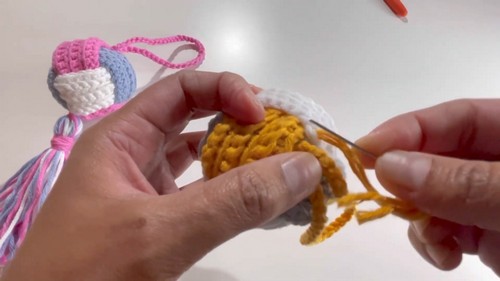
Step 2: Fill the Ball
- Stuff the ball using polyfill stuffing.
- Do not overfill; it should be firm yet soft.
- Stitch and secure the stuffing tightly by sewing along the open edge.
Part 3: Adding the Keychain Loop
- Create a chain of 40 (40 CH) using any yarn color for the loop.
- Stitch the chain directly to the top of the ball using the needle.
- Pull loose ends inside, trim, and secure tightly
Tassel (Optional)
Step 1: Measure Yarn
- Use all three yarn colors.
- Wrap yarn around a flat object (e.g., a visiting card) about 10-12 times.
2: Tie the Tassel
- Slide the yarn off and carefully tie it at the top using another piece of yarn.
- Wrap yarn around the tassel’s “neck” multiple times (about 10 rounds).
- Tie securely, hide the loose ends, and trim the tassel’s bottom to make it even.
3: Attach Tassel to Ball
-
- Use a needle to attach the tassel securely to the bottom of the ball.
Tutor’s Suggestions
- Yarn Choice: Cotton yarn will make the keychain durable and easy to clean.
- Stuffing: Make sure to fill the ball evenly for a balanced shape.
- Color Combinations: Experiment with bold or harmonious colors for a unique look.
Uses
- Attach to keys, backpacks, purses, or zippers.
- Perfect as a decorative item or personalized gifts for friends and family.
- Add a playful charm to your accessories with its soft texture and cheerful tassel.
Tip
If the plates or knot layers feel uneven after assembly, you can carefully adjust them using a small plucker or your fingers to ensure the ball is symmetrical.
Conclusion
This Crochet Ball Keychain with Tassel Pattern is as functional as it is stylish. Whether you’re keeping it for yourself or gifting it to someone, this project offers creativity and satisfaction in one. With simple stitches and thoughtful assembly, it’s perfect for beginners taking on their first decorative crochet project or seasoned crafters wanting something quick and fun.