Quick & Free Crochet Horse Keychain Pattern for Beginners
Looking for a Fun Project? Try This Free Crochet Horse Keychain Pattern

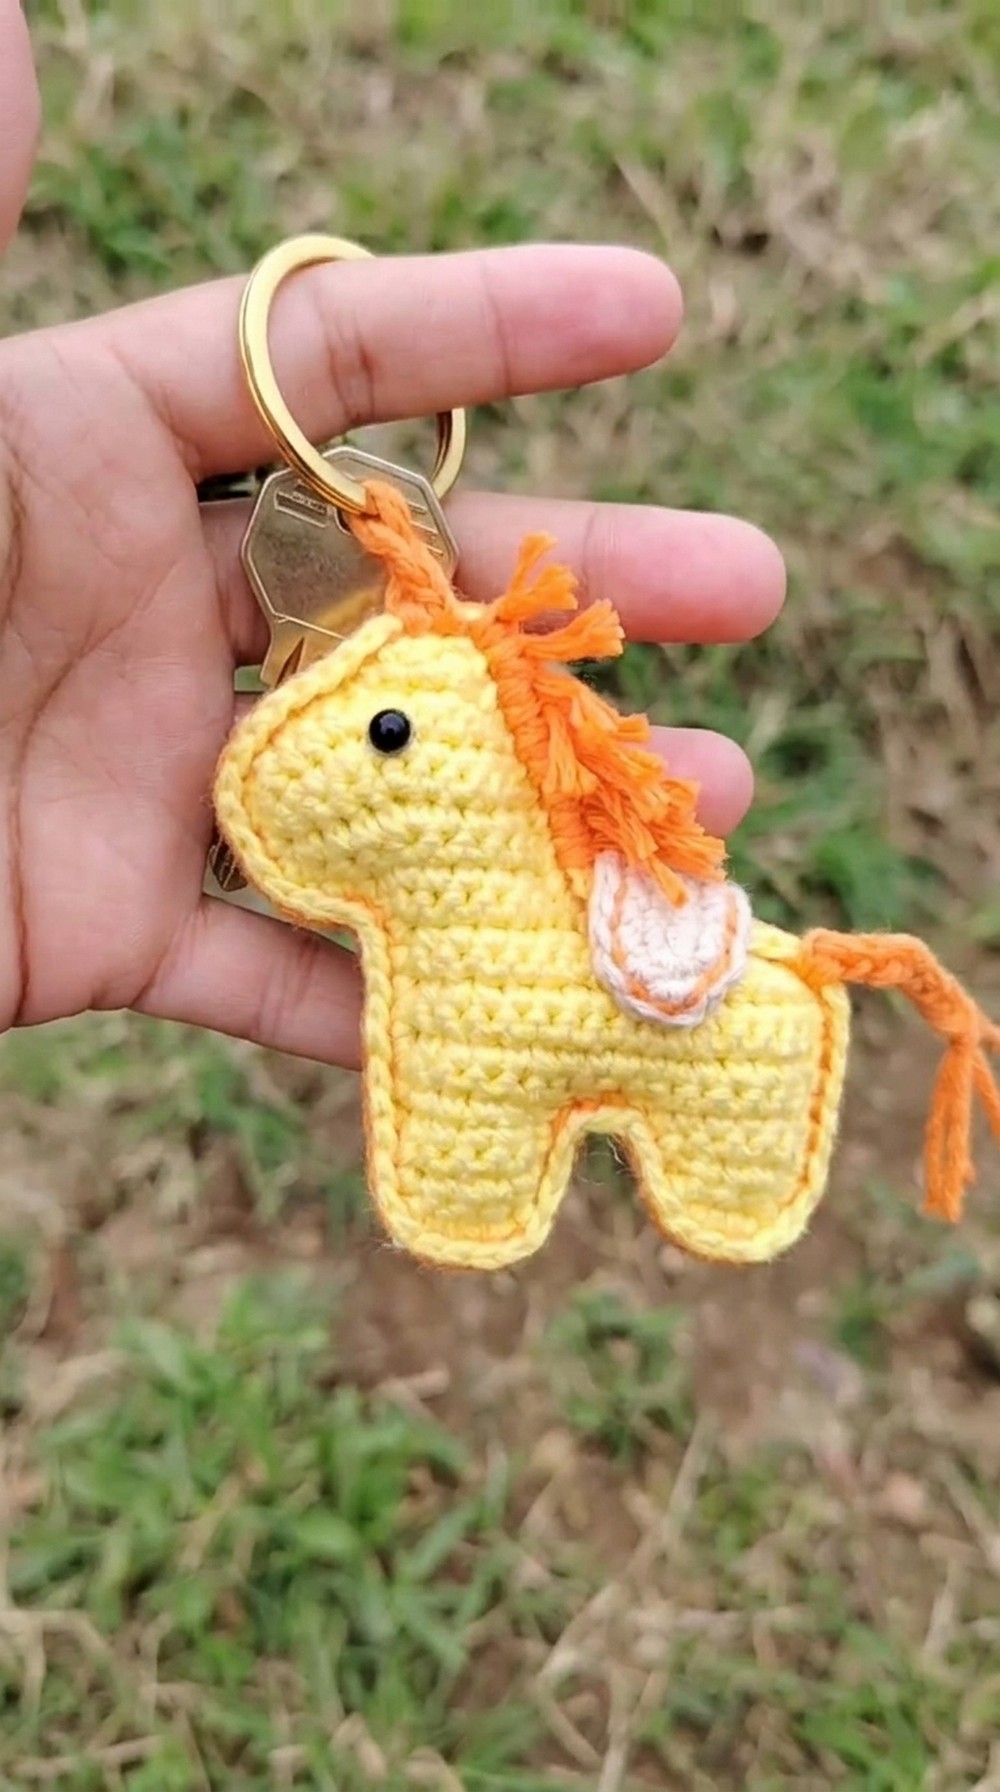
The pattern is easy to follow, with basic stitches that are perfect for those new to crochet. You can customize the horse using your favorite colors, adding a personal touch that matches your style. It’s lightweight and small, which means you can carry this horse keychain pattern wherever you go as a fun companion.
This project is great for kids, teens, or anyone who loves creative handmade crochets. Beyond its cuteness, it’s also a perfect way to practice your crochet skills while crocheting something useful and decorative. If you enjoy making something unique and memorable with your hands, this crochet pattern will surely be a rewarding and joyful experience.
Materials Needed
- Yarn Colors:
- Yellow (Body)
- Orange (Mane, Tail, and Decorative Edging)
- Brown (Saddle)
- Crochet Hook: Size 2.5 mm.
- Synthetic fiberfill stuffing (for amigurumi).
- Safety Eyes: Size 6 mm (you can also use size 5 mm if needed).
- Glue: Use silicone glue (hot/cold) or a strong adhesive for assembling.
- Tools: Scissors, yarn needle.
Special Features
- Level of Difficulty: Beginner-friendly.
- Uses: A lovely keychain holder, bag charm, or even a cute gift for loved ones.
- Personalization: You can choose any color combination for the body, mane, and saddle to suit your style.
Step-by-Step Pattern
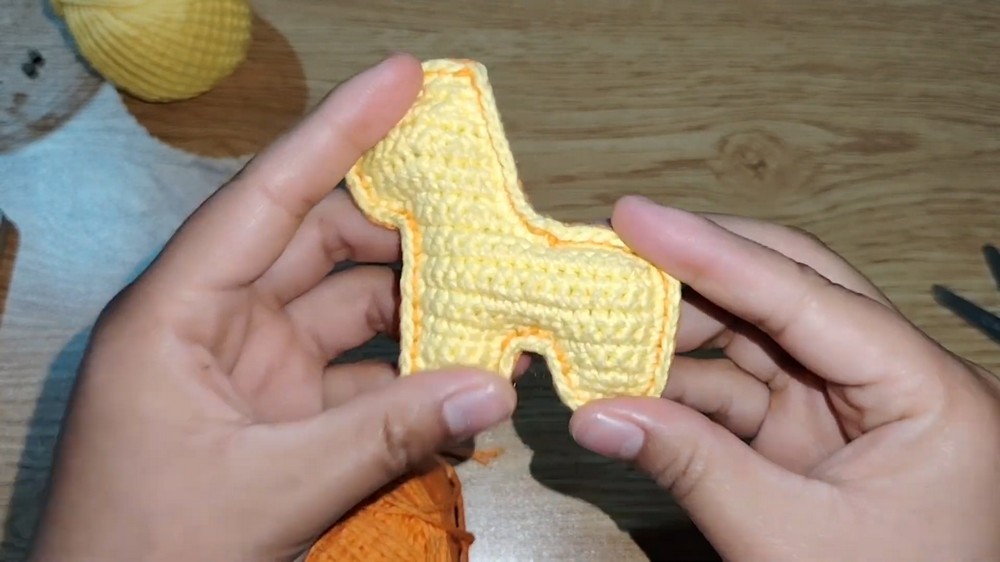
1. Base of the Horse’s Body
Follow these stitches carefully:
- Start with a slip knot and chain 5 chains.
- Work single crochet (sc) in the following pattern:
- Row 1: Go back to the second chain from the hook and make 4 sc across.
- Row 2: Chain 1, turn, make 1 sc, then an increase (2 sc in the same space), followed by 2 sc.
- Row 3: Chain 1, turn, work 1 sc in each stitch (no increases or decreases).
- Tip: Continue shaping the piece row by row as per the tutorial instructions (Rows 4-18) while incorporating increases or decreases.


Make two identical pieces. Cut the tail yarn for one piece, leaving it loose, while leaving the yarn uncut for the second one.
2. Connecting the Legs
- On the second piece (with yarn still attached), make 4 chains, then join it to the first piece by single crocheting the first stitch of the other base.
- Crochet around the edges of both pieces and across the connecting chains to join into one solid shape.
- Work Rows 5-8 in single crochet to build the torso and follow the shaping for Rows 9-18 (includes details for precise row counts with decreases).

3. Assembling the Main Body
- Once both sides are entirely crocheted together:
- Leave a small opening near the base of the body to insert fiberfill.
- Start stuffing the body, ensuring it’s firm but not overstuffed.
- Continue stitching the edges closed, making sure the stitches are tight for a neat finish.
- Fasten off and weave in loose ends securely into the body.

4. Decorative Saddle
- Chain 10, starting at one end, single crochet in the second chain and continue until you have:
- 8 sc in total along the first row.
- On the last stitch, perform 3 sc in the same space to pivot and work around the other side of the foundation chain.
- Continue along the back-side of the foundation chain with 8 sc, ending with 2 sc in the last stitch.
- Add additional rows for refinement and attach with glue.

5. Eyes and Face
- Use safety eyes or beads, gluing them onto the correct position:
- Count 2 rounds below the head’s top edge.
- Adjust placements symmetrically, checking alignment before gluing.

6. Mane and Tail
Mane:
- Cut 10 cm strands of orange yarn (adjust per preference).
- Loop them, creating “fringe-style” attachments along the back of the head.
- Trim evenly for a polished look.
Tail:
- Cut 20 cm strands and attach them to the bottom of the body (in the same fringe method).
- Create a braid using these strands, secure with a small yarn tie, and trim neatly.
7. Keychain Loop
- On the horse’s back, crochet 6 chain stitches, looping them in a circle.
- Attach the loop firmly to secure the keychain hook.

Finishing Touches
- Ensure all loose threads are neatly woven in.
- Add any final embellishments like embroidered details.
Conclusion
You’ve now crocheted your very own adorable horse keychain—a keepsake perfect for gifts or personal use. Its playful pattern and customizable features make it a unique addition to anyone’s collection.
Tip for Success
Take your time with the mane and tail for a professional finish. Using a small comb or brush to fluff the fibers can add volume and character to your horse’s signature look.