
How to Crochet Sheep Amigurumi Pattern That Everyone Will Love
Cute Crochet Sheep Amigurumi Pattern for Gifting and Decor
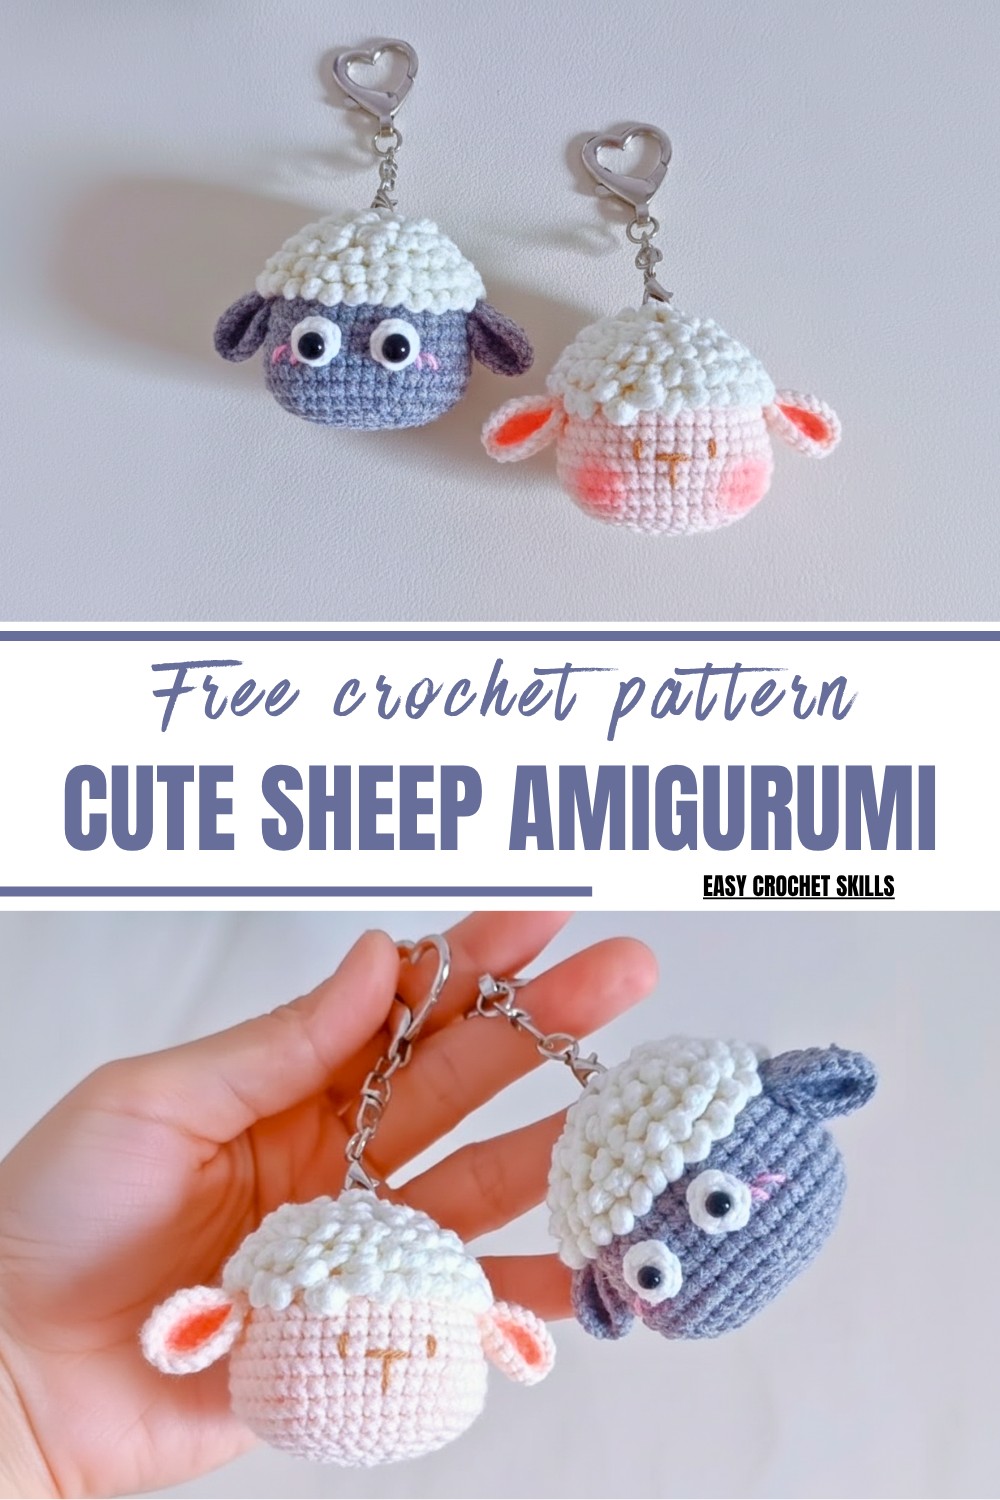
Its textured body, formed by simple yet clever stitches, mimics the fleece-like appearance of a real sheep, adding dimension and character to your creation. Crocheted entirely from cotton yarn, it’s a durable and eco-friendly addition to your handmade collection. This mini masterpiece highlights the fun and creativity that lies within even the smallest crochet designs.
Beyond its lovely appeal, it offers an opportunity to practice key techniques such as increases and decreases, while refining your artistry with detailed elements like facial expressions and ears. Plus, with the ability to personalize colors or add whimsical touches, each design can be a reflection of your unique flair. This crochet pattern embodies joy in every stitch!
Materials Needed
- Yarn: 4-strand cotton yarn in white for the lamb’s body and pink/black for facial details.
- Crochet Hook: 2.0mm.
- Stuffing: Polyester fiber or cotton.
- Sewing Needle: For stitching ears, details, and closing the base.
- Scissors.

Skill Level
Beginner to Intermediate: This pattern involves single crochets, increases, decreases, working in back loops, slip stitches, and chaining. The steps are simple for those with basic knowledge, but require attention to detail for shaping and finishing.
Special Features
- Back Loop Design: Creates a textured, fluffy body for the lamb pendant.
- Adorable Details: Includes a cute face, ears, and textured fuzz created with chain loops.
- Versatile Uses: Perfect for pendants, ornaments, or tiny keepsakes.
Step-by-Step Pattern
1. Lamb Body (Amigurumi Base)
Step 1: Start with Magic Ring
- Wrap yarn around your finger to create a magic ring.
- Chain 1 (doesn’t count as a stitch).
Step 2: First Round (Foundation)
- Crochet 6 single crochets (SCs) into the magic ring.
- Tighten the loop to close the hole.
- Slip stitch (SS) into the first SC and chain 1 as a standing stitch (repeat this at the beginning of every round).

3: Rounds 2–7 (Back Loop Stitches)
- Special Technique: Pick the back loop only of each stitch—creates a fluffy texture for the lamb.
- Round 2: Crochet 2 SC in each stitch (SC increases) for 6 groups, totaling 12 stitches.
- Round 3: Work [1 SC, 1 SC increase] as a group for 6 groups, totaling 18 stitches.
- Round 4: Work [1 SC, 1 SC increase, 1 SC] as a group for 6 groups, totaling 24 stitches.
- Round 5: Work [3 SC, 1 SC increase] as a group for 6 groups, totaling 30 stitches.
- Round 6: Crochet 30 single crochets without increases.
- Round 7: Work [2 SC, 1 SC increase, 2 SC] as a group for 6 groups, totaling 36 stitches.


4: Rounds 8–10 (Building the Shape)
- Crochet 36 single crochets per round for 3 rounds without increasing/decreasing.
5: Round 11 (Subtle Shape Shift)
- Crochet 9 SCs.
- Work [1 SC, 1 SC increase] as a group for 3 groups.
- Crochet 6 SCs.
- Work [1 SC, 1 SC increase] for 3 groups.
- Crochet 9 SCs.
Step 6: Rounds 12–13 (Maintaining Size)
- Crochet 42 single crochets per round.

7: Round 14 (Start Decreasing)
- Crochet 9 SCs.
- Work [1 SC, 1 SC decrease] as a group for 3 groups.
- Crochet 6 SCs.
- Work [1 SC decrease, 1 SC] for 3 groups.
- Crochet 9 SCs.
8: Rounds 15–19 (Shaping the Base)
- Round 15: Work [2 SCs, 1 SC decrease, 2 SCs] as a group for 6 groups, totaling 30 stitches.
- Round 16: Work [3 SCs, 1 SC decrease] as a group for 6 groups, totaling 24 stitches.
- Round 17: Work [1 SC, 1 SC decrease, 1 SC] as a group for 6 groups, totaling 18 stitches.
- Stuff the lamb pendant with cotton/polyester stuffing before proceeding.
- Round 18: Work [1 SC, 1 SC decrease] as a group for 6 groups, totaling 12 stitches.
- Round 19: Crochet 6 SC decreases to close the base. Use sewing needle to pick the front loops and pull tight to close.

2. Lamb Ears
Step 1: Crocheting Each Ear
- Magic ring with 6 SCs for the first round.
- Round 2: Work 6 SC increases.
- Round 3: Work [1 SC, 1 SC increase] as a group for 6 groups, totaling 18 stitches.
Step 2: Finish Each Ear
- Slip stitch (SS) into the first stitch, cut the yarn, and fasten off.
- Crochet 2 identical ears.
3. Texturing (Creating Fluff)
- Use stitches from Rounds 2–7 (front loops):
- Chain 4 stitches, slip stitch in the next stitch repeatedly around the lamb’s body.
- Chain 1 at the end of each round and continue until fluffy texture is achieved.


4. Assembly and Finishing
- Sew the Ears: Attach both ears evenly on the lamb’s head.
- Facial Details: Create expressions using black/pink yarn with a sewing needle.

Tutor’s Suggestions
- For texture, pick contrasting yarn colors for the ears and face.
- Use embroidery techniques for detailing facial expressions, adding charm to the lamb.
Tip
When crocheting texture chains, use light tension to keep the fluffy loops uniform and easy to manage.
Conclusion
This crochet lamb pendant is the perfect little project for personal or gifting use. With an adorable face, soft body, and fluffy texture, this tiny lamb is bound to bring smiles. Whether you crochet one or a whole flock, it’s an easy way to spread handmade joy.


