Easy-to-Follow Cute Crochet Bunny Amigurumi Pattern You’ll Adore
Learn this Crochet Bunny Amigurumi Pattern For Kid’s Room Decor
Special Features
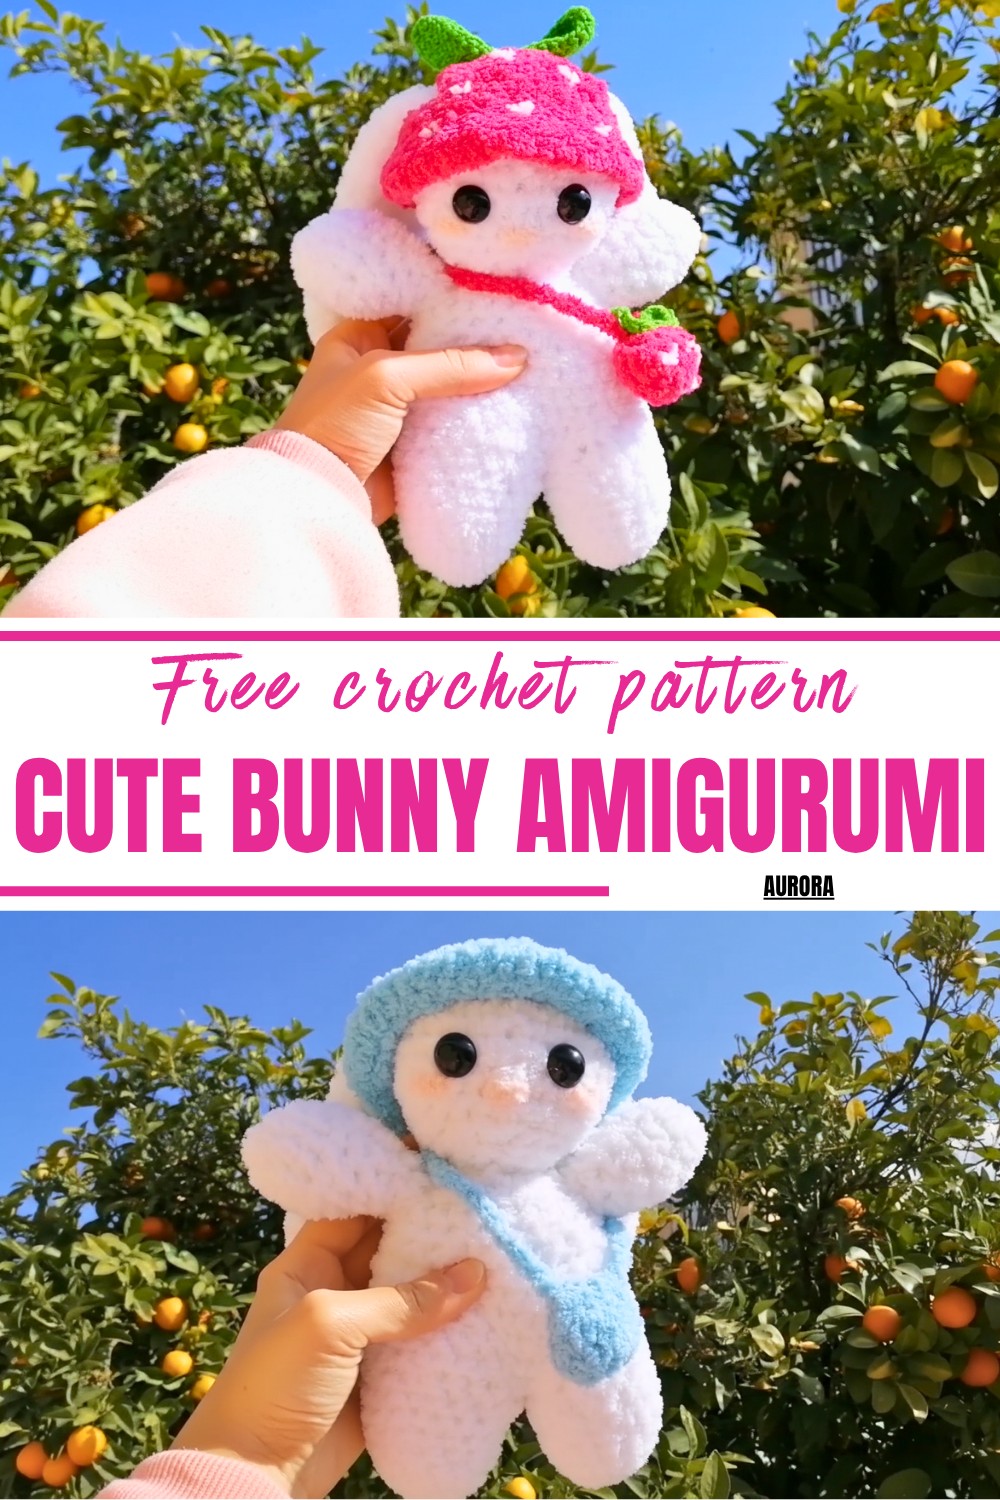
- Customizable Accessories: Includes patterns for a hat, a bag, and even a strawberry-themed design.
- Detailed Step-by-Step Instructions: Perfectly structured to guide intermediate-level crocheters.
- Multi-Purpose Design: Can be used as a gift, home decor, or playful keepsake.
Level of Difficulty
Intermediate: The pattern includes magic ring techniques, increases, decreases, shaping, and assembly, requiring some prior crochet experience.
Step-by-Step Crochet Bunny Amigurumi Pattern
1. Head Pattern
Step 1: Magic Ring
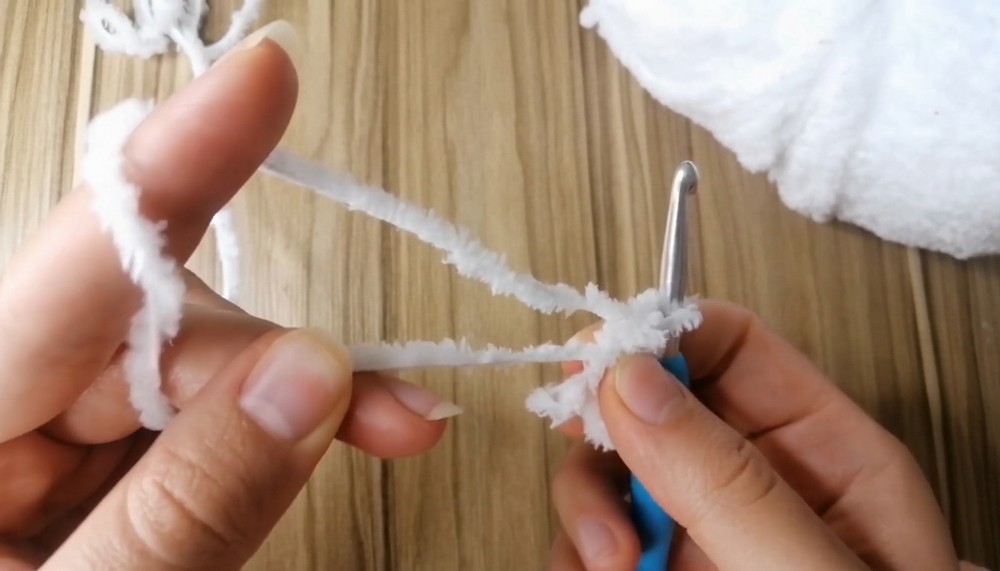
- Begin with a Magic Ring and work 6 single crochets (SC) into it.
- If the magic ring is tricky, make a “fake magic ring” by creating a slip knot, chaining 2, and working 6 SC into the first chain.
2: Increase Rounds
- Round 2: Work 6 increases (2 SC in each stitch).
- Round 3: Work 1 SC, followed by an increase. Repeat this pattern 6 times.
- Round 4: Work 2 SC, followed by 1 increase. Repeat 6 times.
- Building further rounds: Add 1 additional SC before each increase (e.g., Round 5: 3 SC + increase, Round 6: 4 SC + increase).
- Round 7–8: Work 36 SC all the way around (no increases).

3: Decrease Rounds
- Change the pattern: Work 4 SC followed by a decrease (using front loops only). Repeat 6 times.
- Continue decreasing, reducing the SC count before each decrease (e.g., Round 10: 3 SC + decrease).
- Stuff the head before finishing the last round.
- Last Round: Work 6 decreases to close the piece.
- Fasten off with a tail to sew and weave around the last stitches to close the opening.
2. Body Pattern
Step 1: Legs
- Follow the same steps for Round 1–3 as the head.
- Round 1: 6 SC, Round 2: 6 increases, Round 3: 1 SC + increase for 6 times.
- Work Round 4–7: Crochet 18 SC all the way around.
2: Connect the Legs
- Do not cut the tail of the second leg. Align both legs side by side.
- Connect them by inserting your hook into the last SC of the first leg and crocheting through both pieces.
- Round 9: Work 36 SC around both legs.

Step 3: Build the Body
- Work 5 rounds of 36 SC to grow the body without increases or decreases.
- Start decreasing with the pattern 4 SC + decrease (repeat 6 times).
- Continue decreasing rounds until the body is complete. Stuff the body before closing.
3. Ear Pattern
Step 1: Magic Ring
- Start with a magic ring and work 6 SC into it.
- Follow the same steps: Round 2 (6 increases) and Round 3 (1 SC + increase) to reach 18 stitches.
2: Shape the Ear
- Work Round 4–5: Crochet 8 SC + increase (repeat 2 times) to reach 20 stitches.
- Continue with Rounds 6–7: Crochet without increases (20 SC).
- Begin decreasing: 8 SC + decrease (repeat 2 times). Reduce until you have 12 stitches.
- Work 4 rounds of 12 SC to complete the ear.
3: Finishing
- Leave a tail for sewing. Make a second ear and sew both onto the bunny’s head.
4. Arms Pattern
Step 1: Round 1–2
- Round 1: 6 SC into magic ring.
- Round 2: 6 increases.
2: Shaping
- Round 3: Work 5 SC + increase (repeat 2 times).
- Round 4–5: Crochet 14 SC all the way around.
- Begin decreasing rounds: 5 SC + decrease (repeat 2 times).
3: Finishing
- Reduce the stitches to 6 SC in the last round.
- Stuff and leave a tail for sewing. Make a second arm and sew them to the body.
5. Accessories
Hat Pattern
- Start with the same pattern as the head (Rounds 1–4).
- Add chains for the straps, skip stitches, and continue building in rounds.
- Work front loops only in the final round for extra detail.

Bag Pattern
- Follow similar steps as the hat.
- Use additional chains to create straps, tying knots to secure them.
Leaf Pattern
- Chain 10, work half-double crochets (HDC) and double crochets (DC) across the chains.
- Add a slip stitch to finish the rounded edge, if desired.
Assembly Instructions
- Attach the head to the body by sewing between corresponding stitches.
- Sew the arms to the sides evenly.
- Add the ears to the top of the head by securely sewing.
- Place the hat and bag as optional accessories.


Tutor’s Suggestions
- Use safety eyes before finishing the head for the most professional look.
- Stuff all body parts evenly to avoid lumps or uneven shapes.
- Adjust accessory colors for themed bunnies, such as seasonal or holiday-inspired designs (e.g., Easter Bunny).
Uses and Benefits
- Perfect Gift: Makes a wonderful present for kids or loved ones.
- Decoration: A unique handmade item that adds charm to your home.
- Skill Building: Enhances crochet skills through shaping and detailed patterns.
Pro Tip
Use lightweight stuffing for amigurumi to keep the bunny’s shape firm yet soft. Always weave tails securely to prevent unraveling.
Conclusion
This bunny amigurumi pattern is a perfect combination of fun and challenge, offering endless customization options through additional accessories. The finished product is not just cute but also versatile, whether as a gift, decor piece, or keepsake, it’s guaranteed to brighten any space.