
7 DIY Window Bird Feeder Homemade
Here, we’ll explore an amazing series of DIY Window Bird Feeder ideas! These make for a fun and interesting crafting project, and at the same time, they provide a source of food for our feathered friends. By using everyday household materials, anyone can make a bird feeder and attach it to their window.
DIY Window Bird Feeders

Watching the birds come to visit and feed directly from your window is not just exciting; it also brings us closer to nature. If you love birds and enjoy DIY projects, this guide is perfect!
Besides, it’s a wonderful chance to reconnect with nature in a fun and interactive way. Imagine waking up to the sight of colorful, chirping birds feeding just outside your window. So why wait? Let’s start creating an inviting space for our lovely flying friends. It’s simpler than you might think!
Window Birdfeeder
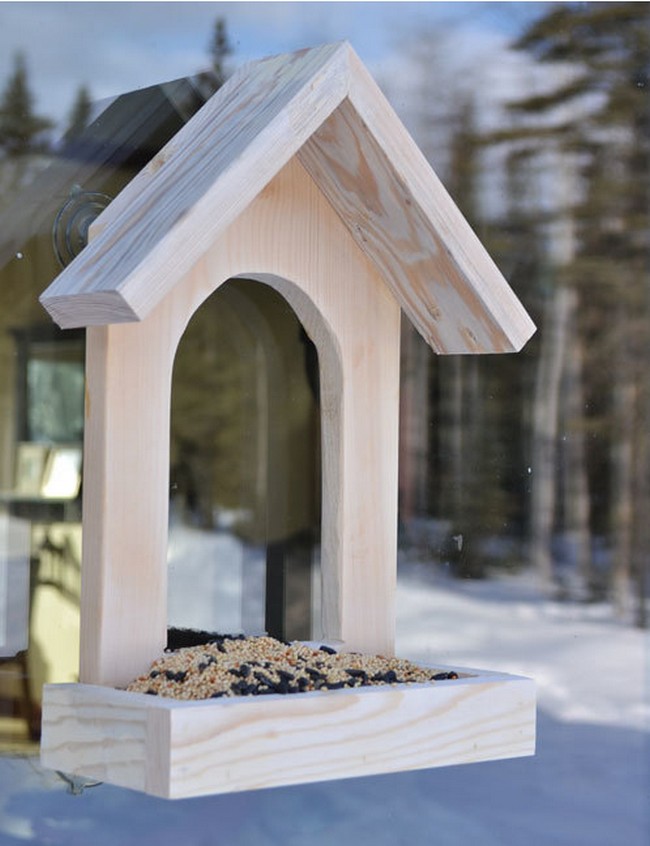
Bring life to your family’s windows and create unforgettable memories with this DIY Window Bird Feeder project. The feeder’s endearing cottage-style structure features a cut-out window that allows you to watch the birds from indoors, while its rooftop and tray provide shelter and space for birdseed. So, why not start making it today?
Create a window birdfeeder by cutting a 1×8 board for the back and tray bottom and 1×3 & 1×2 boards for the roof and tray sides. Attach the tray bottom to the back and add the roof, securing it with glue and 1 1/4″ finish nails. Attach the sides to the back and bottom, adhere the birdfeeder to the window with suction cups, and fill the tray with birdseed.
Materials:
- 1 – 1×8 @ 18″ long1 – 1×3 @ 15″ long
- 1 – 1×2 @ 16″ long
- Glue and 1 1/4″ nails
- 4 suction cups and screws
- birdseed
How To Make A Homemade Window Bird Feeder

This feeder is perfect for watching various bird species up close from the comfort of your own home. It is low-cost and environmentally friendly and made from an empty half-gallon milk carton and a few other household items. Add your touch to this feeder by decorating it with colorful duct tape or washi tape, making it both functional and visually appealing.
First, clean out a household item like a half-gallon milk jug to make the DIY window bird feeder. Cut a large rectangle out of two opposite sides for visibility. Decorate it using duct tape, younger ones can participate in this step for fun. Next, create a small hole at the top and thread a string/twine through it; this will be used to hang the feeder. Attach the string to a command hook or strong suction cup. Position it on a window that offers an unobstructed view. Fill it with birdseed and watch as birds come to feast over the coming days. It’s best if the window has an overhanging roof to keep the feeder dry.
Materials:
- Half-gallon milk jug
- Command Hook or strong suction cup
- String
- Tape to decorate
- Bird seed
Window Bird Feeder
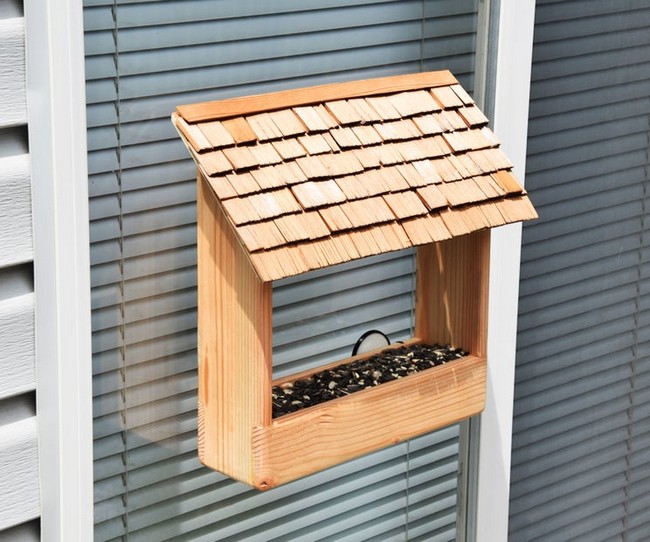
Create a chic and warm ambiance by being the sweet chirping sound of birds just in front of your window with this DIY bird feeder. Showcasing a woodsy farmhouse aesthetic, the addition of a shingled roof protects bird feed from weather elements and looks very elegant on your window!
Cut the feeder’s sides, bottom, front, back, and roof from scrap wood. Create the bottom dado and front-back rabbets. Prepare the mounting boards and drill holes for the suction cups on both them and the feeder’s base. Once everything is glued together, sand and router the product for a smooth finish. Create overhanging plywood roofing and affix it to the feeder. Make shingles and ridge caps with leftover cedar and glue these onto the roof. Apply an outdoor finish for weather resistance. Finally, securely install the bird feeder on the window of your choice and fill it up with birdseed.
Materials:
- Scrap wood
- Pack of 4 heavy-duty vacuum suction cups
- 6mm-1.00 metric Wing Nuts
- Outdoor Finish
Acrylic Bird Feeder With Midcentury Flair
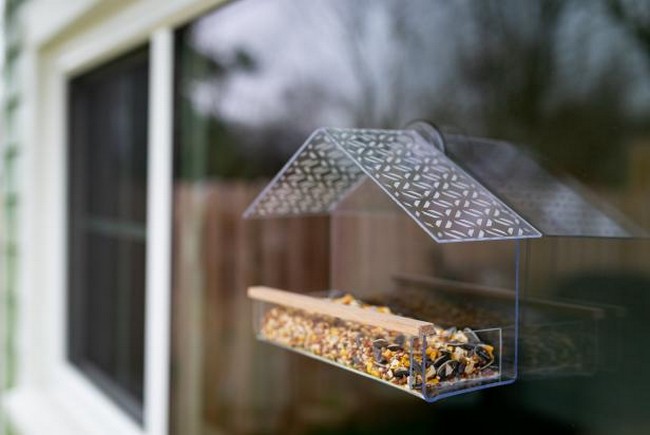
Add a touch of elegance to your backyard with this stylish acrylic bird feeder inspired by mid-century design. Crafted using two 8×10 acrylic sheets, this feeder is transformed into an eye-catching gable shape, complete with a modern stencil for added flair. The design features a snug feeding tray and a convenient suction cup for effortless window attachment.
This DIY project outlines making a bird feeder from acrylic sheets. Start by scoring the sheets, protected by their plastic covering. The scored sheets are heated, bent, and molded into the feeder’s shape, including a gabled peak. Two smaller pieces and one larger piece form the feeding tray. With the aid of a wooden skewer, apply waterproof super glue to assemble the pieces and add a wooden dowel perch. After drying for 24 hours, mount the feeder on a window using a suction cup and add bird seeds.
Materials:
- (2) 8”x10” acrylic sheets
- 220-grit sandpaper
- painter’s tape
- waterproof super glue
- 10” square wooden dowel
- scrap piece of wood
- wooden crate or box
- white acrylic paint
- adhesive vinyl stencil
- permanent marker
How To Make A Window Bird Feeder

This is the simplest DIY bird feeder you can make using materials already available. This bird feeder mounts effortlessly onto an outdoor window using suction cups, a convenient method for saving space and offers an up-close viewing experience. The base is designed with a screen cut to size, fitted using a staple gun, which ensures durability while maintaining a rustic elegance.
Begin by cutting all boards to size. Apply glue to the sides, front, and back boards and clamp until dry. Cut a piece of screen to size for the bottom and attach it using a staple gun. Next, create and attach support bars using glue. Install screw eyes into the top of the support bars after pre-drilling holes to prevent splitting the wood. Finally, attach support bars to the feeder using glue and screws, ensuring placement is inset from the sides and top. Mount using suction cups on a window.
Materials:
- 1″ x 2″ x 8′ Cedar Board
- Aluminum screen
- Exterior-rated glue
- Staple gun and staples (to attach the screen)
- Screw eyes (for hanging the bird feeder)
- Suction cups
Suction Cup Window Bird Feeder
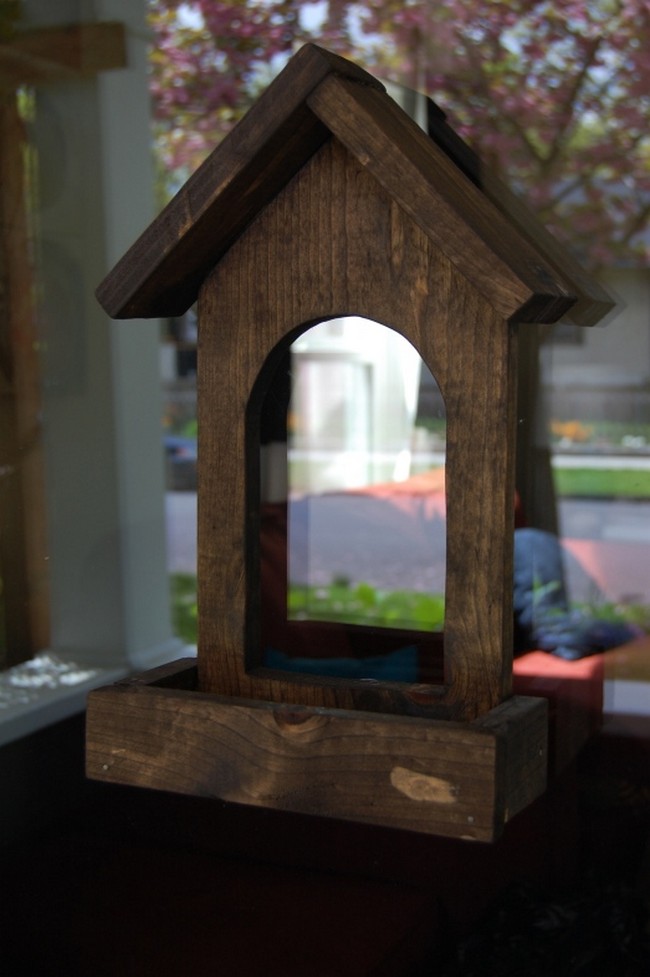
An elegant solution for bird lovers, this DIY Window Bird Feeder brings a piece of nature closer than ever. Showing the rustic appearance farmhouse appearance, it looks very elegant in your window. With the use of sturdy wood, it will last for years.
First, cut and sand wood pieces for your bird feeder. Assemble using wood glue, reinforcing with nails once dry. Drill holes for suction cups at the back. Next, stain your feeder with walnut stain, then apply water seal spray. Dry completely, then secure suction cups to the back using Liquid Nails, allowing 8 hours for setting. Fill the feeder with seeds and attach it to the window.
Materials:
- Wood
- Jigsaw
- Sandpaper
- Wood Glue
- Finishing Nails
- Drill and Drill Bits
- Suction cups
- Walnut Stain from Minwax
- Thompson’s Water Seal Spray
- Liquid Nails
- Bird Seeds


