
Crochet Biscuit Hanging Pendant Pattern That Everyone Will Adore
Crochet Biscuit Hanging Pendant Pattern That Adds Cozy Charm to Your Home

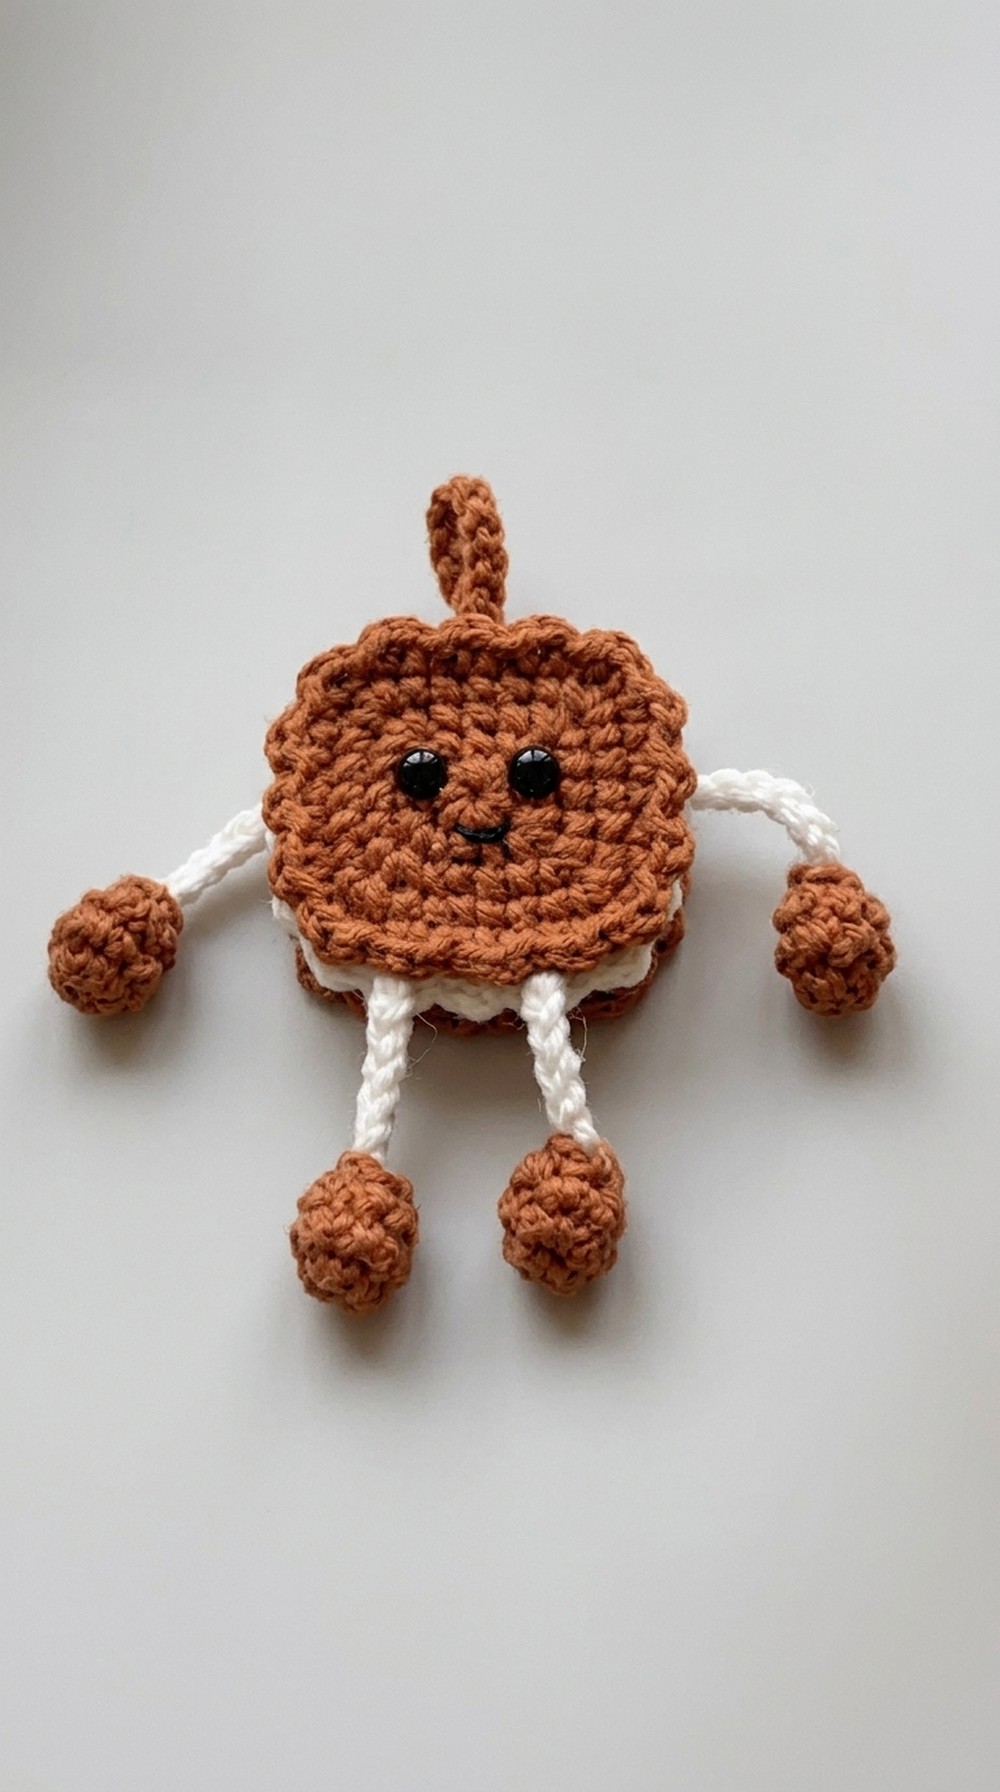
The pattern allows for personal touches, such as colors or adding expressions, ensuring every piece radiates individuality. Its versatility means it can be a whimsical holiday ornament, a cute keychain, or even a décor accent for parties or nursery rooms. Lightweight and compact, you can easily create multiples to share or enhance your surroundings.
For beginners, this pattern serves as a great introduction to techniques like magic rings and grouping stitches, while experienced crocheters will appreciate the fast-paced satisfaction of completing such a delightful project. Beyond its charm and utility, the hanging pendant embodies the joy of turning simple yarn into small keepsakes that spark smiles wherever they hang. It’s not just about crocheting—it’s about making something meaningful with your own hands that connects to the people or places you love most.
Materials Needed
- 4 strands of cotton yarn in your desired color(s)
- Crochet hook suitable for the yarn thickness
- Yarn needle for finishing and sewing
- Scissors
- Fabric glue (optional, for assembly)
Step-by-Step Instructions
Base Biscuit Shape (Make 3 Pieces)
Round 1:
- Start with a magic ring.
- Pull the yarn back and make a standing stitch (does not count as a stitch).
- Inside the ring, crochet 8 single crochets (SC).
- Tighten the magic ring to close.
- Slip stitch (SL ST) into the first stitch to complete the round.
R- 2:
- Begin with a standing stitch (not shown in every round).
- Work the following pattern:
- In the first stitch, crochet 1 SC.
- In the second stitch, crochet a W stitch (3 SC in the same stitch).
- This forms a group of 2 stitches: [1 SC + W Stitch].
- Repeat this pattern for a total of 4 groups.
- Close the round with a SL ST in the first stitch.

R- 3:
- Crochet 1 SC in the first stitch and 1 SC in the second stitch.
- In the third stitch, crochet a W stitch (3 SC in one stitch).
- In the fourth stitch, crochet 1 SC.
- This forms a 4-stitch group: [1 SC, 1 SC, W Stitch, 1 SC].
- Repeat the group pattern for a total of 4 groups. Finish the round with a SL ST.

4 Round:
- Crochet 1 SC in each of the first three stitches.
- In the fourth stitch, crochet a W stitch (3 SC in one stitch).
- Follow with 1 SC in the next 2 stitches.
- This forms a 6-stitch group: [1 SC, 1 SC, 1 SC, W Stitch, 1 SC, 1 SC].
- Repeat for 4 groups and close the round with a SL ST.
R- 5:
- In the first stitch, crochet 1 SC.
- In the second stitch, work a half-double crochet (HDC).
- Slip stitch (SL ST) into the second stitch.
- In the third stitch, crochet 1 SC.
- Crochet another HDC in the fourth stitch and finish it with a SL ST.
- Repeat this decorative pattern until the end of the round.
- Cut the yarn and weave in the ends.

Tip: You will need to make 3 pieces of this biscuit shape following the steps above.
Arms and Legs
Arms and Legs (Make 4 Total):
- Start with a magic ring and make a standing stitch.
- Crochet 6 chain stitches (CH) for the “arms” or “legs.” Leave a long tail for sewing and cut the yarn.
Optional Expression Piece (Face/Front Details):
- Use contrasting yarn to crochet or embroider facial expressions (eyes, mouth, or smile).
- Tie the yarn securely at the back and weave in the ends.
Assembly
-
Joining the Biscuit Pieces (Make a Sandwich):
- Using a yarn needle, align and sew two biscuit pieces together with the decorative edges outward.
- Insert the arms, legs, or hanging rope in between the layers before closing.
- Sew the third piece with an embroidered expression on top for a neat finish.
- Use fabric glue to secure any loose appendages or layers if needed.


Special Features
- Compact Design: The small size makes it perfect for keychains, gifts, or ornaments.
- Customizable: You can add facial expressions, use bright colors, or mix up yarn textures for different themes.
- Beginner-Friendly: With simple stitches like single crochet, slip stitches, and easy rounds, it’s an ideal project for anyone new to crochet.
Level of Difficulty
Beginner: This is a straightforward project that introduces basic crochet techniques like magic rings, single crochet, and grouping.
Tutor’s Suggestions
- Choose cotton yarn for a neat, sturdy finish.
- Use safety eyes or small buttons for an extra cute expression if you’d like to experiment.
- Lightly stuff the biscuit with polyfill before assembling for a more rounded, plush look.
Tip for Success
Always keep stitch counts accurate in every round to retain the biscuit’s circular shape. Use a stitch marker if you’re worried about losing track of rounds or groups.
Conclusion
This biscuit hanging pendant is a lovely little crochet project that’s both quick and fun. Ideal as a thoughtful, handmade gift or a stylish decorative piece, it brings charm to everyday items. With just a few stitches and some creative details, you can turn yarn into a whimsical treasure that everyone will adore.


