How to Crochet Colorful Shorts Pattern for All Sizes
Learn Vibrant Crochet Shorts Pattern Perfect for Summer Days
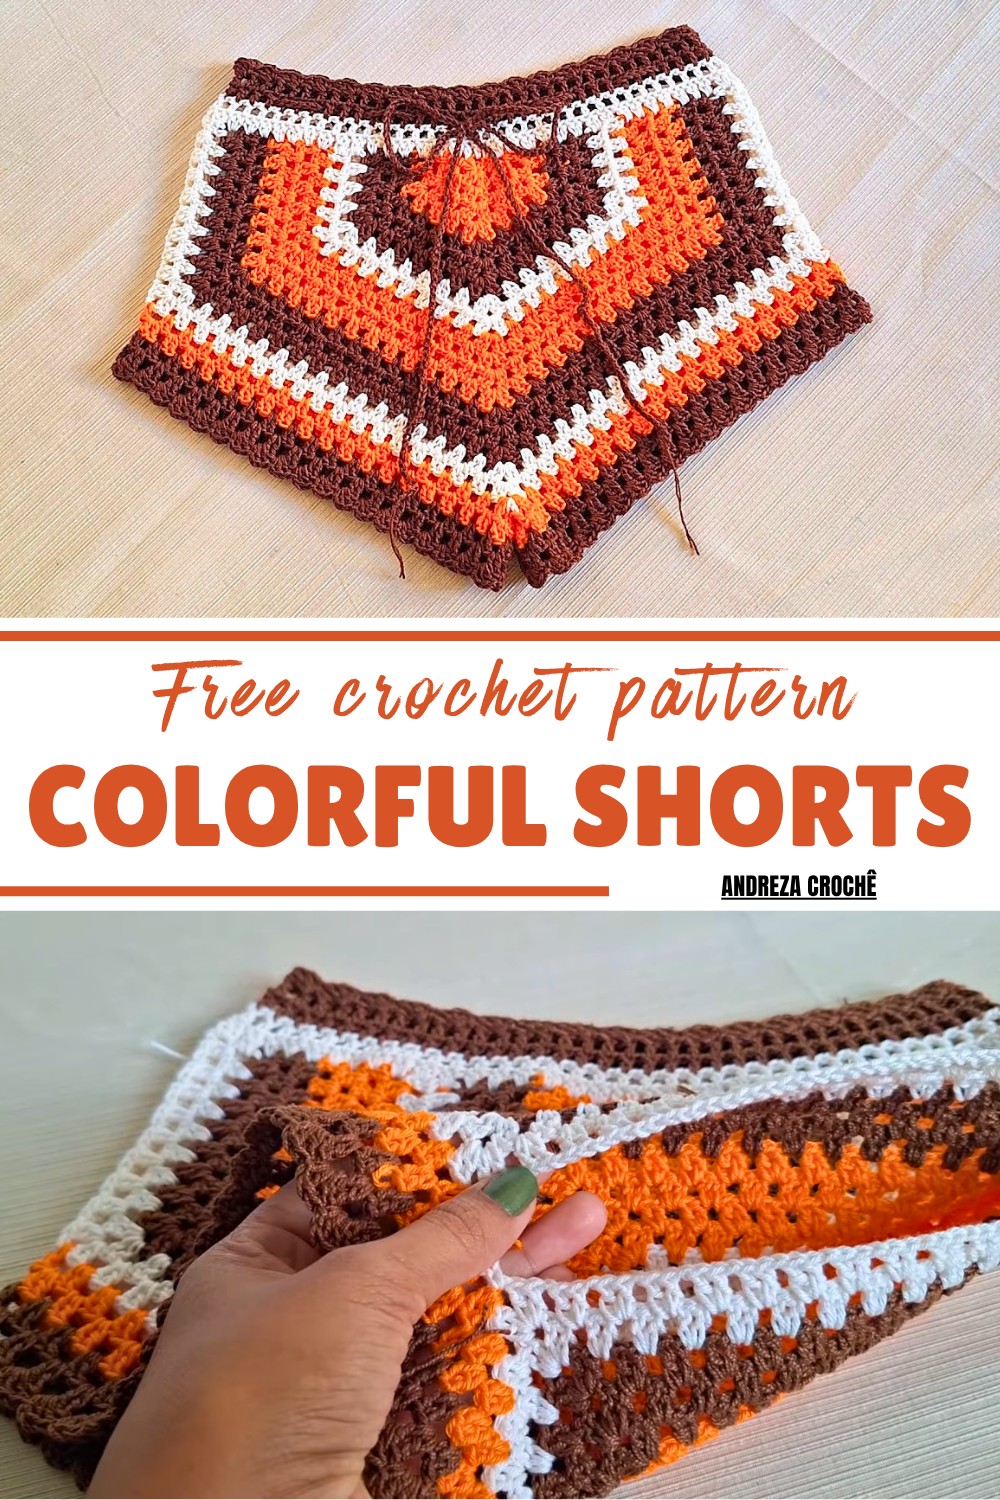
The easy-to-follow pattern, featuring playful block and fan stitches, ensures an enjoyable experience for crocheters of all skill levels. Whether paired with a cute crop top or a flowy beach cover-up, this pattern effortlessly enhances casual outfits with a handmade charm. The adjustable waistband adds functionality, ensuring a snug yet comfortable fit tailored to your body.
One of the biggest advantages of this free crochet pattern is the ability to mix and match colors, allowing you to express your personal style with every stitch. By using durable and soft yarn, you’ll crochet something that’s not only fashionable but also practical for regular use. This pattern is an excellent way to combine creativity with everyday fashion, making it a perfect addition to any handmade wardrobe or a thoughtful gift for loved ones.

Special Features
- Skill Level: Intermediate (Beginner-friendly with clear repetitions).
- Customizable Sizing: Sizes can be adjusted by adding or reducing rows. (Tutorial demonstrates size Small).
- Stitch Types: Magic Ring (MR), Chain (CH), Double Crochet (DC), Single Crochet (SC), Slip Stitch (SL ST).
- Purpose: Perfect for casual outings, beach days, or cozy times at home.
- Customizations: Tailor your shorts with bold colors, different yarn textures, or adjust the cord for a perfect fit.
Materials Needed
- Yarn: Multiple colors (the tutorial uses orange, brown, and off-white).
- Crochet Hook: Suitable for chosen yarn (tutorial uses 3.5mm hook).
- Scissors.
- Tapestry Needle (for finishing ends).
Step-by-Step Crochet Pattern
1. Foundation – Magic Ring and First Round
- Start with a Magic Ring (MR).
- CH 3 (acts as the first DC), then work 1 DC into the ring.
- CH 2, then work 2 DC into the ring.
- Repeat the pattern (CH 2 → 2 DC) until there are 4 sets of 2 DC separated by CH 2.
- Pull the ring tight to close it.
- Connect the last stitch with the first chain 3 using a SL ST.

2. Second Round – Creating Fan Pattern (Leque)
- CH 3 (as 1st DC) and CH 1 (space separator).
- Into the first chain-2 space from the previous round:
- Work 2 DC → CH 2 → 2 DC (creating the first “fan” or “leque”).
- CH 1 as a separator.
- Move to the next chain-2 space and repeat the fan pattern (2 DC → CH 2 → 2 DC).
- Continue this pattern across all chain-2 spaces, creating 3 “fans/leques”.

3. Continuing Rows – Fan on Fan and Blocks Between
- Turn your work.
- Start the row by CH 3 and working 1 additional DC into the first space (increase at the start of the row).
- CH 1, then continue working leque (fan) over leque: 2 DC → CH 2 → 2 DC in each fan space.
- In spaces between the fans:
- Introduce blocks by working 2 DC → CH 1 into the center gaps.
- Alternate between fans and blocks across the row. The fans remain the same, while the blocks increase with each row.

4. Shaping the Shorts
- Repeat the row pattern of alternating leques and blocks, ensuring blocks increase by 1 with each row.
- Work until the desired size is achieved. (For a size Small, tutorial demonstrates approximately 12 rows of alternating fans and blocks).
- Alternate colors as desired (the tutorial uses 4 rows of orange, 3 rows of brown, and 2 rows of off-white).
5. Joining Front and Back Panels
- Place the front and back panels together.
- CH 3 and begin stitching the panels together using SC or SL ST along the sides:
- Alternate between stitching into the panel edges and working rows of DC to match the front and back seams.
- Continue joining until both panels are connected, ensuring smooth edges for wear.

6. Adding the Waistband
- Attach yarn to the top edge where the front and back panels merge.
- Work 2 DC into each stitch around the waistband, starting with CH 3 as the first DC.
- Complete the round and close with a SL ST.
- For the next round, alternate between:
- CH 1 → DC → CH 1, creating a row of “squares.”
- Repeat this row for 2 additional rounds to form a sturdy yet stretchy waistband.

7. Adding Cords
- Use a new strand of yarn to create a long chain of CH for the cord (approximately 200–300 chains, depending on preference).
- Weave the cord into the “square-shaped” holes of the waistband for easy adjustment.
- Knot the ends of the cord securely.
8. Creating the Leg Holes
- Attach yarn to the leg hole edge and begin Circular Rows:
- Work 2 DC → CH 1 around the edge.
- Continue this pattern for 2 rows of one color, then add 2 rows of another color.
- Add the same finishing details as the waistband.

Tutor’s Suggestions
- Size Adjustments: For sizes larger than Small, add 2–3 rows of blocks and fans for the panels and increase the waistband rows for a better fit.
- Color Choices: Have fun with bold, bright shades for a playful look, or stick to neutral tones for elegance.
- Care: Use cotton yarn for breathability, especially for warm months.
Conclusion
These crochet shorts bring together style, comfort, and versatility in one delightful project. Perfect for summer days or staying cozy at home, the pattern beautifully balances functionality and fashion. With allowances for color customization and sizing, the pattern is adaptable and fun for crocheters of different skill levels. You can tailor the shorts to match your wardrobe or use them as unique handmade gifts.
Final Tip
Keep track of row counts using a marker, especially for panels and waistband consistency. This ensures smooth stitching and perfect alignment when joining pieces together.