Warm, Trendy, & Easy to Follow Crochet Blanket Pattern Must Try
Access a free crochet blanket pattern that guides you step-by-step to crochet warmth and charm while saving time and effort.
Wrap yourself in warmth and creativity with this incredible guide that brings both beginners and seasoned crocheters a delightful project. This Free Crochet Blanket Pattern isn’t just about making a blanket; it’s an opportunity to design something personal, functional, and cherished. Perfect for snuggling during chilly evenings, as a heartfelt handmade gift, or even as a charming addition to your home, this pattern makes home décor and coziness go hand in hand.
How to Elegant Crochet Blanket Pattern for Cozy Vibes

Its simplicity makes it great for beginners, while the potential for customization keeps experienced hands engaged. Whether you choose soft pastels for a baby crib blanket, earthy tones to complement a modern living room, or vibrant hues for a touch of cheer, this pattern adapts effortlessly to your creative vision. The step-by-step framework ensures ease of use, saving time and stress while delivering stunning results.
Plus, working on it provides a calming outlet, turning downtime into something practical and meaningful. Affordable, versatile, and packed with charm, this pattern is not only a rewarding hobby but also a practical way to make your space or gifts shine.

Features
- Beautiful puff + shell texture on both blanket and border
- Rectangular baby size: about 40″ x 36″ (102 x 91 cm)
- Quick make: approx. 7.5–8 hours
- Yarn‑friendly: about 450 g of DK (double knitting) yarn
- Repetitive 4‑row repeat – great TV or relaxing project
Skill Level
Advanced Beginner
You should be comfortable with:
- Chains (ch)
- Single crochet (sc)
- Double crochet (dc)
- Working into chains and chain spaces
- Learning puff stitches and repeating rows
Once the repeat is established, it’s very easy and rhythmic.
Materials
- Yarn: DK / light worsted weight
- Approx. 450 g (4½ x 100 g balls, about 300 m each)
- Sample used white double knitting yarn.
- Hook: 4 mm crochet hook
- Stitch markers or contrast yarn (optional, for counting chains/rows)
- Yarn needle (for weaving in ends)
- Scissors
Finished Size
- Width: approx. 40 inches (about 102 cm)
- Height: approx. 35–36 inches (about 89–91 cm)
The blanket in the pattern was worked over 152 starting chains and 70 rows.
Stitch Abbreviations (US Terms)
- ch – chain
- sc – single crochet
- dc – double crochet
- st(s) – stitch(es)
- sp(s) – space(s)
- sl st – slip stitch
- puff st – puff stitch
Special Stitches
Puff Stitch (used throughout)
- Yarn over, insert hook into stitch/space, yarn over and pull up a loop = 3 loops on hook.
- Repeat this 4 times total in same space: you’ll have 9 loops on hook.
- Yarn over and pull through all loops.
- Tighten slightly to form a neat puff.
In border corners, some puffs are worked with 3 repeats instead of 4. The tutor always pulls up loops 3 or 4 times per puff, then closes through all loops.
Blanket Pattern
Foundation Chain
- Make a slipknot.
- Chain 152 (multiple of 8 + 1).
- The tutor likes to mark every 10 chains with a stitch counter or a piece of contrast yarn to avoid miscounting.
- Add 1 more chain for the pattern = 153 chains total.

Pattern multiple: (8 × n) + 1. She uses 152 as the multiple of 8 +1 extra chain.
Row 1 – Shell Row (Base Row)
Work into the back bumps of the foundation chain if you like a neat edge.
- Turn the chain to see the back side.
- Skip the first ch, in 2nd ch from hook:
- Work 1 sc.
- Skip next 3 ch, in the 4th ch:
- Work 7 dc in the same chain. (Shell)
- Skip next 3 ch, in the 4th ch:
- Work 1 sc.
- Repeat from Step 3–4 across the row:
- Skip 3 ch, 7 dc in next ch; skip 3 ch, sc in next ch
- At the end you will finish with 7 dc in the 4th-from-last chain, then:
- Skip 3 ch, in the very last ch: 1 sc.
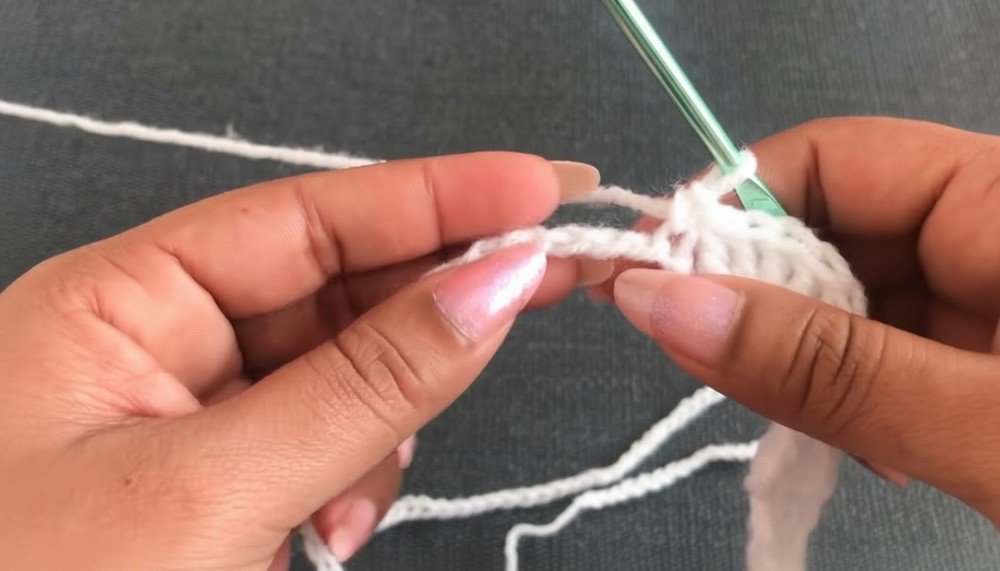
You should have 19 shells (7 dc each) separated by sc’s.
Row 2 – Puff “Framework” Row (Half V at ends, full V in middle)
- Ch 4, turn.
- In the first sc of Row 1 (directly below):
- Work 1 puff st (4 times pulling up loops, then close through all loops).
- Ch 5.
- In the same sc:
- Work 1 puff st, ch 2, 1 puff st (all in same sc).
- This makes a double puff V-stitch (two puffs separated by ch 2).
- Ch 5.
- In next sc (between shells):
- Work puff st, ch 2, puff st in the same sc.
- Repeat Step 5–6 across:
- Ch 5, (puff st, ch 2, puff st) in next sc.
Ending Row 2:
- In the last sc of the row:
- Work 1 puff st, then ch 1, then 1 dc in the same sc.
- This forms a half V at the end.
You now have:
- A half puff-V at each end
- Double puff-Vs in every sc between shells
Row 3 – Shell Row (Full + Half Shells)
- Ch 3, turn. (Counts as 1 dc.)
- You are starting in the half puff-V from Row 2. In that ch-1/space area:
- Work 2 dc in the space next to ch-3.
- Together with ch 3, that makes 3 dc total = half shell.
- Find the first puff V from Row 2.
- Locate the ch-5 arch above the shell.
- In the 4th dc of the next shell (from Row 1):
- The tutor “anchors” the arch. But what you do is:
- Sc into the top of the shell (into the central/top dc) to hold the arch neatly.
- In the next ch-2 space (between the 2 puffs of the V-stitch):
- Work 7 dc in that ch-2 space (full shell).
- Again anchor:
- Sc into the top of the next shell (Row 1) under the ch-5 arch.
- Repeat Steps 4–5 across:
- 7 dc in each ch-2 space (between puffs), then sc in top/middle of shell below

Ending Row 3:
- At the last half puff-V (end of Row 2), in the space:
- Work 3 dc = half shell.
Row 3 now has:
- Half shell at each end
- Full shells (7 dc) across the middle anchored to the previous shell row.

Row 4 – Puff “Framework” Row (Full V’s)
- Ch 1, turn.
- In the first dc space at the start of the row (between 1st and 2nd dc of half shell):
- Work 1 sc.
- Ch 2.
- In the sc between shells below (Row 3):
- Work puff st, ch 2, puff st all in that sc.
- Ch 5.
- In the next sc between shells:
- Again work puff st, ch 2, puff st.
- Repeat Steps 5–6 across to the last sc between shells.
Ending Row 4:
- At the end, after the last puff V-stitch:
- Ch 2, and sl st into the top of the turning ch-3 from previous row (or into last dc), forming a neat edge.
Row 4 is a full “framework” row with puff V-stitches across.
Row 5 – Shell Row (All Full Shells)
- Ch 1, turn.
- In that first sc from Row 4:
- Work 1 sc.
- In the first ch-2 space from the nearest puff V:
- Work 7 dc (full shell).
- Sc into the top of the shell/puff group (anchoring as before).
- Repeat 7 dc in each ch-2 space between puffs, sc in shell top along the row.
Ending Row 5:
- You start with a full shell and
- You end with a full shell, with sc’s between shells.
At this point the main pattern is established.
Pattern Repeat
From here on, the blanket repeats a 4-row cycle:
- Row 2 repeat – Puff framework with half V at ends
- Row 3 repeat – Shell row with half shells at ends
- Row 4 repeat – Puff framework with full V’s
- Row 5 repeat – Shell row with full shells
The tutor explains:
You repeat Rows 2, 3, 4, and 5 continuously:
- Puff row (with half V ends)
- Shell row (half shells)
- Puff row (full V’s)
- Shell row (full shells)
Continue repeating this 4-row sequence until you reach your desired height.
For the sample blanket:
- Work 70 total rows (35 shell rows + 35 puff framework rows).
- Height: approx. 30–36 inches depending on tension.
Border
After completing 70 rows (or your desired height), fasten off only if needed and then start the border around the entire rectangle.
The aim:
- Add shells along sides to match the top/bottom
- Then add puff V corners and shell edging to frame the blanket beautifully.
Border – Round 1 (Shells Around)
You already have shells on the top and bottom edges. Now you add shells on the two long sides and turn corners.
- At one corner, from the last shell row, you’re ending with:
- 7 dc shell and sc.
- Without cutting yarn, begin working down the long side of the blanket.
Along the Side Edge:
- Into each shell/ch-3 edge on the side:
- Work 7 dc into the side of the shell (essentially into/around the turning chains or visible side spaces).
- Then 1 sc in the side of the sc between shells.
Repeat:
- 7 dc along the side of each row cluster (into the “chain side” or side of shell),
- sc into the side of the sc, forming shells along the long side.
Corners:
At each corner:
- In the corner stitch/chain (last st of a row or start chain):
- Work 7 dc to form a corner shell.
- Then 1 sc into the first st of the next side (turning the corner neatly).
Do this around:
- Top: already has shells
- Side 1: add shells & sc as described
- Bottom: work shells into chain foundation spaces as you did in Row 1
- Side 2: same as Side 1.
At the end:
- Join with sl st to the first sc or dc of the round.
Now all 4 sides are framed by shells.
Border – Round 2 (Puff V Corner Round)
Now work a puff framework row around the shells.
- From a corner shell, ch 3, then into the same shell space:
- Puff st (3 pulls), ch 1, puff st = first corner V.
- Ch 2.
- In the same corner space again:
- Puff st, ch 1, puff st (another V).
So each corner has two puff V’s, separated by ch 2 in between, forming a big corner motif.
Along the Sides:
Between corners, over each sc (between shells):
- Work puff st, ch 2, puff st in each sc.
- Between each of those puff V’s, ch 5.
Pattern along each edge:
- In each sc between shells: (puff st, ch 2, puff st)
- Between two V’s: ch 5
Work this around all 4 sides, forming puffed framework with decorative chains.
Corners (same as first):
At each corner sc/space:
- In that corner space:
- [(puff st, ch 1, puff st), ch 2, (puff st, ch 1, puff st)]
After completing the round:
- Join to the top of the starting ch with a sl st.
Border – Round 3 (Final Shell Round)
This round adds final shells into the framework you just built.
- Sl st into the first ch-1 space of the corner V.
- Ch 3 (counts as dc).
- In the same ch-1 space:
- Work 6 more dc (total 7 dc, forming a shell).
- In each ch-2 space between puffs along the sides:
- Work 7 dc in the ch-2 space.
- Over each ch-5 arch, anchor the shell by working 1 sc into the top of the underlying shell or into the mid point where the V’s meet (as tutor shows: “anchor with sc on top of shell”).
Repeat shells across every ch-2 space and sc between shells to the next corner.
Corners:
- In each corner cluster’s ch-1 spaces, place shells similarly, making the corners rounded and full.

At the end of the round:
- Join with a sl st to the top of the first ch-3.
- Fasten off, leaving a tail to weave in.
Finishing
- Weave in all ends with a yarn needle, hiding them in the puff stitches and shells.
- Gently shape or block if desired (usually not strictly necessary with acrylic/DK unless you want a very flat look).
- Admire your soft, squishy, textured blanket!
Tutor’s Suggestions & Notes
- Use a stitch counter or contrast yarn to keep track of long foundation chains (152 chains is easy to miscount).
- The blanket is very soft and perfect for babies due to the yarn choice and airy puff texture.
- The pattern is repetitive and only really has two “types” of rows:
- Shell row
- Puff framework row
- Even beginners can manage this after getting used to puff stitches.
Uses
- Baby shower gifts
- Newborn photography props
- Stroller, car seat, or crib blanket
- Lap throw for adults (adjust size by changing starting chains and number of rows)
- Sellable item for crochet fairs or online shops
Tip
To adjust the blanket width, simply start with a chain that is a multiple of 8 + 1 (for example: 8×N + 1 chains) and then add your extra turning chain at the end. Keep a detailed note of how many shells you have in Row 1 so it’s easy to track symmetry and avoid mistakes in later rows.
Conclusion
This puff and shell baby blanket is soft, stylish, and easy to memorize once the repeat is established. With just DK yarn and a 4 mm hook, you’ll have a beautiful, cozy blanket that looks advanced but is beginner-friendly. It’s a lovely way to make a thoughtful, handmade gift that will be treasured for years.