How to Perfectly Crochet Beanie Pattern for All Skill Levels
Cozy style begins with the free crochet beanie pattern, a simple and lasting design that adds warmth and charm to everyday wear.
Chilly days call for something warm, stylish, and handmade. This beginner-friendly crochet beanie pattern offers an easy way to stitch a cozy beanie that’s both functional and fashionable. Beanies make practical additions to any wardrobe, keeping you snug during cold seasons while adding a handmade, personal touch to your outfit. Whether you’re making one for yourself, a loved one, or as a thoughtful gift, this pattern allows you to customize the size, color, and texture to suit any preference.
Try This Easy and Stylish Free Crochet Beanie Pattern

Featuring simple stitches, this pattern is perfect for beginners learning the ropes or experienced crocheters looking for a quick project. Using chunky yarn and a basic hook, the process is as enjoyable as the finished result. The snug fit and seamless texture ensure your beanie is both comfortable and durable, making it ideal for everyday wear, outdoor adventures, or even evening walks.
Its versatility means you can adapt the pattern to fit different styles and ages, from playful pom-poms for kids to minimalistic tones for adults. Perfect for colder months or even as handmade holiday gifts, this project is a great way to keep warm while showcasing your crochet skills. Make one to enjoy the charm of something truly unique and practical.
Materials Needed
- Yarn: Chunky-weight yarn; 70% acrylic, 30% wool blend.
- Hook: 7mm crochet hook.
- Scissors
- Tapestry Needle (for joining and weaving in ends).
- Optional: Comb or brush for finishing the pom-pom.
Special Features
- Chunky Texture: The combination of single crochet, half-double crochet, and slip stitches creates a stretchy, textured pattern.
- Easily Adjustable Size: Just increase your starting chain and rows for a larger-sized beanie.
- Quick Project: This pattern can be completed in under an hour, making it ideal for last-minute gifts or weekend projects.
- Pom-Pom Finishing Touch: A chic pom-pom adds a playful and trendy element.
Difficulty Level
- Beginner to Intermediate: Suitable for beginners familiar with basic stitches (single crochet, half-double crochet, and slip stitch) and those wanting to experiment with simple shaping.
Tutor’s Suggestions
- Use chunky acrylic or wool blend yarn for a warm and stretchy finish.
- Maintain consistent tension, especially while alternating half-double crochets and slip stitches.
- For a more unique look, try multicolored or textured yarns for the pom-pom and beanie.
Step-by-Step Instructions
Step 1: Starting the Base
- Chain 47: Begin with a slip knot and chain 47. (You can adjust this starting chain for larger sizes in multiples of 2, +1 to ensure an even number of stitches.)
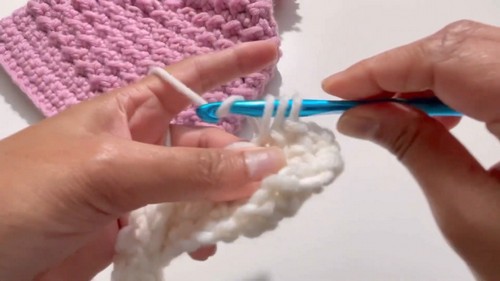
- Row 1: Insert your hook into the 2nd chain from the hook, yarn over, and pull through both loops to form a single crochet (sc).
- Continue placing 1 sc in each chain across the row.
- You’ll end Row 1 with 46 single crochets.
- Row 2: Chain 1, turn your work, and place 1 sc in each stitch across the row (46 stitches). Repeat this process for 3 more rows.
- After the 4th row, you should have a foundation of 46 single crochets per row.
2: Creating the Textured Pattern (Row 5 onwards)
- Row 5:
- Chain 1, turn your work, and yarn over to prepare for a half-double crochet (hdc).
- Insert your hook into the first stitch, yarn over, pull through (3 loops on your hook), yarn over again, and pull through all 3 loops. This creates your first hdc.
- In the next stitch, work a slip stitch (insert hook, yarn over, pull through both loops).
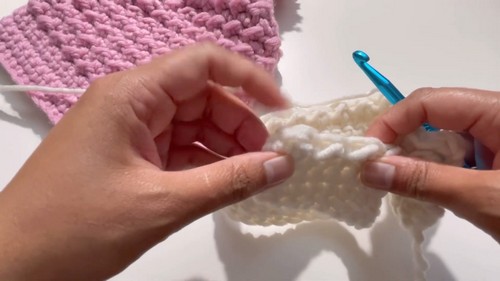
- Alternate between 1 hdc and 1 slip stitch across the row. End the row with a slip stitch in the 46th stitch.
- Row 6: Chain 1, turn your work, and follow the same pattern:
- Start with 1 half-double crochet in the first stitch, followed by 1 slip stitch in the next stitch.
- Alternate across the row, ensuring you end with a slip stitch.
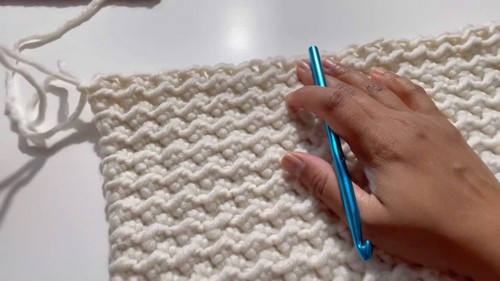
- Repeat Rows 5 and 6 for 22 rows or until your project reaches your desired height (8 inches for a small adult size).
Step 3: Shaping and Seaming the Beanie
- After completing all 26 rows (4 sc rows + 22 textured rows), fasten off your yarn, leaving a long tail for seaming.
- Use the long yarn tail and a tapestry needle to fold the beanie in half, matching the edges. Sew the sides together using a whip stitch or your preferred seaming method.
- Ensure both edges are securely joined before moving to the top section.
Step 4: Closing the Top of the Beanie
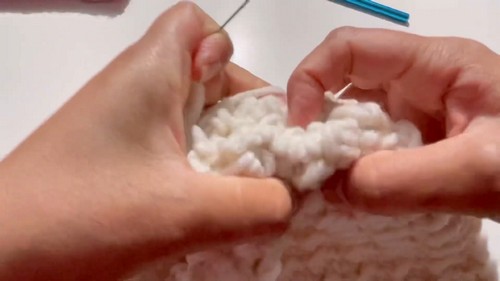
- Cut another long piece of yarn and thread it onto your needle.
- Working along the top edge of your beanie, use a loose running stitch (weaving in and out along the edge).
- After sewing around the top opening, pull the yarn tightly to gather the top. Repeat the gathering process twice for a more secure hold.
- After gathering, tie a knot to secure the top and weave in the ends.
5: Making the Pom-Pom
- Find a sturdy box or any object to wrap your yarn around.
- Wrap the yarn many times around the box (no need to count) until the pom-pom is as full as you’d like.
- Carefully slide the yarn off the box and tie it tightly in the center using another piece of yarn.
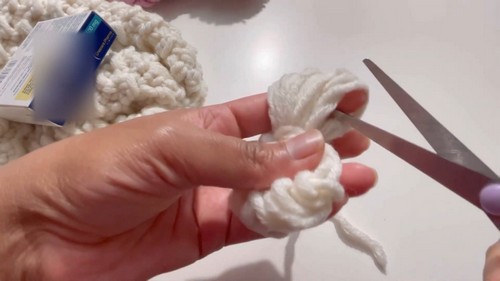
- Use scissors to cut through all the loops on both sides of the pom-pom. Trim the edges to form a neat ball shape.
- For extra fluff, brush the pom-pom gently with a comb or hand-fluff it.
Step 6: Attaching the Pom-Pom
- Find the center of your beanie (at the top) and use your tapestry needle to attach the pom-pom securely.
- Pull the pom-pom’s threads through the top of the beanie and tie them tightly inside.
- Weave in all ends and trim any excess yarn.
Final Touches
- Turn your beanie inside out to examine the seams and ensure everything is secure.
- Smooth out the pom-pom and fold up the bottom edge of the beanie, if desired, for a snug fit.
Uses and Benefits
- This chunky beanie is perfect for everyday wear during winter or fall.
- Makes a thoughtful, handmade gift for friends and family.
- Customizable in size and color for adults, teens, or children.
Tip for Perfection
To ensure the hat fits perfectly, measure the head circumference and adjust your initial chain count in multiples of 2. Also, brush and trim the pom-pom carefully to add a professional touch.
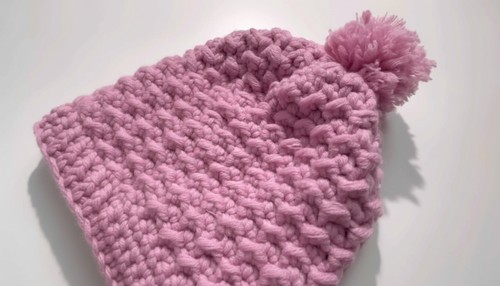
Conclusion
You’ve just completed a stylish chunky beanie with a fluffy pom-pom! This project is quick, practical, and versatile, making it a joyful addition to your crochet creations. Whether for yourself or as a gift, this beanie pattern will keep you (or your loved one) warm and fashionable.