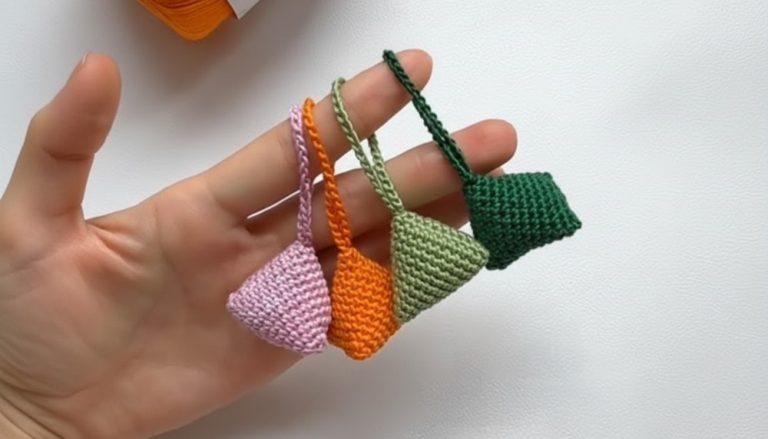
How to Cute Crochet Star Keychain Pattern for Everyday Use
Crochet Star Keychain Pattern to Brighten Your Accessories

One of the greatest advantages is how customizable this pattern is. Experiment with bright, bold colors for a fun look or subtle pastel shades for elegant simplicity. It’s also a wonderful stash-buster project that lets you repurpose leftover yarn into something meaningful. Beginners find satisfaction in mastering techniques like increases and decreases, while experienced crocheters enjoy the quick results this small project offers.
Beyond its use as an accessory, it can serve as a decoration or gift for special occasions—perhaps as part of a keychain collection or a small festive ornament. Simple, charming, and practical all at once, this crochet pattern offers joy in its creation and utility in its use, making it a versatile addition to your crochet repertoire.

Special Features
- One-Piece Design: The entire star is crocheted without joining separate pieces.
- 3D Effect: Stuffed for a dimensional and sturdy finish.
- Lightweight and Versatile: Perfect for bag charms, keychains, or phone decorations.
- Beginner-Friendly yet Engaging: A simple pattern with some creative stitches like the W-stitch and M-stitch.
Level of Difficulty
Intermediate. While the basic stitches are beginner-friendly, the W and M stitches, combined with shaping, may require some practice for first-timers.
Materials Needed
- Yarn: Four-strand cotton yarn (or any medium-weight yarn).
- Hook: 2.0mm crochet hook.
- Stuffing: Cotton or fiberfill for a 3D look.
- Scissors: For cutting yarn.
- Tapestry needle: Used for weaving in ends.
Step-by-Step Pattern
Step 1: Start with the Center
- Magic Ring: Begin by creating a magic ring.
- Round 1: Crochet 5 single crochets (Sc) into the ring. Pull the ring tight to close the circle.
- Locate the first Sc and join the round with a slip stitch (Sl St).
- Note: This completes Round 1.
2: Build the Star Body
- Before Round 2: Add a Sl St before starting to ensure smooth transitions.
- Round 2:
- In each stitch, crochet 3 single crochets (this creates a slight point for the star).
- Repeat around the circle (5 groups of 3 Sc).
- Join with a Sl St to close the round.
- Round 3:
- Crochet 1 Sc in the first stitch.
- In the second stitch, crochet a W stitch (3 Sc into 1 stitch).
- Complete the pattern by crocheting 1 Sc in the next stitch.
- Repeat this sequence for all 5 sections.
- Join with a Sl St to complete the round.
- Tip: After this round, you’ll start seeing the five-pointed shape emerging.

3: Shaping the Star
- Round 4:
- Start with Ch 1.
- Crochet 2 Sc in the first two stitches.
- In the third stitch, crochet a W stitch.
- Finish the pattern with 2 Sc in the following two stitches.
- Repeat for all 5 sections to complete this round.
- Rounds 5 to 7:
- Follow the pattern from Round 4, but add 1 Sc to the number of single crochets before and after the W stitch with each round.
- Example:
- Round 5: Crochet 3 Sc, a W stitch, and 3 Sc.
- Round 6: Crochet 4 Sc, a W stitch, and 4 Sc.
- Round 7: Crochet 5 Sc, a W stitch, and 5 Sc.

4: Adding Dimension (Decrease Rounds)
- Round 8 (Start Decreasing):
- Start with Ch 1.
- Crochet 5 Sc.
- Then, crochet an M stitch (combine 3 Sc into 1 as follows):
- Insert hook into the front loop of each of the next 3 stitches.
- Yarn over and pull through all 3 front loops to combine them into a single Sc.
- Crochet 5 Sc to complete the first point of the star.
- Repeat this process for each section of the star.
- Round 9:
- Start with Ch 1.
- Crochet 4 Sc.
- Crochet an M stitch in the next 3 stitches.
- Finish with 4 Sc.
- Repeat for all 5 star points in this round.
- Tip: You’ll start to notice the arcs of the star curving downward, giving the star its iconic shape.


5: Adding Dimension and Stuffing
- Finish the Last Points: Crochet the remaining stitches to close the points of the star while leaving a small opening.
- Stuff the Star: Insert stuffing into the star shape, making sure the corners are filled well to maintain the three-dimensional effect.

Tutor’s Suggestions
- Experiment with Colors: Try using gradient or multi-colored yarn for a unique look.
- Practice M and W Stitches: These are foundational for shaping the star, so spend time perfecting them.
- Make Matching Accessories: Pair your star with other shapes like hearts or circles for a complete charm collection.
Uses
- Bag Charms: Add a playful touch to handbags or backpacks.
- Keychains: Make a durable and lightweight keyring accessory.
- Room Décor: Cluster them into garlands for wall hangings.
- Gift Decorations: A handmade star can add a thoughtful touch to gift wrap.
Tip
For a cleaner look, block your star after you finish crocheting. This will help even out the stitches and make each point stand out more. Also, use smaller crochet hooks if you want the stitches to appear tighter.
Conclusion
This crochet star keychain pattern is a small yet satisfying project that combines simple techniques with impactful results. Its versatility allows you to use it in countless ways, while its beginner-to-intermediate difficulty makes it accessible for crocheters of most skill levels. Brighten your day and your accessories with this charming crochet piece.