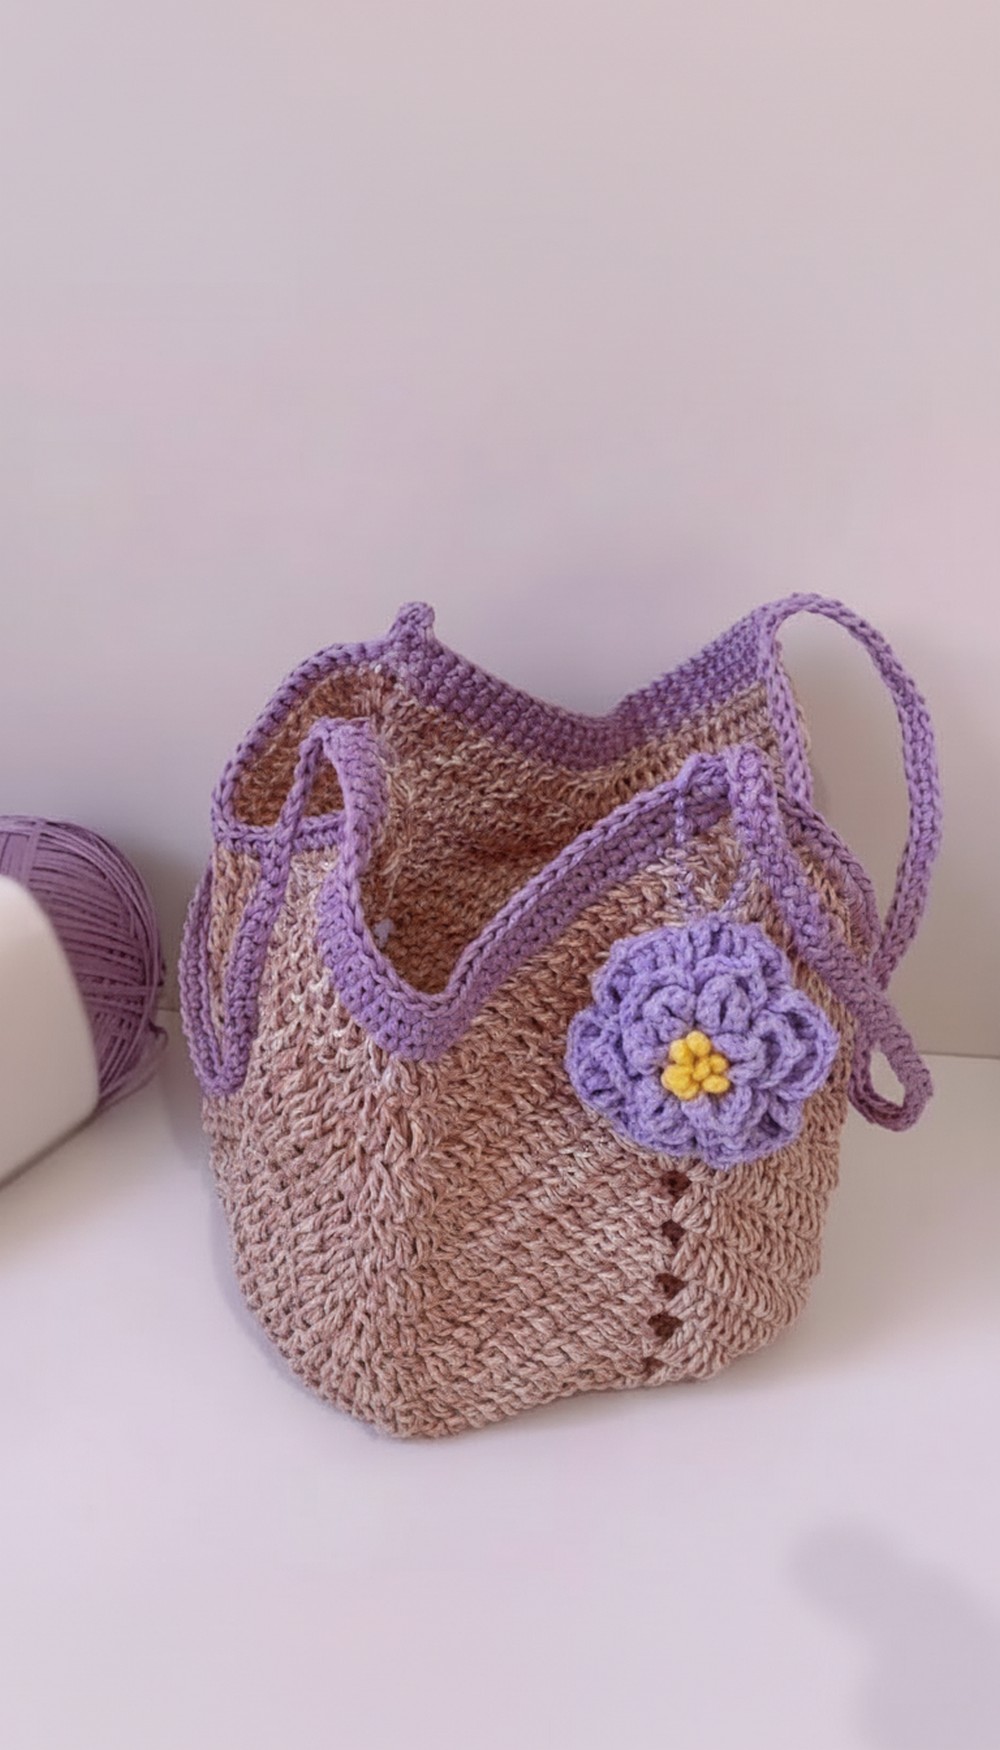
How to Crochet Nice Bag Pattern That’s Simple and Stylish
How Can You Chic Crochet Nice Bag Pattern? Find Out Here

Beyond its aesthetic appeal, the pattern is highly practical—it accommodates all your necessities and offers the flexibility to customize its size, colors, and even strap length. It’s a sustainable solution for those looking to reduce their reliance on plastic without compromising on style.
The step-by-step pattern ensures that even someone new to crochet can enjoy the satisfaction of completing a useful and stylish project. This pattern isn’t just an accessory; it’s a reflection of your personality and creativity. Functional, fashion-forward, and planet-friendly, it’s the perfect addition to your wardrobe or a thoughtful handmade gift for loved ones.
Special Features
- Spacious Design: Holds numerous items needed for shopping or outings.
- Durable Structure: Worked with three strands of yarn for extra sturdiness.
- Customizable Size: You can adjust the length of the bag’s straps and body to suit your preference.
- Eco-Friendly: A reusable, handmade alternative to plastic bags.
Level of Difficulty
Beginner to Intermediate. Basic crochet techniques are used, but familiarity with double crochet (dc), magic rings, and creating increases are essential.
Materials Needed
- Cotton-raffia blend yarn (use 3 strands held together)
- Crochet hook: 3.5 mm
- Stitch markers (optional)
- Scissors
- Yarn needle (for weaving in ends)
Stitches and Terms (US Terminology)
- ch: chain
- sc: single crochet
- dc: double crochet
- hdc: half-double crochet
- sl st: slip stitch
- magic ring: adjustable loop used to start projects worked in the round
Pattern Instructions
Step 1: Prepare 3 Strands of Yarn
To create the durable structure required for this bag:
- Fold the yarn in half.
- Fold it again to hold three strands together as you crochet.
Adjust the strands as needed whenever you pull the yarn to ensure continuous thickness.
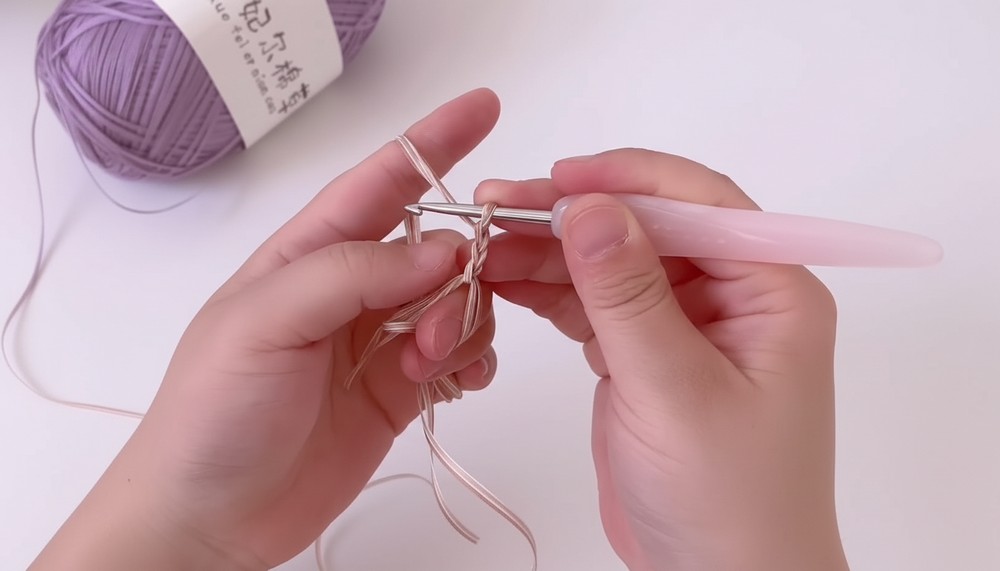
2: Base of the Bag (Rounds in the Magic Ring)
- Start with a magic ring. Insert your crochet hook into the ring, pull through the loop, and tie a knot.
- Ch 2 (counts as a double crochet).
- Work 3 dc in the ring. This forms the first corner of the base.
- Ch 3 for a spacer, then work another 3 dc.
- Repeat this step three more times to form four sets of 3 dc, separated by 3 ch spaces.
- Close the round with a sl st into the second chain of the beginning ch 2.

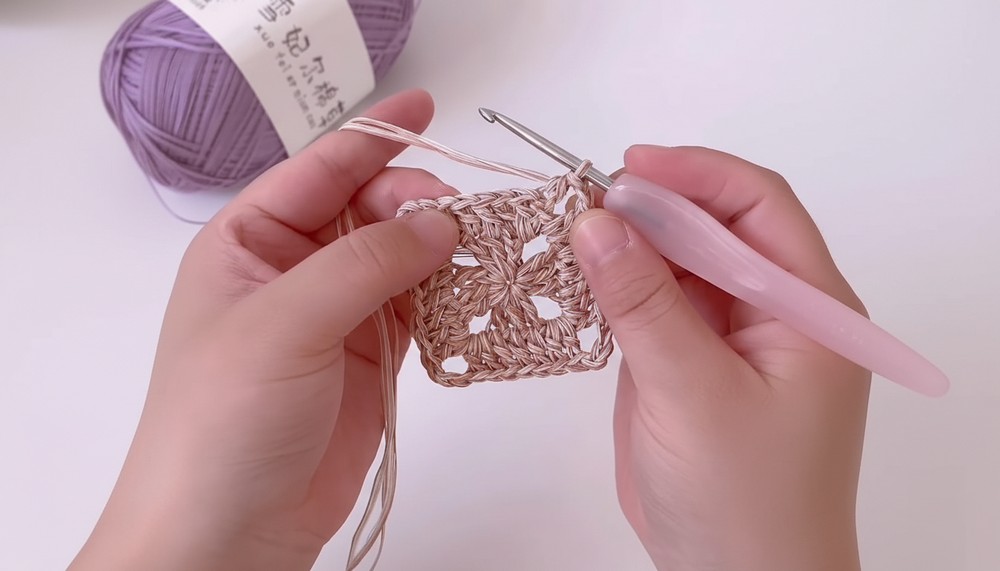
3: Building the Base – Add Rounds with Corners
For each successive round, the corners (spaces formed by the 3 chains) will remain consistent in pattern, while the spaces between will be filled with additional dc stitches.
Base Round Structure:
- The four corners:
- Work 2 dc, ch 3, 2 dc in each corner space.
- For all remaining stitches between corners:
- Work 1 dc in each stitch from the previous round.
Repeat Rounds:
- Continue working the corners and filling in the rest of the stitches with dc until your base reaches the desired size.
- Adjust the number of rows based on your preferred dimensions.
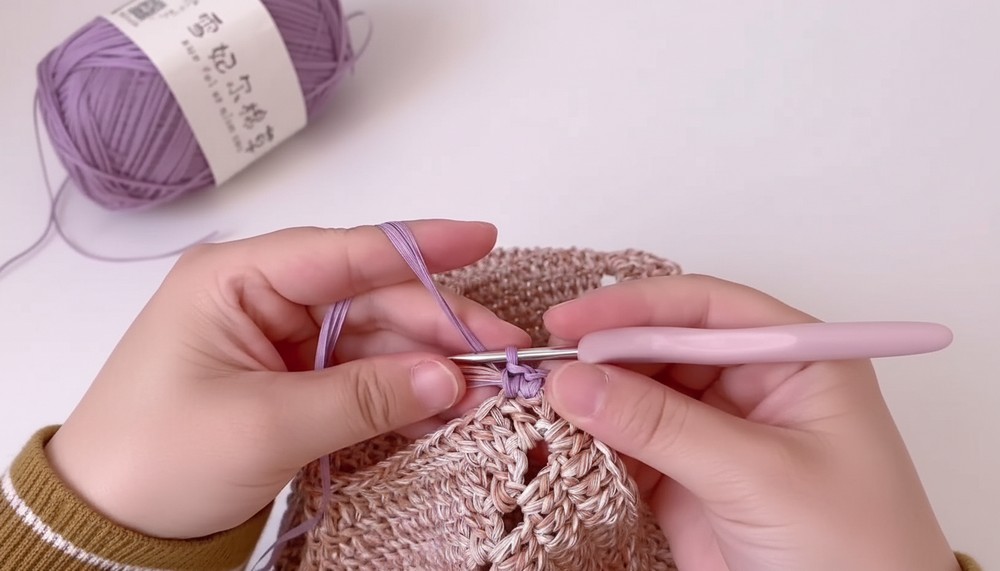
4: Start Crocheting the Bag’s Body
Once the base is complete:
- Use a marker to identify the middle double crochet of each side and mark the 4 stitches on either side of this center stitch.
- Work as follows:
- When reaching the marked stitches, crochet dc decreases to shape and curve the body.
- For all other stitches, continue dc normally.
- At the corners:
- Work 2 dc, ch 3, 2 dc to maintain consistency and shape.
Step 5: Repeat for the Body
- Continue the pattern, decreasing in the middle sections and maintaining the corner structure for 8 rounds or until you get your desired height.
- Change colors if desired after finishing your last body round.
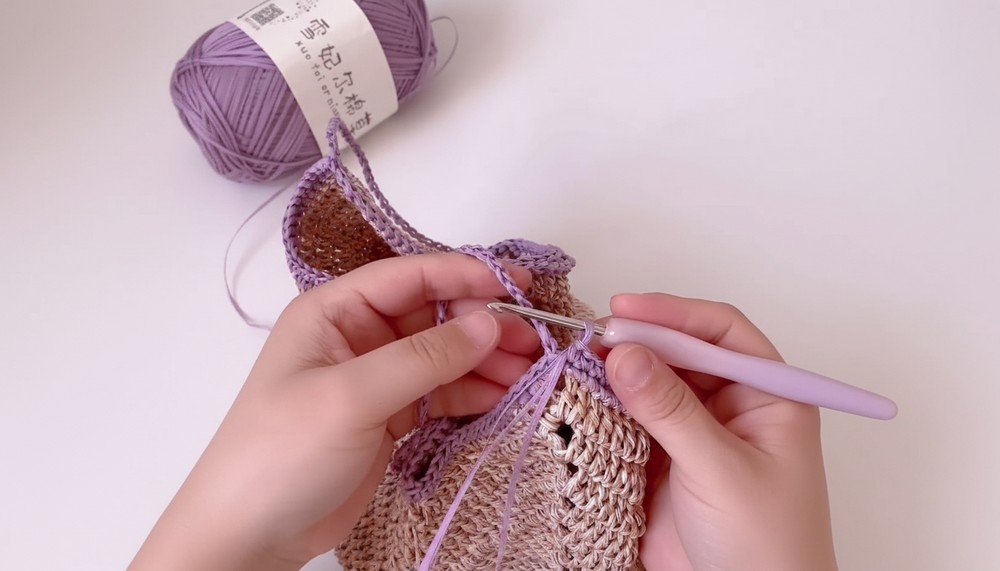
6: Single Crochet Edging Around the Top
- Start with a row of single crochet (sc) around the top edge:
- Work 1 sc in each stitch.
- For corners, work 2 sc in the chain spaces to maintain structure.
- When the round is complete, finish with a sl st.
7: Bag Strap Creation
- Begin the strap by chaining your desired length (e.g., 60 chains for a medium-length strap).
- Adjust based on how long you want the strap.
- Skip the corner spaces and directly attach the strap by working sc into the stitches on the opposite side.
- Continue working sc all along one side of the strap to reinforce it. Repeat for both straps.
Step 8: Final Round
- Work a final sc edging around the strap and top edge of the bag to give it a finished look.
- Weave in all loose ends using the yarn needle.
Tutor’s Suggestions
- Adjust Dimensions: Expand rows at the base for a larger bag or reduce rows for a smaller one.
- Strengthen the Strap: Reinforce the straps with additional rows of single crochet for durability.
- Use Durable Yarn: Cotton or raffia blends work well because they provide structure and are eco-friendly.
Uses
- Shopping: A sustainable and spacious alternative to plastic bags.
- Daily Use: Perfect for carrying books, office items, or essentials.
- Gifting: A thoughtful, handmade gift idea for eco-conscious friends.
- Picnics or Outings: Easily holds snacks and supplies for outdoor events.
Tip
For enhanced durability, you can line the bag with fabric or use yarn stiffener for added structure.
Conclusion
This shopping basket bag pattern combines functionality and environmental friendliness with a touch of style. Whether you’re using it for groceries, casual outings, or as a go-to everyday bag, this project is tailor-made for both utility and elegance.