How to Crochet Rose Pot Pattern for Enhanced Decoration
Eye-Catching Crochet Rose Pot Pattern for Trendy Looks

Lightweight and durable, the pattern makes an excellent long-term decoration that fits seamlessly into any aesthetic. Keep stitches tight and consistent for a polished look. Select bold or contrasting yarn colors to highlight the beauty of your rose pot and make it stand out.
Materials Needed
- 5-ply cotton yarn (any color for the rose, green for the leaves and sepals, and brown for the soil).
- 2.5 mm crochet hook.
- Wire (18–20 cm).
- Scissors.
- Stitch markers.
- Needle for sewing.
- Glue (for attaching elements).
- Optional: Gravel or stones (to stabilize the pot).
Special Features
- Difficulty Level: Beginner-friendly.
- Materials Required: Basic crochet supplies and wire (for structural support).
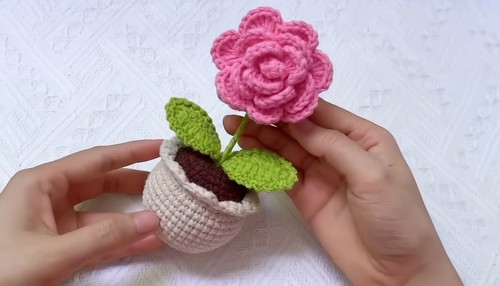
- Main Features: Realistic rose pattern with a decorative pot and leaves.
- Uses: Table decor, gifts for special occasions, or personalized craft for your space.
Crochet Pattern
All sections are divided into easy-to-follow steps. Take your time to ensure neat and clean results!
Sections of the Project
The project is broken into five parts:
- Rose Petals
- Sepals
- Leaves
- Pot
- Soil and Assembly
1. Rose Petals
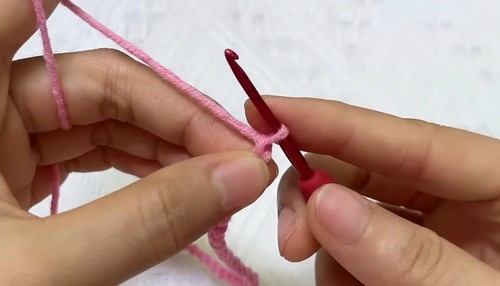
- Start with the Base Chain:
- Begin with a slip knot.
- Chain 52 stitches.
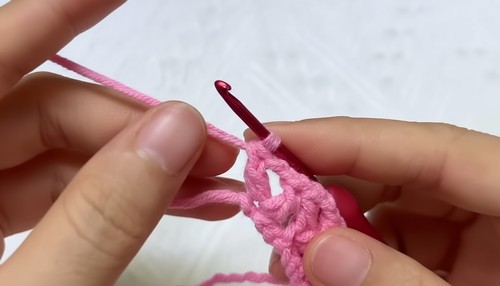
- Row 1: V-Stitch Pattern:
- Start from the 7th chain from the hook.
- Make a double crochet (DC) into the 7th chain.
- Skip 2 chains, then in the next chain:
- Make 1 double crochet, chain 2, and make 1 double crochet into the same chain (V-stitch).
- Repeat this V-stitch pattern across the row, skipping 2 chains between each.
- You should have a total of 15 V-stitches by the end of the row.
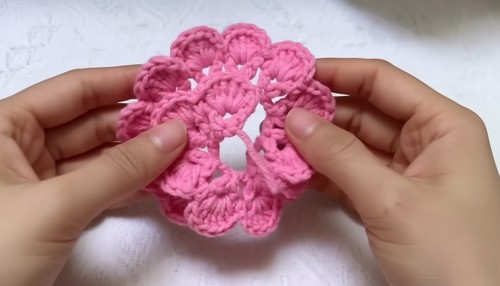
- Row 2: Create Petals:
- Chain 1 and turn your work.
- Into the chain-2 space of the first V-stitch, make:
- 6 double crochets.
- Chain 1, then make a single crochet into the space between two adjacent V-stitches.
- Repeat this pattern of chain 1, 6 double crochets into chain-2 space, chain 1, and single crochet into the next gap across the row.
- Finish with a final chaining and a slip stitch at the end. Fasten off and trim yarn.
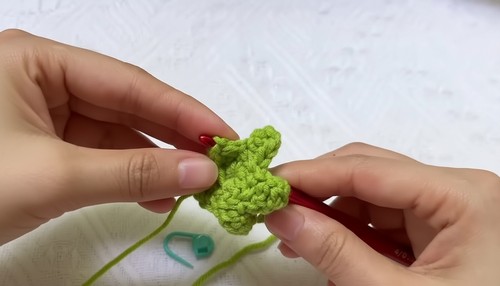
2. Sepals
- Magic Ring Base:
- Create a magic ring and chain 1.
- Work 10 double crochets into the magic ring.
- Pull the loop tight and close the magic ring with a slip stitch into the first double crochet.
- Petal Formation on Sepal:
- Chain 6.
- Into the second chain from the hook:
- Make a slip stitch.
- Into the next chain:
- Make a single crochet.
- Into the next chain:
- Make a half double crochet (HDC).
- Into the next two chains:
- Make 1 double crochet in each.
- Skip 1 stitch from the base and attach the petal with a slip stitch into the next stitch.
- Repeat this pattern to make a total of 5 sepals.
- Fasten off, leaving a long tail for assembly later.
3. Leaves
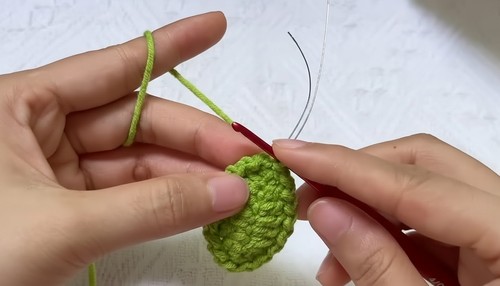
- Start with the Foundation Chain:
- Create a slip knot and chain 9 stitches.
- Work Around the Wire:
- Insert your hook into the second chain from the hook and make a single crochet, incorporating the wire as follows:
- Place the wire on your working yarn and crochet around it.
- Repeat through the chain as follows:
- HDC in the next chain.
- DC in each of the next 3 chains.
- HDC in the next chain.
- Into the final chain: Make 3 single crochets to turn the piece.
- Insert your hook into the second chain from the hook and make a single crochet, incorporating the wire as follows:
- Return on the Other Side:
- Work along the backside of the chain:
- HDC in 1 stitch, DC in 3 stitches, HDC in 1 stitch, single crochet in 1 stitch.
- Slip stitch into the first stitch to seal the round.
- Work along the backside of the chain:
- Second Round for Leaf Finishing:
- Chain 1. Use the front loops only to create a smooth finish by making slip stitches and chain 1 alternately around.
- Fasten off, secure loose ends, and wrap excess wire with yarn for a neat stem.
- Repeat for a second leaf.
4. Pot
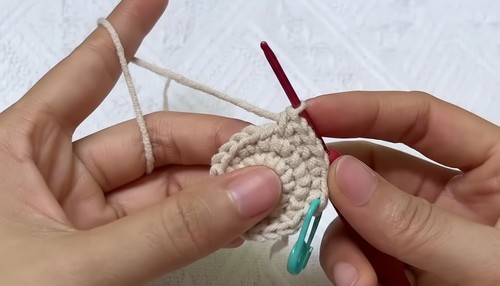
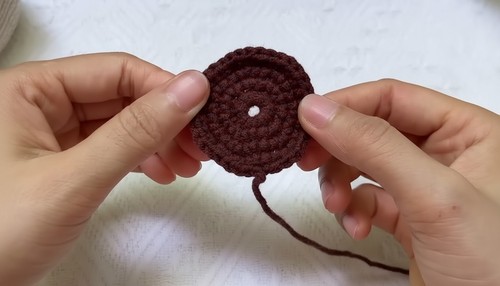
- Round 1:
- Start with a magic ring. Chain 1.
- Work 7 single crochets into the magic ring. Close with a slip stitch.
- Round 2 to 5 (Increases):
- Round 2: Work 2 single crochets in each stitch (increase). Total: 14 stitches.
- Round 3: Alternate 1 single crochet, 1 increase. Total: 21 stitches.
- Round 4: Alternate 2 single crochets, 1 increase. Total: 28 stitches.
- Round 5: Alternate 3 single crochets, 1 increase. Total: 35 stitches.
- Building the Body (Rounds 6–13):
- Work single crochets (no increases) into the back loops only for round 6.
- Continue with normal single crochets from rounds 7–13 to build height.
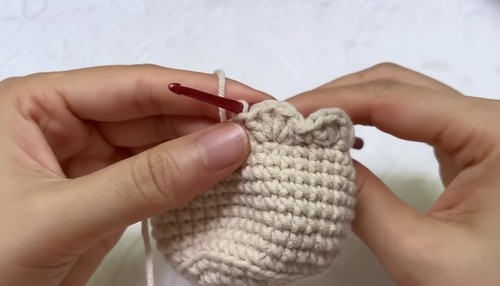
- Round 14–15:
- Round 14: Work 4 single crochets, 1 decrease. Repeat around.
- Round 15: Use front loops only and create a decorative edge with 4 double crochets in one stitch followed by 1 single crochet in the next stitch.
5. Soil and Assembly
- Soil Base:
- Create a magic ring. Work 14 single crochets and close tightly.
- Repeat rows as in round 3–5 of the pot to match the diameter.
- Stuff the pot with filling (or gravel for weight) and sew soil onto the pot using the long tail.
- Assembling the Rose Pot:
- Attach the rose to the branch with glue and insert the branch through the sepals and soil.
- Glue and wrap yarn to secure sepals and leaves in place.
- Ensure everything is tightened and finished neatly.
Tutor’s Suggestions
- Yarn Choice: Use cotton yarn for a cleaner finish and natural aesthetics.
- Secure Parts: Use glue sparingly and ensure proper alignment while assembling.
- Experiment: Try different colors for a vibrant rose garden!
Bonus Tip
Add a few drops of essential oil inside the soil or rose petals to turn this decor into an aromatic delight!
Conclusion
This beautiful crocheted rose in a pot is a perfect way to showcase your creativity and craft a timeless piece of decor. Its natural look and handmade charm make it ideal for personal use or as a thoughtful gift for loved ones.