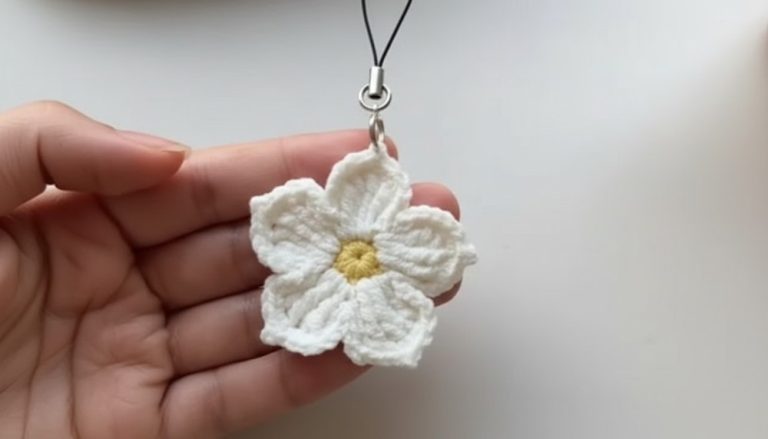
Free Crochet Cherry Blossom Coaster Pattern to Boost Your Decor
Spruce up your space with an easy and beautiful free crochet cherry blossom coaster pattern, a delightful touch for any room or occasion.
A cup of tea feels more special when placed on a floral coaster. This cherry blossom coaster pattern offers both practicality and a touch of elegance. Its pattern mimics the beauty of a single flower, bringing a soft and serene look to any surface. Perfect for protecting tables or desks, this pattern balances simplicity with charm, making it a thoughtful handmade addition to your space.
Crochet Cherry Blossom Coaster Pattern to Add a Pop of Floral Charm

The instructions are straightforward, making it suitable for beginners, while still holding enough detail to keep seasoned crocheters entertained. The pattern invites creativity, encouraging the use of traditional cherry blossom hues or unique custom colors to match your style. Beyond its practical use, this pattern serves as a small piece of art that enhances daily moments like coffee breaks or tea time.
Whether adding elegance to your table or brightening another’s day, it combines purpose and beauty effortlessly. Each stitch represents an expression of care, turning an ordinary item into something truly personal and unique.

Cherry Blossom Coaster Crochet Pattern
Difficulty Level: Beginner-Intermediate
Special Features: Spike front post triple crochet for added texture
Uses: Ideal for home decor, gifting, or adding a touch of floral charm to tea and coffee settings.
Materials
- Cotton yarn in pink or your preferred cherry blossom shades
- Crochet hook (size suitable for your chosen yarn, typically 3mm – 3.5mm)
- Scissors
- Yarn needle (for weaving in ends)
Step-by-Step Instructions
Round 1: Base Circle
- Make a Magic Ring.
- Chain 4 (counts as the first double crochet and a chain 1).
- Make 1 Double Crochet (DC) in the ring, followed by Chain 1.
- Repeat Step 3 eight more times (you should have 10 DCs with chain 1 spaces in total).
- Pull the tail tightly to close the ring.
- Slip stitch to the third chain of the starting chain 4 to join and fasten off Round 1.
- Cut the yarn and secure the end.

Round 2: Building the Petals
- Start in any chain 1 space from the previous round.
- Join new yarn and Chain 3 (counts as the first DC).
- In the same chain 1 space, make 2 DCs.
- Chain 3, then make 3 DCs in the next chain 1 space.
- Chain 1. This completes one petal cluster (3 DCs, 3 Chains, 3 DCs).
- Repeat the entire sequence four more times in the remaining chain 1 spaces.
- Close the round by making a slip stitch in the third chain of the starting chain 3 and fasten off.
- Cut the yarn, leaving a tail.


Rnd 3: Adding Dimension with Front Posts
- Start in the first stitch of any petal cluster.
- Chain 1.
- Work a Spike Front Post Triple Crochet (FPTrC) around the first stitch of the round below (this creates a textured, elongated crochet).
- Make 4 DCs in the first chain 3 space of the petal cluster.
- Chain 3, then make 4 more DCs in the same chain 3 space.
- Slip stitch into the first chain 1 space to anchor the petal. This completes one section.
- Repeat this entire process four more times around to form a total of 5 enhanced petal clusters.


Rnd 4: Final Petal Detailing
- In the first stitch of the round, make a slip stitch to anchor your yarn.
- Chain 1, then work a Front Post Single Crochet (FPSC) around the same stitch.
- Skip 1 stitch, then make 2 Double Crochets (DCs) in each of the next 3 stitches.
- In the next chain 3 space, work as follows:
- Make 3 DCs, then Chain 1.
- Make 1 Single Crochet (SC), Chain 1 again, then make 3 more DCs in the same chain 3 space.
- Work 2 DCs in each of the next 3 stitches, then skip 1 stitch.
- This completes one petal detail.
- Repeat the same sequence four more times around to complete all the petals.
- Close the round by making a slip stitch in the first stitch and fasten off.
- Cut the yarn and weave in the ends using a yarn needle.

Weaving in Ends
After finishing all rounds, use your yarn needle to securely weave in any loose ends. This will ensure the coaster remains neat and durable.
Conclusion
Crocheting the Cherry Blossom Coaster is a fun and fulfilling way to blend creativity with functionality. This pattern makes fantastic gifts or decorative pieces to brighten up any table setting. The pattern’s mix of simple stitches and textured elements makes it suitable for advancing your crochet skills without overwhelming complexity.
Tutor’s Suggestions
- Use cotton yarn to ensure durability and water absorption when used as coasters.
- Experiment with colors—pink and white are classic, but a vibrant palette can make the design pop.
Tip
To prevent your cherry blossom coaster from curling, block the finished piece by gently dampening it and pinning it to a flat surface to dry. It will retain the desired shape beautifully!