
7 DIY Vanity Table Ideas For Everyday Makeup
What is even more helpful than a vanity table for quick morning preparation? It organizes every product while providing a dedicated spot for makeup. Build your vanity table perfectly based on space, room style, and feature needs.
So, in this post, I’ll introduce 7 DIY vanity table ideas from the farmhouse, modern to rustic, and colorful options. For customization lovers, there will be compact wall-mounted options to glowy vanities and even repurposed units. So, choose from these guides collected by professionals.
The Basic Structure and Ideal Materials
The basic structure of a vanity table includes:
- A tabletop or counter
- Storage compartments or drawers
- A mirror (optional but common)
- Supportive legs or a wall-mount system
See Also: Mirror Frame Ideas
For durability and aesthetics, the best woods to consider are:
- Oak: For a sturdy build
- Pine: If you prefer something lighter
- Maple: For a smooth finish
- Cedar: Adding a delightful scent
Free Makeup Vanity Woodworking Plans

Homemade Makeup Vanity Table
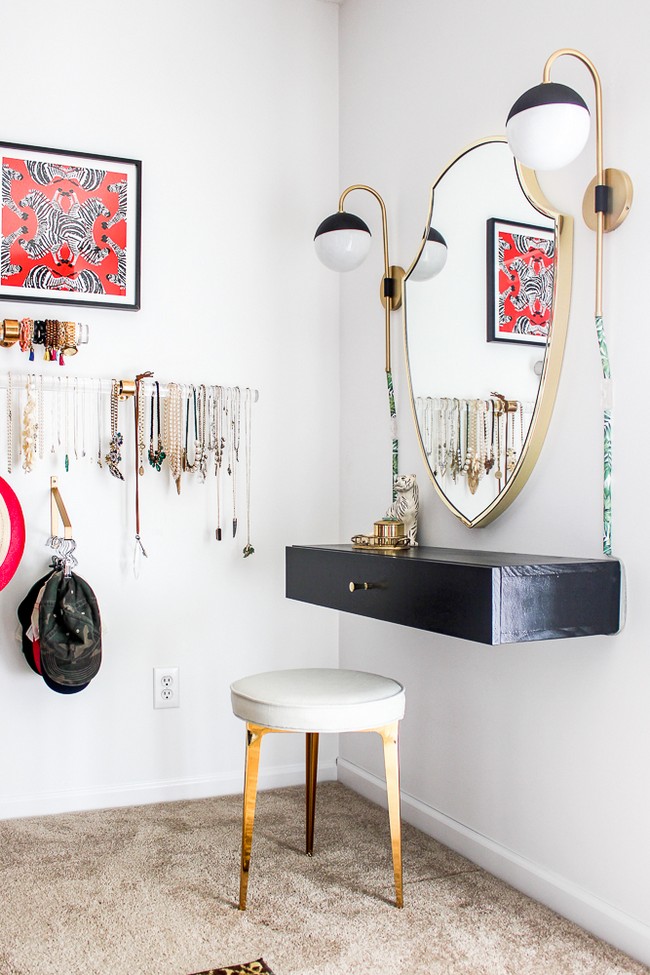
Uses: This homemade makeup vanity table brings a personal touch of beauty and utility to your room. It’s a special spot to sit, apply makeup, and prepare for the day with all your essentials in its hidden storage. Its sleek design does not crowd your space, maintaining a light and airy feel, perfect for bringing a dash of charm into your dressing or closet area.
Materials:
2 pieces of 1″ x 12″ x 4′ Pine Boards
1 piece of 1″ x 6″ Pine Board, at least 36″ long
A 2″ x 2″ furring strip, ideally 36″ long
Wood Glue
3 1/2″ Long Construction Screws (5-6 pieces)
1 5/8″ Long Construction Screws (about 6 pieces)
Two 2″ Corner Braces
A pair of 90 Degree Surface Mount Hidden Spring Hinges
Making:
The journey to assembling this charming piece involves straightforward steps, accessible even to beginners. The construction ensures both function and elegance, starting with wall-mounted basics for a light, uncluttered look and incorporating hidden storage. Attaching the table to the wall saves space and creates an illusion of openness. Adding a hinged front panel reveals a storage area, efficiently using every inch. Painting adds the final touch, bringing the vanity to life in the color of your choice.
Simple Makeup Vanity
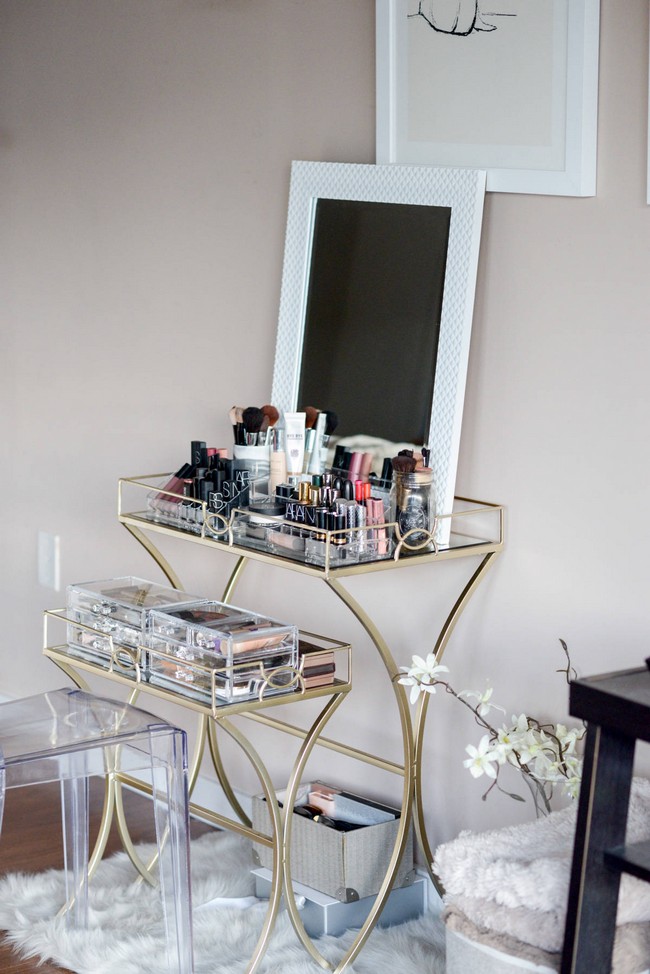
Uses: This compact beauty station saves space, keeps makeup organized, and adds a touch of elegance to any room. Its user-friendly design ensures that everything you need is within arm’s reach, making your daily beauty routine hassle-free and enjoyable. Whether getting ready for work or preparing for a special night out, this vanity serves as your prep station.
Materials:
A flat tabletop (a repurposed shelf works great)
Screws and brackets for assembly
A mirror (size according to preference)
Paint or varnish for customization
Making:
It starts with choosing the right spot in your room, ensuring it gets plenty of light. The construction is straightforward—attach a smooth, flat surface for the tabletop to a sturdy base, such as a set of small drawers that also offer extra storage. Adding a mirror and personal touches like a fresh coat of paint or decorative drawer handles completes your vanity, making it uniquely yours.
Lighted Vanity Mirror Unit

Uses: Beloved by many, this glowing friend lights up your face, helping every detail to shine. Whether prepping for your day or a grand evening, this mirror with lights ensures your makeup is perfect. It adds a splash of star-like glamour to your routine, making you feel like a star from the nostalgic era of flawless Hollywood elegance.
Materials:
Plywood sheet (28×34 inch)
Wooden boards (32 inch, 2 pieces)
Undercoat or primer
Paintbrush and paint (color of your choice)
A mirror (18×30 inch)
Lamp sockets with cords (6 pieces)
Drill and screwdriver
Construction adhesive
Screws (3-inch and 2-inch sizes)
Making:
Apply two coats of primer to the surface and sides of the 28×34 inch plywood sheet and the 32-inch board pieces. Allow drying for at least 2 hours. Choose a color that suits your style and apply it evenly across all plywood surfaces and boards! Allow the paint to dry fully. Remove the mirror and set it aside safely. Mark positions for the six lamp sockets on the plywood, three on each side, ensuring even spacing. Drill a ¼-inch hole at the center of each marked circle for the sockets. Insert the lamp socket cords through the holes and secure the sockets to the plywood using screws. Drill three 1/16 holes through each wood board and affix them to the wall with the 3-inch screws, painted side facing outwards for a neater finish. Attach the vanity mirror assembly to these boards using the 2-inch screws for stability.
Stylish Makeup Vanity With Lights

Uses: Nothing like a Stylish Makeup Vanity With Lights elevates a personal space. A welcome addition to bedrooms or dressing rooms, these vanities provide the perfect spot to apply makeup or keep yourself groomed. The brightly lit mirror enhances natural illumination, providing an excellent view while applying makeup or fixing hairstyles. Further, they come with ample storage, keeping all your beauty products within easy reach.
Materials:
Two Ikea Alex 5-drawer units
One high gloss white table top (47×23)
Ikea Stave Mirror
Two Ikea Musik Wall Lamps
Three Packs of Crystal Clear Round Light Bulbs
One Wireless Remote Light Switch or Power Strip
Wire Cutters
Wire Caps
Electrical Tape
Making:
A clean, glossy tabletop and practical drawer units form the base structure. The special feature, vanity lights, is brought to life by attaching wall lamps on either side of a mirror. A small modification of the lamps from hardwired ones to plug-ins is required, which is achieved by manipulating extension cords. Once the cords are plugged, the lights function seamlessly, flanking the mirror and illuminating the vanity space. Attention to subtle details, like ensuring a flush fitting of the lights against the wall, can elevate the overall appearance of the vanity.
Dresser into Makeup Vanity

Uses: Turning a dresser into a makeup vanity brings new life to a room, offering a unique spot for beauty routines. This clever use of furniture saves space and turns a simple storage piece into the star of a room.
Materials:
A sturdy dresser
Elegant drawer knobs or pulls
Adhesive paper or surface-covering material to refresh the top
Basic tools like a screwdriver, hammer, and possibly a drill
Making:
The process of making this dresser-turned-vanity starts with choosing a dresser that matches the room decor and has enough space on top to fit personal items. Simply swapping out old knobs for fancy new ones can give it an entirely new look. The dresser quickly becomes a functional and stylish makeup vanity by positioning a comfortable chair underneath.
Tiffany Inspired Makeup Vanity

Uses: Picture a space where every morning starts with a luxurious routine, surrounded by the beauty of a design inspired by one of the most iconic jewelry brands. This vanity isn’t just about function; it’s about adding a glamorous vibe to the bedroom, making getting ready for the day or an evening out an experience to cherish.
Materials:
Custom desk as the vanity base
High-quality paint in turquoise and black shades for a classic finish
A stylish, comfortable chair
An elegant mirror to complement the vanity
Turquoise Lamp from Target for added glamour
Crystal Lamp from Hobby Lobby for sophisticated lighting
Making:
This particular makeup vanity was custom-made, blending perfectly with the Tiffany-inspired theme of the bedroom. Its creation involved careful selection of color and design elements aligned with the luxury and style for which Tiffany & Co. is famous. The turquoise and black colors provide a classic look. At the same time, the overall design was curated to fit seamlessly into a teenage dream bedroom, offering a personal touch and a sense of ownership.
DIY A Wall Vanity
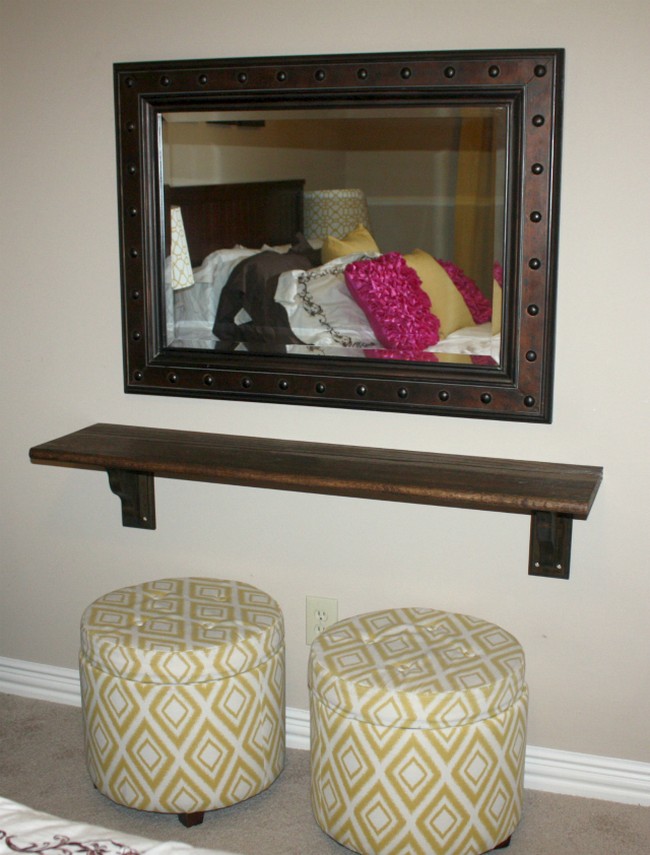
Uses: It is perfect for those with limited floor space, serving as a dedicated spot for beautification rituals. Whether putting on makeup or styling hair, this vanity simplifies these tasks, keeping essentials within arm’s reach.
Materials:
A wood shelf
Corbels for support
Wood stain for color
Polyurethane for protection
Separate sponges for stain and polyurethane
A soft rag for wiping
Stools or a bench for seating
Making:
To make this wall vanity, you start by preparing the wood shelf and supporting corbels – these are stylish brackets that hold the shelf up. Once the wood is smooth, a stain is applied to give it color. Then, coat it with polyurethane to protect and give it a shine. This layering process needs patience, as the drying time between coats is essential. Finally, the shelf and corbels are fixed to the wall; a mirror goes above, and stools below, completing your new vanity spot.


