7 DIY Ita Bag Ideas and Guides
Ita bags are tote or bag packs adorned with cute keychains and pins of mostly cute manga and anime characters. This trend is gaining huge popularity among youth and kids. But, for those who love to make everything handmade, I have curated these DIY ita bag ideas, whether you want to decorate the existing bag or sew a new one from scratch. So, open the drawer of your little character-themed accessories and start recreating these ideas yourself.

How are Itta Bags Made?
Making your ita bags is exactly similar to sewing other bags except for what we call decorating. After sewing the bag, you will glue or pierce various items, theming characters. As the word ita literally means “ouch (a word after feeling sudden pain). So, you will try to insert as many of these things as possible.
How To Make An Ita Bag Using An Insert

Uses: Be it anime, bands, or any pop culture obsession, an Ita Bag offers a unique and fun way to carry around and showcase your cherished collection, making every day slightly brighter.
Materials:
Ita Bag
Showcase items (buttons, pins, etc.)
Ruler
Hot Glue
Making:
First, handpick the treasures you wish to display and lay them out on a piece of cardboard, which acts as your insert. Measure the insert to fit the bag window perfectly, then stylishly arrange and secure your collection items onto it. Make sure it displays all your items distinctly and creatively. Now, simply slide it into your bag’s window, and you’ve breathed new life and personality into a simple carrier!
How To Make An Ita Bag Without Sewing Machine
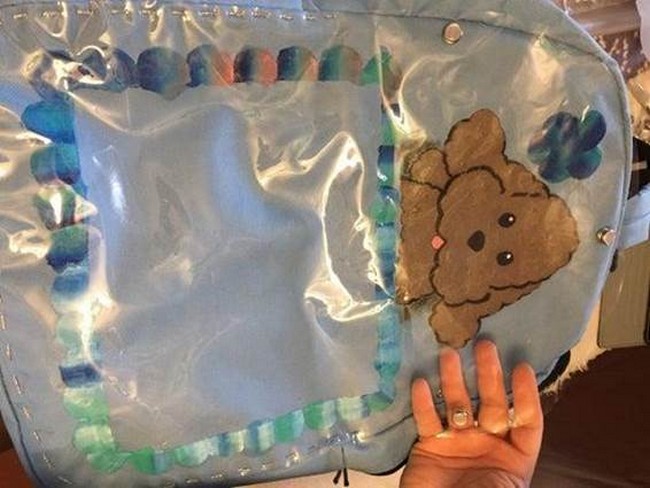
Uses: A standout accessory among manga fandoms that’s not just a bag but a wearable homage to your beloved characters. The trend is spreading from Japan and Asia to North America, as is the admiration for these bags! Now, imagine creating one without a sewing machine! Not only is it possible, but it’s also as enjoyable as using the bag itself!
Materials:
A suitable backpack
Straight pins
Tissue paper
Writing implement(s)
Hammer or snap pliers
Masking or painter’s tape
A small block of wood
Making:
Without welding a machine’s needle, this guide breaks down the process into straightforward steps. You begin by eliminating any additional pockets from your desired backpack, then engage in a seamless transformation using a clear vinyl medium-weight material, which you can thriftily glean from the packaging of new bedding linens. After tracing and cutting according to your backpack’s frontal dimensions, the vinyl is deftly attached to the bag region using embroidery thread and straight pins. Snaps fasteners add final touches, ensuring your collectibles stay protected and admired.
Crafting An Ita Bag
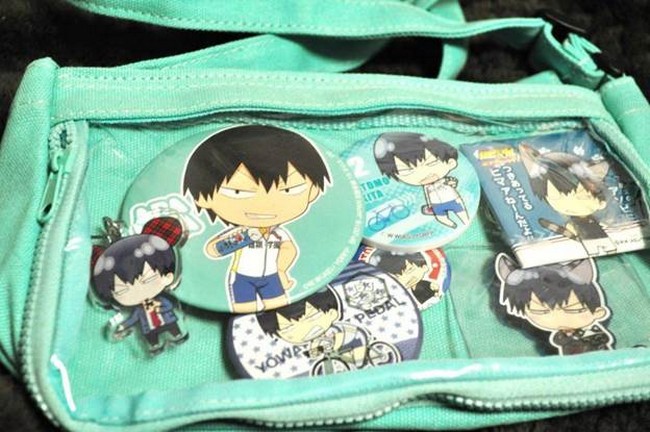
Uses: As a perfect personal billboard, it allows fans to channel their affection and devotion right on their shoulders.
Materials:
A bag of your choice
Fabric for the bag interior
Decorative items of your choice (badges, pins, keychains, etc.)
Staples or other fasteners
Zip or velcro for sealing the bag
Making:
Choose a bag that fits your style and the number of collectibles you wish to display. Clear vinyl or PVC is then cleverly used to create a protective pocket for your cherished badges, pins, and keychains. The process involves placing and strategically arranging your memorabilia for maximum visual impact while keeping them firmly stapled to the insertable fabric. Finally, attaching the insert inside the bag and sealing it with a zip or velcro finishes the creation.
DIY Pokemon Ita Bag

Uses: It acts as a mobile tribute to your favorite pocket monsters while also serving as a practical carryall for your day-to-day items. It’s the ideal companion for conventions, casual outings, or making daily life fun and colorful.
Materials:
A base bag
Pins, charms, and plushies
A backing material to arrange your items on
Making:
To assemble your own Pokemon Ita Bag, start by designing a layout of your desired display. The bag should be adorned with your chosen Pokemon paraphernalia–think of plush charms and vibrant pins that echo your love for these adorable creatures. Cleverly arrange these items so each is in the perfect spot, and then secure them to a backing that will showcase them against the bag’s window. Sealing this in with clear material allows for a peek into your Pokemon world.
Glowing LED Ita Bag

Uses: Essentially, this bag serves not only as a portable light show, radiating a soft, soothing glow, but also doubles as a decorative accessory that lets you display your favorite charms, badges, or trinkets with flair. It’s a stunning accessory for conventions, meetups, or just to add a sparkle to everyday outings.
Materials:
Heart ita bag
Adafruit circuit playground
LiPo battery
WS2812B LEDs
Male headers
Clear acrylic
Solder
Heat shrink
Making:
Making the Glowing LED Ita Bag involves several steps, starting from getting the heart-shaped vector for laser cutting. It is important to ensure the heart is in the exact shape. The cutting process utilizes a laser. The LED building follows next, involving the arrangement of LEDs on the acrylic heart. The soldering process finishes up the electrical connections. Programming the LEDs to desired effects wraps up the electrical setup. A diffuser is made to manage the LED effects, usually a small fabric pillow over the LEDs. The final step is creating the charm display base using decorative fabric.
Ita Messenger Bag Pattern

Uses: This versatile accessory, with its roomy size (approximately 15″ by 12″ by 3″), makes it perfect for carrying large items like laptops. Whether you are stepping out for an informal outing or going for a more formal setup, the Ita Messenger Bag strikes a beautiful balance between functionality and style.
Materials:
Paper for making patterns
Ruler and pen/pencil
Fabric for the body of the bag
Clear fabric for the display pocket
Fabric for lining
Sewing machine and accessories (thread, pins, etc.)
Making:
The essential element of this bag is its ‘ita’ part, a clear pocket on the flap! This part facilitates the display of pins and collectibles. It begins with pattern construction, drawing each part according to precise measurements. The fabrics are cut as per these patterns—a clear fabric for the pocket and another fabric for the body of the bag. Stitching begins with the pockets. Attach the clear pocket to the flap of the messenger bag so that the collectibles can be slipped in. Assembly of the body follows next, with careful alignment and stitching to ensure proper positioning. The attachment of accessories such as handles and straps makes it ready to be slung over the shoulder!
Ita Bag Insert Tutorial
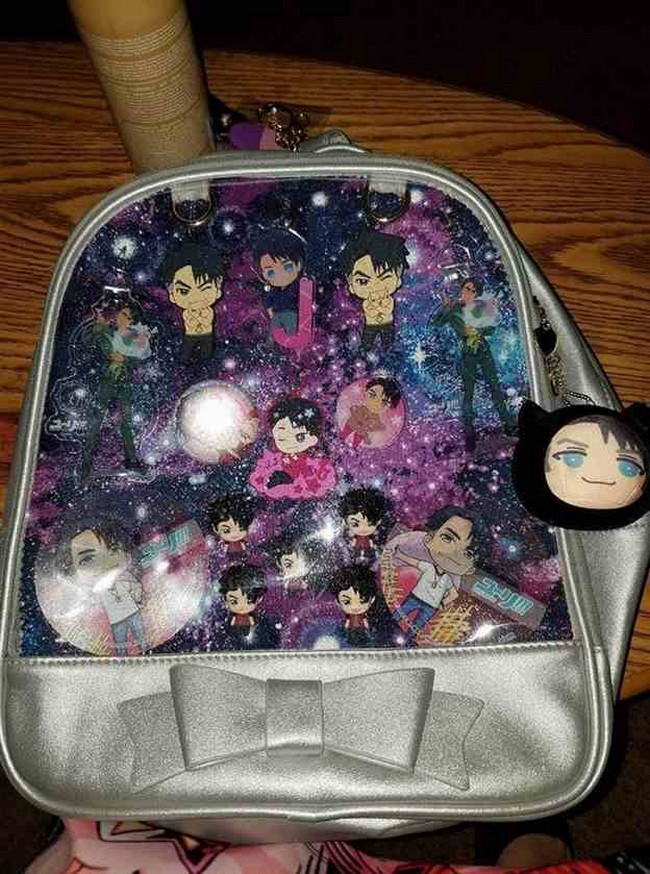
Uses: A vibrant and customized insert brings new life to any Ita Bag, perfectly matching your style and taste. Other than adding an aesthetic sparkle to your bag, an Ita Bag Insert has the practical use of protecting your precious items from being damaged.
Materials:
Cardboard or stiff fabric
Original fabric to decorate
Glue or thread
Safety pins or strong adhesive
Scissors and pen or pencil for tracing and cutting.
Making:
The initial step involves tracing the shape of your insert on cardboard or stiff fabric, ensuring it fits your bag perfectly. The traced shape is then carefully cut out. The next step is to place the desired fabric (which should be consistent with the theme of your collectibles) over the cardboard or fabric. Glue it or sew it to fix it properly. Once your fabric is attached, you can start the fun part! Lay out your treasures on the fabric in a pattern that pleases your eye. Once you are happy with the arrangement, attach them using safety pins or a strong adhesive. Now, put your completed insert inside your Ita Bag and flaunt your creation!
More DIY IDEAS


