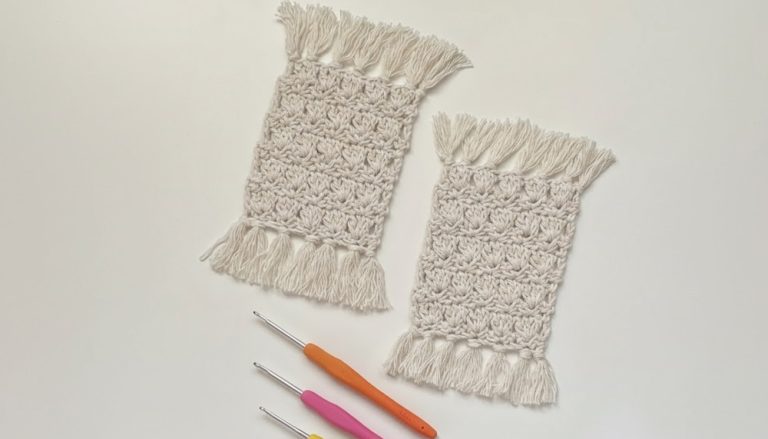
Cute Crochet Dumpling Earphone Bag Pattern for Stylish Storage
Step-by-Step Crochet Dumpling Earphone Bag Pattern for Everyday Charm

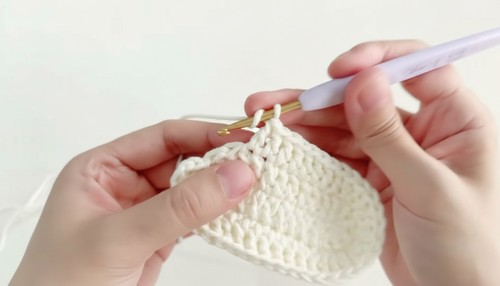
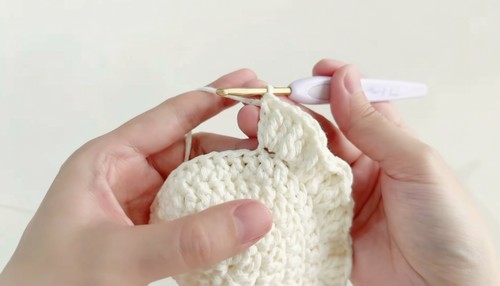
To ensure an even and neat appearance, frequently count your stitches throughout the rounds and use stitch markers at important points like corners and increases. This helps maintain the shape and size uniformly while you crochet.
Materials Needed:
- Yarn: 2mm hollow cotton (or preferred yarn).
- Hook: 3.5mm crochet hook.
- Accessories:
- Snap button or small button for closure.
- Black thread (for embroidery).
- Blush or fabric paint (optional).
- Tools:
- Yarn needle.
- Scissors.
- Stitch markers (optional).
Special Features:
- Multi-Purpose Design: Functions as an earphone bag or a cute pendant. It can also be stuffed with cotton for extra shape.
- Compact and Playful: The dumpling-like shape is ideal for storing small items securely with a snap button.
- Customizable: Adjust colors, face embroidery, or blush for personalization.
- Beginners Welcome: Basic stitches are used, along with added decorative lace and simple embroidery.
Level of Difficulty: Beginner to Intermediate
This pattern uses chain stitches, single crochets, long stitches, and medium stitches, along with basic sewing and assembly techniques.
Step-by-Step Pattern:
1. Dumpling Base:
Foundation:
- Chain Stitch: Work 11 chain stitches.

Round 1:
- Skip the last two chains.
- In the third chain:
- Work 1 long stitch (ls) by wrapping the hook around the yarn and pulling up a loop.
- Then, work 2 more long stitches in the same chain.
- On the next 7 chain stitches: Crochet 1 long stitch in each chain.
- In the last chain stitch: Crochet 6 long stitches to turn to the opposite side.
- Opposite Side: Crochet 7 long stitches, corresponding to the previous row of chains.
- On the last chain stitch: Crochet 3 long stitches to complete the round.
- Pull through the thread and mark the last stitch (optional).


R 2:
- Start Round 2:
- Chain 2 stitches (acts as a turning chain).
- On the first stitch: Crochet 2 long stitches.
- Repeat 2 long stitches in each of the next three stitches.
- Repeat for the edges: Work 7 long stitches on the straight edges.
- At the corner: Work 7 long stitches.
- For the turn area: Crochet 18 long stitches (add 1 stitch every other stitch).
- Repeat for the other side: Work 7 long stitches on straight edges and end with 3 long stitches per corner.

R 3:
- Start Round 3:
- Chain 2 stitches.
- Work 1 long stitch in the first stitch and 2 long stitches (increase) in the next stitch.
- Repeat these steps for 9 long stitches.
- Continue working 7 long stitches on straight edges.
- In the corner area, work 12 long stitches, adding 1 stitch every other stitch.
- Once completed, pull through the thread securely.
Round 4:
- Chain 2 stitches.
- Work 50 long stitches across the current base, ensuring that the stitch count matches from previous rows.
2. Lace Edging:
Creating the Fabric Shape:
- Fold the Base: Fold the completed crochet fabric in half to form the dumpling shape.
- Leave 1 stitch unworked on each edge before starting lace decoration.
Lace Pattern:
- On the first stitch: Crochet 3 long stitches.
- On the second stitch: Crochet 3 long stitches.
- Repeat this 3 long stitches per stitch around the edge by working into half stitches of the base.
- Continue Repeating: Crochet 3 long stitches into similar positions around the entire edge.
3. Back Closure Chain:
- Chain Stitch: On the back of the bag, create a series of chain stitches for the button-loop closure.
- Snap Button Installation: Sew a button onto the corresponding front of the bag.
4. Decorative Embroidery:
- Face Embroidery:
- Use black thread to sew eyes and a small smile on the front section of the fabric.
- Blush:
- Apply blush or fabric paint below the eyes for added decoration.

5. Legs (Optional Pendant):
- Cast On: Create a ring of stitches to form the base of the legs.
- Work Stitches:
- Crochet 3 short stitches, then 3 medium stitches around the loop.
- Alternate 3 short stitches and 3 medium stitches in the sequence to complete the look.
- Finish: Once rounds are tight, fasten off and sew to the base of the dumpling.

6. Assembly and Finishing Touches:
- Secure all loose ends by weaving through the base or sewing.
- Attach the legs (if desired for a doll pendant).
- Tighten and secure the closure handle at the back of the dumpling.

Conclusion:
Your delightful dumpling earphone bag is ready. This compact bag pattern is both functional and decorative, perfect to store earphones or small items securely. You can also modify this pattern into a playful pendant or small toy with legs and facial decorations.
Tutor’s Suggestions:
- Material Choices: Use hollow cotton for a soft yet sturdy design.
- Customizing Colors: Create vibrant dumplings by mixing pastel or bright yarn colors.
- Safety Note: If creating for small children, avoid buttons and opt for secured closures like Velcro or snaps.
Tip:
When closing the bag with lace or sewing buttons, ensure stitches are evenly spaced to maintain symmetry. Use stitch markers for alignment before sewing.