Quick and Simple Free Crochet Bitten Oreo Pattern to Try Tonight
Playful Free Crochet Bitten Oreo Pattern Perfect for Tiny Decor

These crochet Oreos can be used in so many creative ways. Add them to your amigurumi collection, use them as adorable decor for your home, or turn them into keychains and bag charms. They also make fantastic handmade gifts for snack lovers or as part of a themed decoration set. The pattern itself is easy to follow and can be customized in different colors to suit your preferences.
Crocheting this pattern is not just about crocheting a cute item; it’s also a relaxing and rewarding experience. It lets you practice essential crochet techniques while making something lighthearted and fun. Experiment, personalize, and add your own twist to this simple yet innovative pattern that’s guaranteed to bring joy and lots of smiles!
Materials Needed
- Yarn: Medium-weight yarn in black (for the cookie) and white (for the cream filling).
- Crochet hook: 4mm or size appropriate for your chosen yarn.
- Stitch markers.
- Scissors.
- Yarn needle for sewing and weaving in ends.
- Optional: Glue for assembling pieces.

Level of Difficulty:
Beginner
Abbreviations Used
- ch: Chain
- sc: Single Crochet
- inc: Increase (2 single crochets in one stitch)
- sl st: Slip Stitch
- MR: Magic Ring
Step-by-Step Crochet Pattern
Common Pattern of R1 & R2
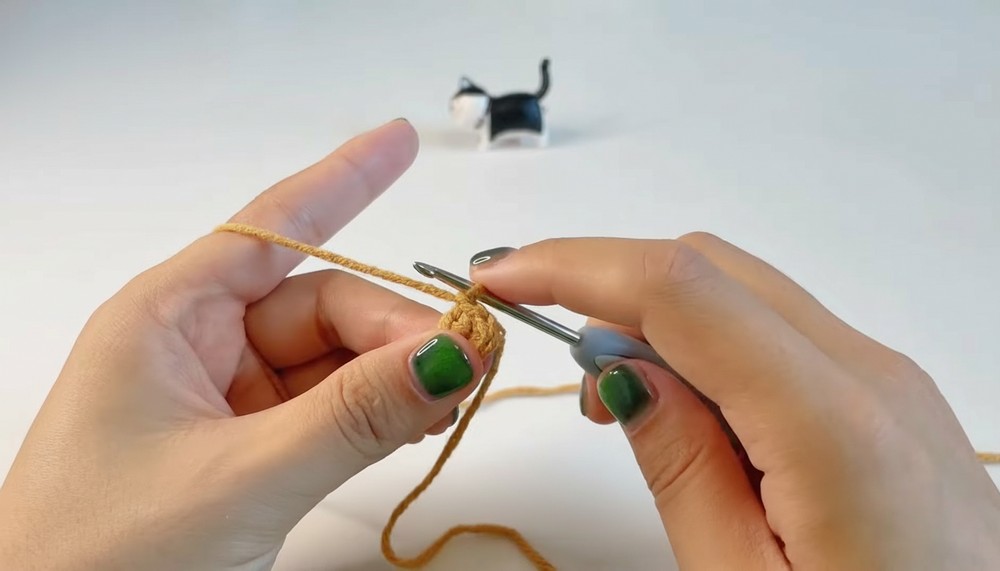
Round 1:
- Magic ring, crochet 6 sc into the ring.
- [6 sts]
- Tighten the ring and join with a sl st into the first sc.
- Chain 1 for the next round.

R 2:
- Make 1 sc inc in each stitch around.
- [12 sts]
- Join with a sl st into the first sc.
- Chain 1 for the next round.

Rest Pattern of Single Bitten Oreo
Round 3:
- Pattern: 1 sc, 1 sc inc (repeat 6 times).
- [18 sts]
- No slip stitch join; turn your work and chain 1 for the next round.
R 4:
- Pattern: 2 sc, 1 sc inc (repeat 5 times), 1 additional sc.
- [21 sts]
- Turn your work and chain 1.
Round 5:
- Pattern: 3 sc, 1 sc inc (repeat 5 times), 1 additional sc.
- [26 sts]
- Turn your work and chain 1.

R 6:
- Pattern: 4 sc, 1 sc inc (repeat 5 times), 1 additional sc.
- [31 sts]

Finishing:
- After completing the final stitch, cut the yarn.
- For gluing: leave a 5 cm tail.
- For sewing: leave a 20 cm tail.
- Pull the loop out to secure the end.
Rest Pattern for Half-Bitten Oreo
Round 3:
- Pattern: 1 sc, 1 sc inc (repeat 4 times), 1 additional sc.
- [13 sts]
- Turn your work and chain 1.
R 4:
- Pattern: 2 sc, 1 sc inc (repeat 4 times), 1 additional sc.
- [17 sts]
- Turn your work and chain 1.
Round 5:
- Pattern: 3 sc, 1 sc inc (repeat 4 times), 1 additional sc.
- [21 sts]
- Turn your work and chain 1.
6:
- Pattern: 4 sc, 1 sc inc (repeat 4 times), 1 additional sc.
- [25 sts]
Finishing:
- After completing the final stitch, cut the yarn.
- For gluing: leave a 5 cm tail.
- For sewing: leave a 20 cm tail.
- Pull loop out to secure the end.
Weave In Ends
- For each piece (2 cookie pieces and 1 cream piece), weave in the ends.
- Use a needle and weave the center yarn through stitches, forming a knot to secure it.
- Trim the yarn as necessary.

Sewing Pieces Together
Assemble Oreo:
- Align the pieces, making sure the right sides are facing out.
- Using a needle, sew through all layers starting at the center hole of each piece.
- Continue sewing until you reach the bitten section.
- For the open bite area, sew around the edges to ensure stability.
- After sewing, weave in the yarn ends again through the middle and pull tight before trimming.


Special Features
- Beginner-Friendly: Simple single crochet stitches and basic increases make this perfect for beginners.
- Customizable Biting: Create a full Oreo, single-bite, or half-bitten Oreo to suit your preference or project needs.
- Versatile Use: Great for amigurumi collections, toy food sets, keychain charms, or whimsical decor.
Tutor’s Suggestions
- For beginners, break the project into manageable steps, pausing after each significant part.
- Experiment with different colors for more variation. Chocolate Oreos or look-alikes with fun colors can make your project exciting.
Tip
To ensure even tension and a smooth finish, avoid pulling the yarn too tightly, especially when making the magic ring and the initial rounds.
Conclusion
You’ve successfully crocheted a delightful Oreo with a single bite taken out. This charming and playful pattern is not only fun to make but also adds a unique touch to any collection. Try out different variations to expand your crochet repertoire.