
How to Crochet Mesh Top Pattern Everyone Will Love

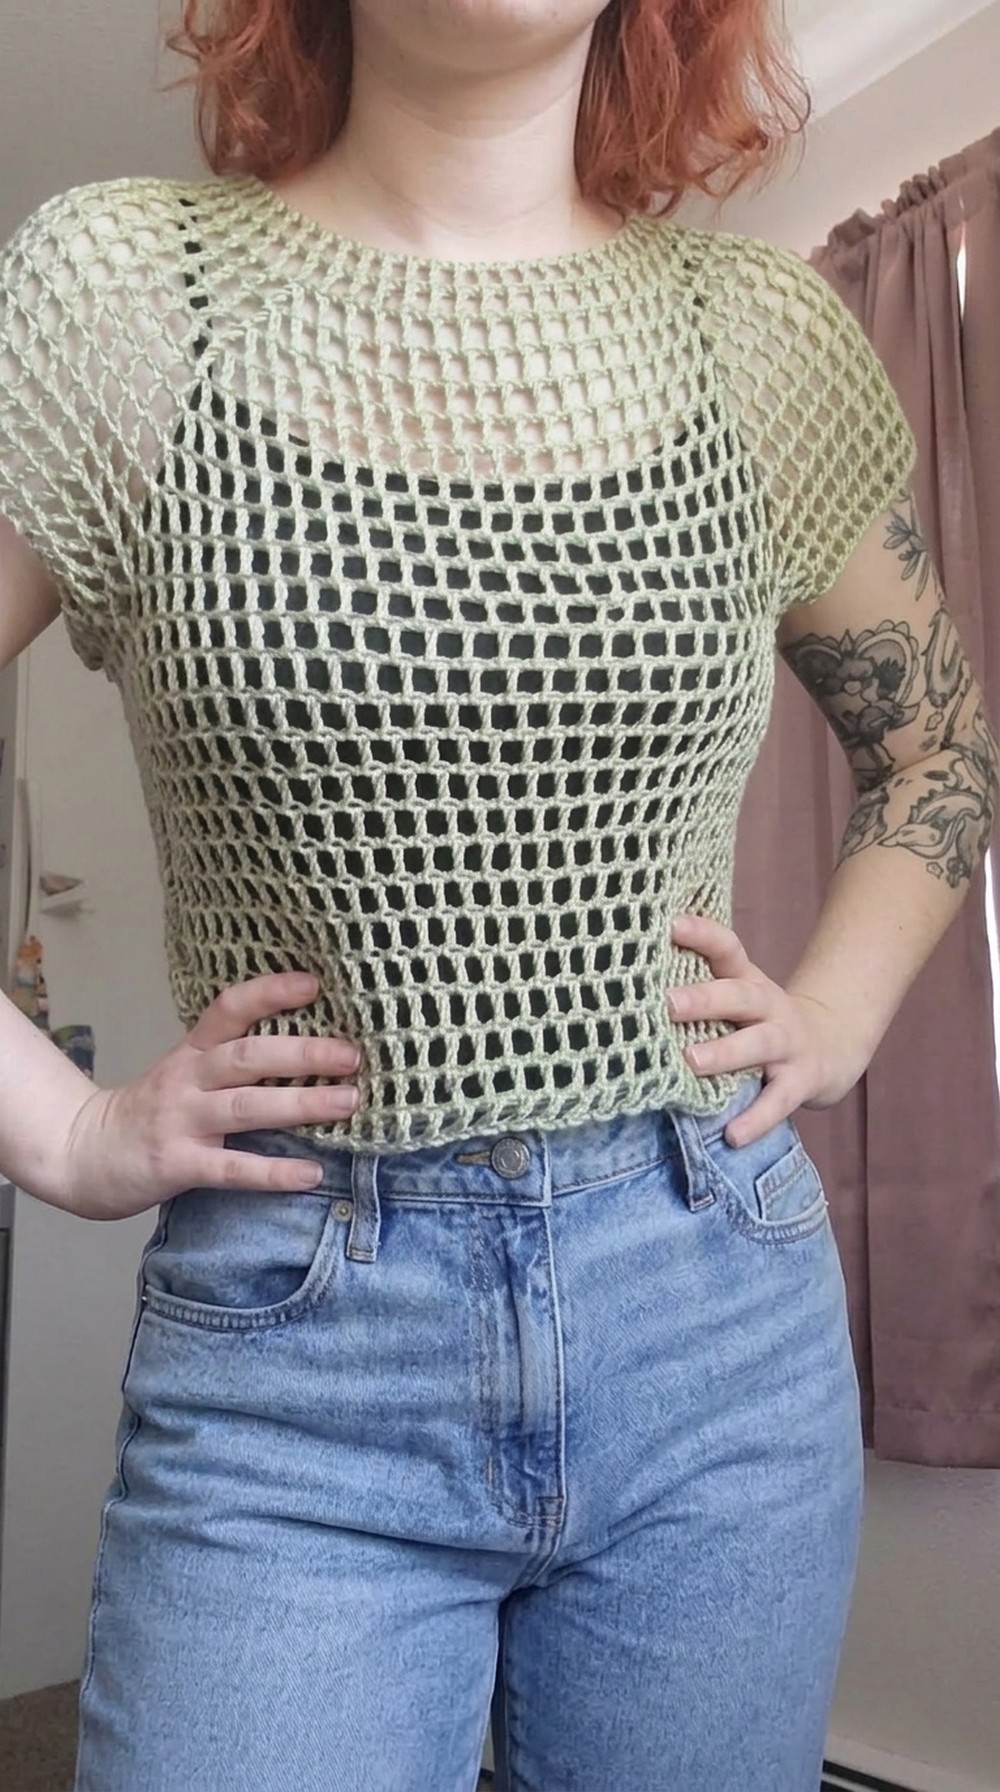
Using just a few materials—leftover yarn and a crochet hook—you can crochet a versatile piece that fits perfectly to your size and aesthetic preference. The beauty of this pattern lies in its adaptability, whether dressed up with accessories or kept minimal for relaxed summer vibes. Functional yet elegant, it’s perfect for days when you want effortless style without sacrificing comfort.
This project is an excellent opportunity to put extra yarn to good use and enjoy the satisfaction of crocheting something wearable and practical. Designed for customization, this mesh top pattern offers endless possibilities to make it uniquely yours. Comfortable, stylish, and ideal for everyday wear, it’s the ultimate summer essential to add handmade charm to your wardrobe.
Materials Needed
- Yarn: Lightweight summer yarn (exact weight and brand used from Hobby Lobby, size 3 suggested).
- Crochet Hook: 4 mm (size smaller than the hook size recommendation of the yarn for tighter stitches).
- Stitch Markers: Helps guide increases, decreases, and section divisions.
- Scissors and Needle: For cutting yarn and weaving in ends.
Special Features
- Lightweight Design: Perfect for summer wear with a breathable, airy look.
- Beginner-Friendly Steps: Incorporates basic techniques like chains, slip stitches, and treble crochets.
- Adjustable Sizing: Great for all sizes since you can modify row counts and stitch placement.
- Stylish and Functional: Offers a modern look, lightweight drape, and cozy comfort.
Level of Difficulty: Beginner to Intermediate.
Uses: Ideal for casual summer wear, layering over a tank top or swimsuit, or as a handmade gift.
Crochet Mesh Top Pattern
Starting the Neckline
- Create a Slip Knot:
- Cross yarn, bring the tail under the loop, and pull through to form a knot. Insert your hook into the loop.
- Foundation Chain:
- Chain a number of stitches that is even. This will depend on your size. For example, the tutorial’s size uses 124 chains as a neckline base.
- Ensure the chain is long enough to go over your head. Adjust if necessary.
- Connecting the Chain:
- Straighten the chain so it’s not twisted.
- Slip stitch into the first chain to form a circle.


Row 1: Starting the Pattern
- Chain 5 to begin the row. This counts as 1 treble crochet (Tr) + 1 chain (Ch 1).
- Treble Crochet (Tr) Instruction:
- Yarn over twice.
- Skip the first stitch and insert the hook into the next stitch.
- Yarn over, pull through the stitch (you now have 4 loops).
- Yarn over, pull through 2 loops. Repeat twice to complete the stitch.
- Skip one stitch, chain 1, and treble crochet into the next stitch.
- Repeat this pattern (Chain 1, skip a stitch, treble crochet) around.
- At the end, slip stitch into the 4th chain of the starting chain-5 to complete the row.

Row 2: Continuing the Pattern
- Start the row with Chain 5 (counts as Tr and Ch 1).
- Treble crochet into the top of each treble crochet from the previous round.
- Continue the Chain 1, Treble Crochet into the next treble crochet pattern.
- End the row with a slip stitch into the 4th chain of the starting chain-5.


Increasing Rows (Row 3–9)
- For Row 3, divide the circular piece into four sections using stitch markers.
- At every stitch marker, create an increase:
- Treble crochet into the marked stitch.
- Chain 2.
- Treble crochet into the same marked stitch (creates a “V” shape).
- Continue the pattern around with these increases at the stitch marker points, chaining 1 and skipping stitches as usual.
- Subsequent Increasing Rounds: For future rows, place the increases into the center of the previous increase-Vs.

Continue increasing rows (around 9 rows in total), or until the fabric fits approximately below your chest level or near your armpits.

Creating the Armholes
- Begin the row as usual with the starting Chain 5.
- When you reach your first stitch marker for the armhole:
- Treble crochet into the marked stitch.
- Chain a number of stitches that fits your preferred armhole size (e.g., chain 20).
- Connect this chain to the next marked increasing stitch with a treble crochet.
- Continue the pattern across the body until you reach the next armhole marker and repeat the process.
- Complete the row with treble crochets into chains and stitches.
Completing the Body
- Continue with the established pattern (Ch 1, Tr into the next Tr) across the armholes and body.
- Add rows until the top reaches your preferred length.

For reference, the sample pattern includes 12 additional rows after the armhole row, totaling 24 rows (neckline to hem).
Adding Sleeves
- Attach Yarn: Insert your hook into the middle of the armhole chain and attach new yarn with a slip stitch.
- Work the Same Pattern: Follow the Ch 5, Tr, Ch 1 pattern around the sleeve opening.
- Decrease Rows:
- At the “corners” of the sleeve’s base (armhole seam sections), create decreases:
- Treble crochet into the stitch before the corner.
- Begin another treble crochet into the corner but finish it together with the first treble crochet by pulling through all loops on your hook (decrease complete).
- At the “corners” of the sleeve’s base (armhole seam sections), create decreases:
- Additional Rows:
- Add decreases every other row until the sleeve fits snugly.
- Finish with a single row of the pattern, no decreases, for a clean edge.

Finishing Details
- After completing the body and sleeves, weave in all loose ends using a needle.
- Block the top (optional) to shape it perfectly and smoothen the stitches.
Conclusion
You now have a beautifully airy Crochet Mesh Top! Its lightweight pattern makes it perfect for summer outings or layering over swimwear. This wearable pattern is customizable, ensuring a flattering fit for every body type, and it’s beginner-friendly while introducing valuable skills like treble crochets, increases, and shaping.
Tutor’s Suggestions
- Test the Fit Regularly: Try on the top as you work to ensure a proper fit, especially with armholes and sleeve length.
- Choose the Right Yarn: Use breathable, lightweight yarn for ultimate comfort in warm weather.
Tip:
For a neater edge on chains (such as the armholes), try crocheting tighter stitches. This gives your top a polished and professional look without sagging.


