How to Crochet Candies Keychain Pattern for Quick Results
Learn a Fun Crochet Candies Keychain Pattern for Any Occasion

The project also doubles as an excellent classroom or workshop idea, since its repetitive stitches improve hand coordination and rhythm without overwhelming learners. Sellers appreciate how easily the pattern adapts to custom color combinations or seasonal palettes, making it a profitable addition to crochet fair displays or online listings.
Lightweight pattern keeps the pieces comfortable to carry, while the dense stitches hold their shape through daily use. Whether you need an uplifting weekend project or a signature item for market tables, this cheerful pattern brings sweetness, personality, and practicality in equal measure.
Materials Needed
- Yarn:
- Green and white (Silv Gurumi brand for candy body colors).
- Six colorful yarns (for candy spots – you can choose colors based on your preference).
- Crochet Hook: Size #2 (and a thinner hook for decreases).
- Keyring.
- Fiber Filling: For stuffing the candy.
- Scissors and Pinking Shears.
- Cold Silicone Glue (Optional for sealing edges or customization).
- Needle: For sewing and hiding yarn tails.
Special Features
- Customizable Design: Use different color combinations for the body and candy spots to suit personal preferences or occasions.
- Beginner-Friendly: Simple stitches with repetitive sequences make it accessible for new crocheters.
- Lightweight and Functional: Perfect for keychains, party favors, or even selling as handmade products.
Step-by-Step Crochet Candy Pattern
Step 1: Starting the Body
- Begin with white yarn, create a slip knot, and make 16 chains.
- Chains: 1, 2, 3… 16.
- Connect the final chain to the first chain with a slip stitch to form a circle.
- Add 1 chain for height.
- In the same stitch, crochet a single crochet (SC). Continue making SCs around the circle into every chain space.
- At the end of the round, you should have 16 single crochets.
- Finish the round by closing it with a slip stitch in the first SC.

2: Adding Colored Spots
- Round 2: Chain 1 and start making SCs as before.
- On every third SC, do not close the stitch; instead, switch to another color yarn to create a “spot effect.”
- For example:
a. On the third SC, change from white to yellow yarn, and complete the stitch with the yellow yarn.
b. Work 1 spot stitch in yellow, then switch back to white to crochet the next three SCs.
- For example:
- Repeat the pattern using the following spot colors:
- Yellow → Turquoise → Orange → Green → Fuchsia → Back to Yellow.
- Continue this alternating sequence to create a candy-like spotted appearance, securing the ends of the colored yarns inside the work. Finish the round with a slip stitch in the first SC.


3: Building Thickness
- Round 3: Work 16 SCs only with white yarn.
- Finish the round with a slip stitch and chain 1.
- Round 4: Repeat the spot sequence from Round 2 using alternating colors for candy spots.
- For an extra playful look, you can change the order of colors or use different combinations.
- Round 5 (Body Plain): Crochet another round of 16 SCs in white without spots to add shape to the body.
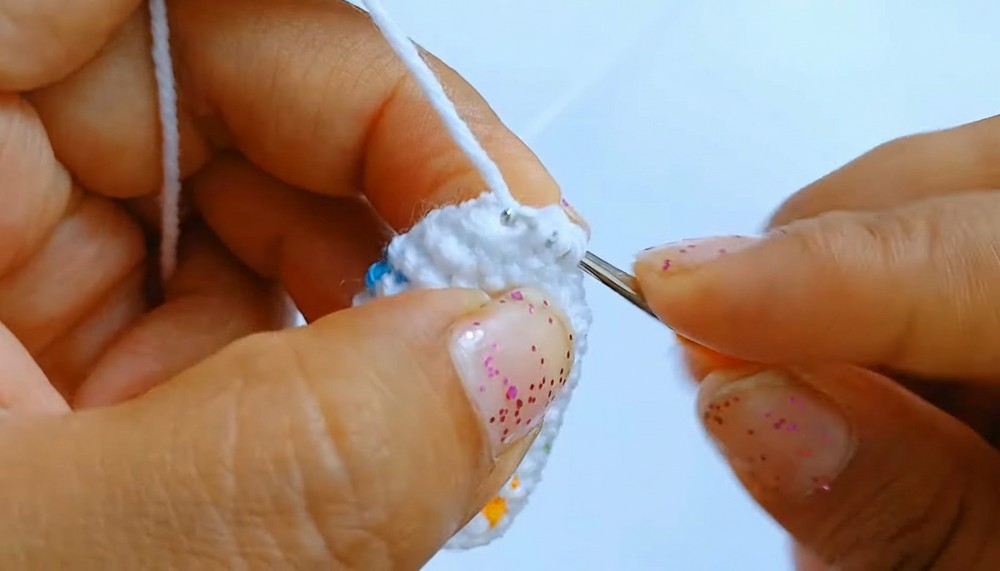
4: Closing the Body
Round 6: Begin working in decreases:
- Alternate between single crochet and decrease stitches:
- SC → Decrease (combine the next two stitches).
- Repeat this sequence five times, ending with a final SC.
- At the end of this round, you should have 11 stitches.
5: Final Shaping & Stuffing
Round 7: Work tight decreases to narrow down the candy ends:
- Use a thin hook and crochet 5 decreases (only working through the back loops for neatness).
- Complete the round with a single SC.
- At this stage, there will be 6 stitches left.
- Cut the white yarn and use a needle to weave it through the remaining 6 stitches to close the hole.
- Add fiber filling from this end and repeat the closing process on the opposite side of the candy body.

Step 6: Adding Candy Edges
- Work through the leftover loops from the candy body edges.
- Use green yarn (or any desired color) and create double crochet stitches (DC):
- Chain 3 to start.
- Crochet DCs evenly around the edge, alternating between 1 DC and DC increases (2 DCs in one stitch).
- Repeat this pattern around the edge for a total of 16 DCs.
- Use a needle to bind off the edge securely and hide remaining yarn strands. Repeat the same process for the opposite side.


Step 7: Finishing Touches
- Keyring Attachment: Use pliers to attach the candy to a keyring for functionality.
- Custom Décor: Add bows, seals, or even glue the edges to keep them closed for a more polished look.

Tutor’s Suggestions
- Difficulty Level: Beginner to Intermediate (basic stitches and easy sequences).
- Color Variation Tip: Use pastel or bright colors for spots to emphasize the candy-like playfulness.
- Event Gift Idea: These candies are ideal for party favors, birthday giveaways, or as crochet shop items.
Conclusion
This crochet candy keychain is not only visually appealing but also simple to achieve, even for beginners. Its cute and customizable pattern makes it a versatile project, whether you’re gifting it or adding it to your own collection. The colorful spots give it a fun, whimsical vibe, while the uncomplicated stitches make it accessible for crocheters of all skill levels.
Pro Tip:
To keep the yarn edges tidy, burn the ends lightly with a lighter or secure them with silicone glue. It ensures durability and keeps the keychain looking professional.