Functional Free Crochet Granny Square Bag Pattern
Step up your accessory game with this Free Crochet Granny Square Bag Pattern featuring durable design & the perfect touch of handmade beauty.
Who says functional can’t be stylish? This granny square bag isn’t just another crochet project; it’s a blend of classic pattern and everyday utility. Starting with a simple granny square base, this pattern evolves into a practical accessory that’s sturdy, spacious, and completely customizable. Whether you’re heading to the farmer’s market, packing your essentials for a day out, or gifting a loved one with something handmade, this bag pattern seamlessly fits into all lifestyles. Its durable structure ensures it can hold more than its fair share of items, while its retro-chic style adds a touch of charm to every outfit.
Free Crochet Granny Square Bag Pattern Perfect for Everyday Style

The best part is, It’s beginner-friendly and free, making it accessible for anyone ready to show off their crochet skills. The pattern lets you experiment with colors and textures, giving you endless possibilities to make it your own.
By using simple stitches and thoughtful techniques, even those new to crochet can achieve a fantastic result without feeling overwhelmed. From function to fashion, this granny square bag pattern brings beauty and practicality to your crochet repertoire. It’s the project you didn’t know you needed!

Special Features
- Design: Step-by-step instructions for a granny square base transitioning into a structured, stylish bag.
- Durability: Uses bulky yarn with a tight stitch for sturdy construction.
- Personalization: Options to adjust size, color, and strap length.
- Skill Level: Beginner to Intermediate.
Materials Needed
- Yarn: Bulky weight yarn in your chosen color.
- Hook: 4.0 mm crochet hook.
- Extras: Four stitch markers, grommets, sewing needle, scissors.
- Optional: Hammer and grommet kit for professional finishing.
Step-by-Step Pattern
Granny Square Bottom
Round 1 – Forming the Magic Ring
- Create a magic ring by wrapping yarn around your fingers to form an X. Insert your hook under the X, pull up a loop, and chain (ch) 1.
- Chain 3 (this counts as your first double crochet [dc]).
- Work 2 dc into the ring, followed by a chain 2.
- Repeat: Work 3 dc, chain 2, three more times.
- You should now have four clusters of 3 dc, forming four corners.
- Tighten the magic ring and close the round with a chain 1, followed by a half double crochet (hdc) into the top of the starting chain-3 to position you in the corner.


Rnd 2 – Expanding the Base
- Chain 3 (counts as your first dc). Work 1 dc into the same corner space.
- Crochet 3 dc into each side cluster space.
- Add 2 dc, chain 2, 2 dc in each corner to expand.
- Close the round with a chain 1 and hdc into the top of the ch-3.
- You now have 7 dc per side.
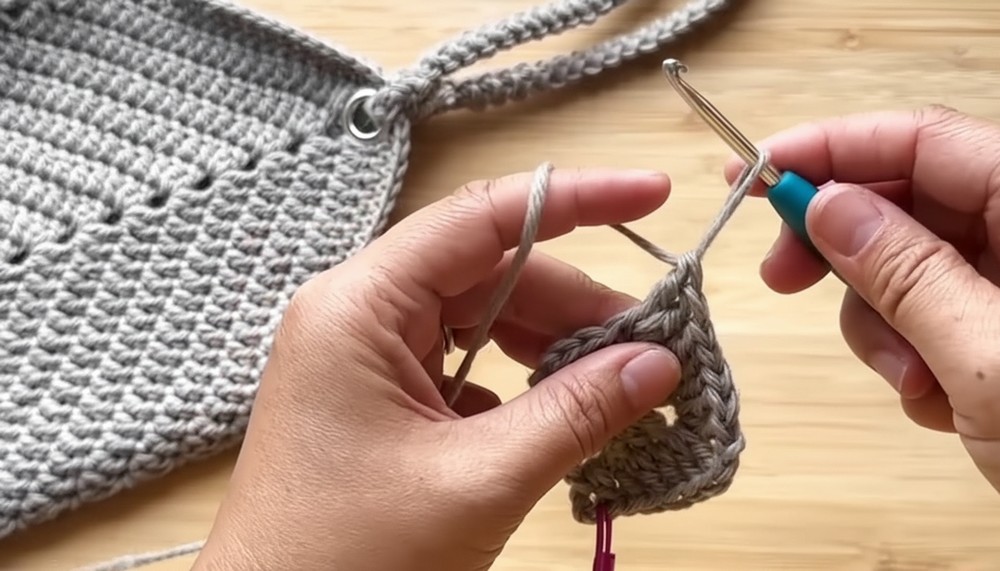
3 Round – Pattern Continuation
- Begin with a chain 3 and 1 dc into the corner.
- Work all dc stitches across the side, making 2 dc + ch 2 + 2 dc in each corner.
- Continue the pattern, progressing in the same manner, adding stitches to each side with each round.
- Repeat until you have 9 rounds, or until the desired size is achieved (approximately 10 in x 9.75 in or 25 cm wide).

Bag Shape and Body Formation
Mark the Center Points
- Use stitch markers to mark the center of each side. Count your stitches evenly from the middle.
Rnd 10 Onwards – Shaping the Bag
- Begin as usual with 2 dc in each corner and the usual side stitches.
- When you reach the center marker, stop one stitch before it.
- Skip 3 stitches (including the center stitch) and continue crocheting along the side.
Round 11+ – Decreasing Rows
- To decrease, identify the center and stop 2 stitches before it.
- Work a decrease by turning 2 stitches into 1:
- Yarn over, insert hook in the first stitch, pull up a loop, yarn over, pull through 2 loops. Repeat for the next stitch. Yarn over, pull through all 3 loops.
- Skip the center stitches entirely and repeat the decrease on the other side.
- Continue this pattern across all four sides to create a structured shape, decreasing 4 stitches per round.

Final Body Dimensions
- After 13 rounds, the height of the bag will measure approximately 9 in (23 cm), with peak height at 12 in (31 cm).

Single Crochet Rounds for Finishing
- Add 2 rows of single crochet (sc) to smoothen the edges.
- At the bag’s valleys (areas formed due to decreases), crochet 2 stitches together to maintain tension and consistency.
Adding Grommets
- Select the peaks for grommet placement (3 out of 4 bag peaks).
- Use a grommet kit to attach:
- Insert the long-neck piece of the grommet through the fabric.
- Cover with the flat piece, align with the tool, and hammer firmly.

Creating the Straps
- Chain 2 to start.
- Insert hook into the first chain, pull up a loop, yarn over, and complete a single crochet (sc).
- Rotate work, insert hook under both side loops, pull up a loop, and complete another sc.
- Continue working in this cording technique until straps measure 26 in (66 cm) or your desired length.
Attaching the Straps
- Thread each strap through the grommets from the outside to the inside.
- Secure with a tight knot and sew the ends in for added stability.

Finished Bag Dimensions
- Final height: 9 in (23 cm).
- Strap length: 26 in (66 cm).
Tutor’s Tips
- Use a 4 mm hook even with bulky yarn for a tighter, stronger stitch.
- Be patient with decreases; consistent tension ensures a smooth and professional finish.
- Grommets elevate the bag’s look but require careful placement and a sturdy surface for hammering.
Uses
- Everyday use: A sturdy, fashionable tote for groceries, books, or essentials.
- A thoughtful, handmade gift perfect for friends and family.
- Beginner-friendly project to build skills in bag-making and grommet attachment.
Conclusion
This sturdy and stylish granny square bag pattern is a versatile and rewarding project. Combining creativity with practicality, you’ll end up with a durable accessory that stands out. Whether for personal use or creating a heartfelt gift, this pattern is a must-have in any crocheter’s collection.
Final Tip:
For a professional look, block your granny square base before shaping the bag. It ensures exact dimensions and a polished finish!