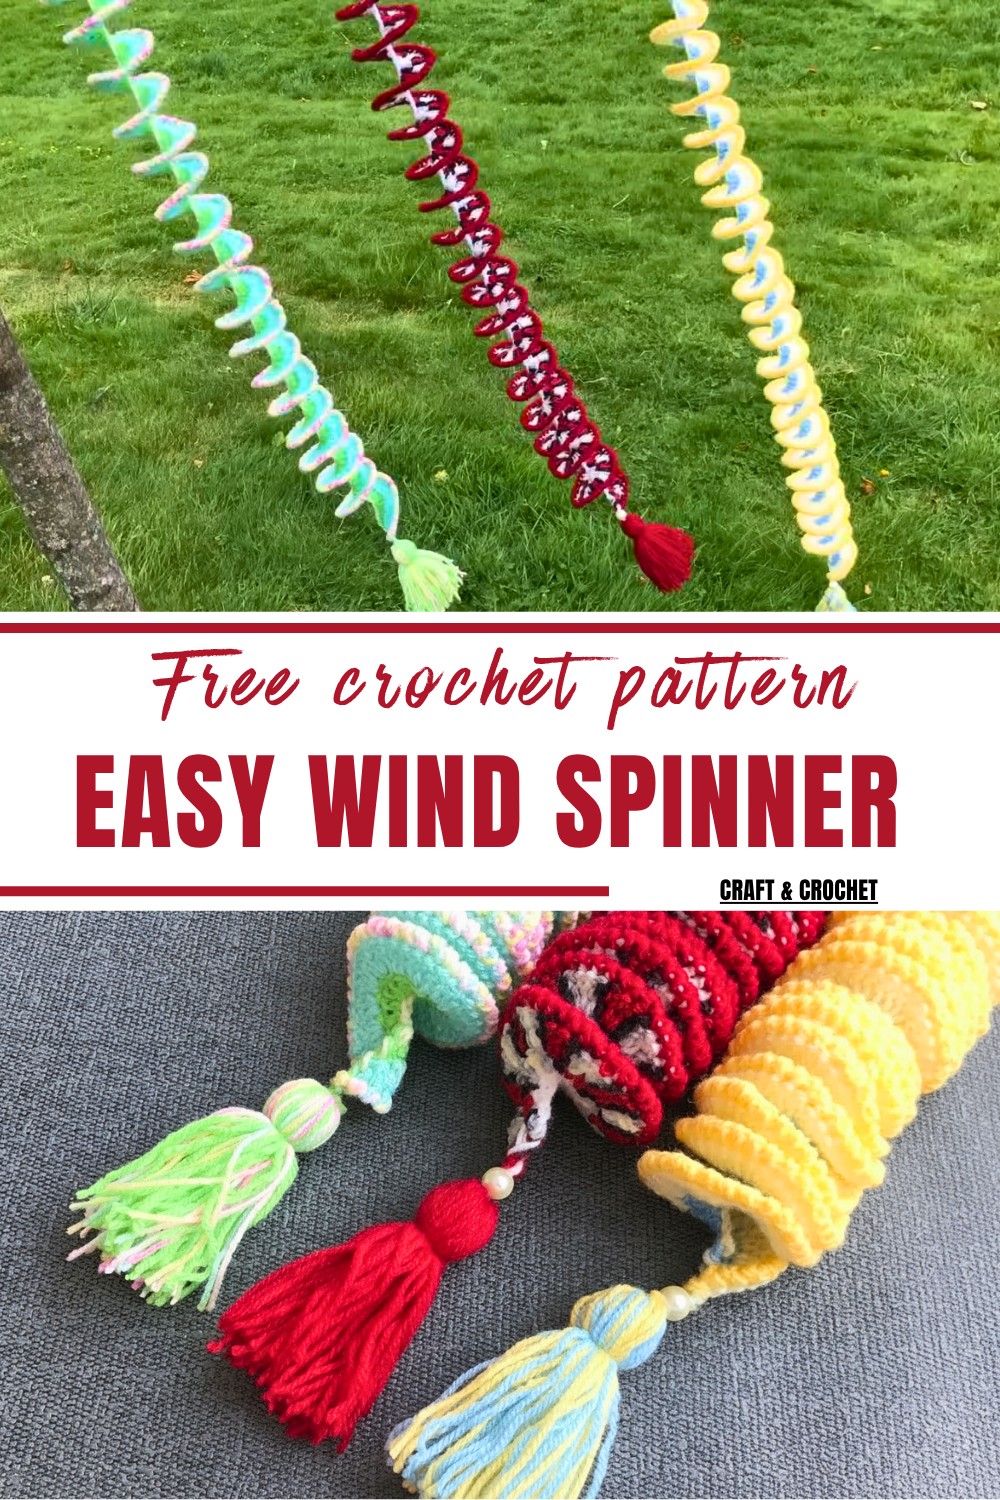
Easy Crochet Wind Spinner Pattern to Brighten Your Home
Twirl into fun with this free crochet wind spinner pattern, perfect for adding a splash of color and motion to your home or garden décor.
Who says home décor has to sit still? With a crochet wind spinner, you can add a pop of movement and color to any space, indoors or out. Designed to elegantly twist and twirl with even the slightest breeze, this artistic pattern combines simplicity and charm. Using just a few basic stitches, you’ll crochet a spiral that seems to flow effortlessly, making it a perfect project for beginners and experienced crocheters alike. Hang it on your porch to let it dance in the wind, or brighten up an indoor corner for a fun, playful accent. Its versatility also makes it a practical choice for gifts, party decor, or even minimalist art.
Free Crochet Wind Spinner Pattern You’ll Love to Try Today
Beyond its visual appeal, this project is a stress-free way to unwind while turning spare bits of yarn into something extraordinary. With just a hook and a bit of colorful yarn, you’ll have a hanging centerpiece that’s guaranteed to catch the eye and bring joy with every spin.

Level of Difficulty: Beginner-friendly
Special Features:
- Made using three colors of yarn for a vibrant and cheerful design.
- Customizable with chain sizes for small or large wind spinners.
- Great for home décor, parties, or as a delightful handmade gift.
Materials Needed
- Yarn: Three colors of double-knitting yarn.
- Hook Size: 4mm crochet hook.
- Additional Supplies: Scissors and a needle for trimming and hiding yarn tails.
Step 1: Foundation Chain
- Leave a small tail of yarn to begin with.
- Slip Knot: Make a slip knot on your hook.
- Chain 100 (or 110): Create a foundation chain of 100 chains. If you prefer a smaller wind spinner, you can chain 75 instead.
- Note: For a 100-chain spinner, the size will be approx. 65 cm when flat and 80 cm when completed.
- Once the chain is complete: Cut the yarn slightly longer and tie it securely.
2: First Row (Base of the Spinner)
- Attach your first color of yarn (e.g., blue) to the first chain.
- Begin with Chain 3: This counts as the first double crochet (DC).
- Two DC per Chain: In the same chain, make one more DC, and repeat along the entire chain.
- Tip: Ensure that you make two double crochets (DC) into each chain to create the base spiral effect.
- Once you finish the row, there should be a total of 200 double crochets (for a 100-chain foundation).
- Trim the yarn slightly longer and tie it off securely.
- The first row will now look like a slightly coiled spiral.

3: Second Row (Adding Volume)
- Take your second color of yarn (e.g., light yellow) and attach it to the first double crochet of the first row.
- Begin with Chain 3: Again, this counts as the first DC of the row.
- Three DC per Space: In the same double crochet space, make two more DC. Then, move to the next DC and make 3 DC in that space.
- Repeat this pattern for the entire row.
- Note: In this row, you will be working three DC into each previous DC space to expand the spiral further.
- Once done, you will have approximately 600 double crochets.
- Trim the yarn slightly longer and tie it off securely.

4: Third Row (Finishing Touches)
- For the final row, use your third color of yarn (e.g., dark yellow).
- Start with Chain 1: This ensures a seamless transition for single crochet (SC) stitches.
- Backward SC Stitch:
- Work one SC into each double crochet from the previous row, but in reverse.
- To work backward: Insert the hook into the previous DC, pull up a loop, and then yarn over to complete the stitch.
- This creates a neat and decorative edge.
- Continue this pattern until the row is complete.
- Trim the yarn, tie it securely, and use a needle to hide the yarn ends.


5: Adding a Pom-Pom (Optional)
- Use two yarn colors (e.g., blue and dark yellow) to match your spinner’s design.
- Wrap the yarn around four fingers approximately 25 times for two colors (or 50 times for a single color).
- Slide the yarn off your fingers and tie it tightly in the center using yarn tails.
- Cut the loops evenly to create a pom-pom and trim as needed for a round shape.
- Attach the pom-pom to the bottom of the wind spinner.

Final Adjustments
- To shape the spiral, stretch it gently from top to bottom while rotating. This will create the perfect coiled look. You can use a bead at the top to secure if desired.

Tutor’s Suggestions
- You can experiment with different lengths of chains (e.g., 75, 100, or 110) for various spinner sizes.
- Consider using gradient or multi-colored yarn for a more stunning effect with fewer color changes.
- This pattern is easy to customize for holidays, events, or personalized home décor.
Conclusion
Your crochet wind spinner is now complete! This vibrant and decorative piece is not only easy to create but also customizable to suit any occasion. Use it to brighten your home and gift it to a friend.
Bonus Tip
To prevent yarn tangling while working with multiple colors, wind small separate balls of each color before starting. This keeps your workspace organized and prevents frustration.