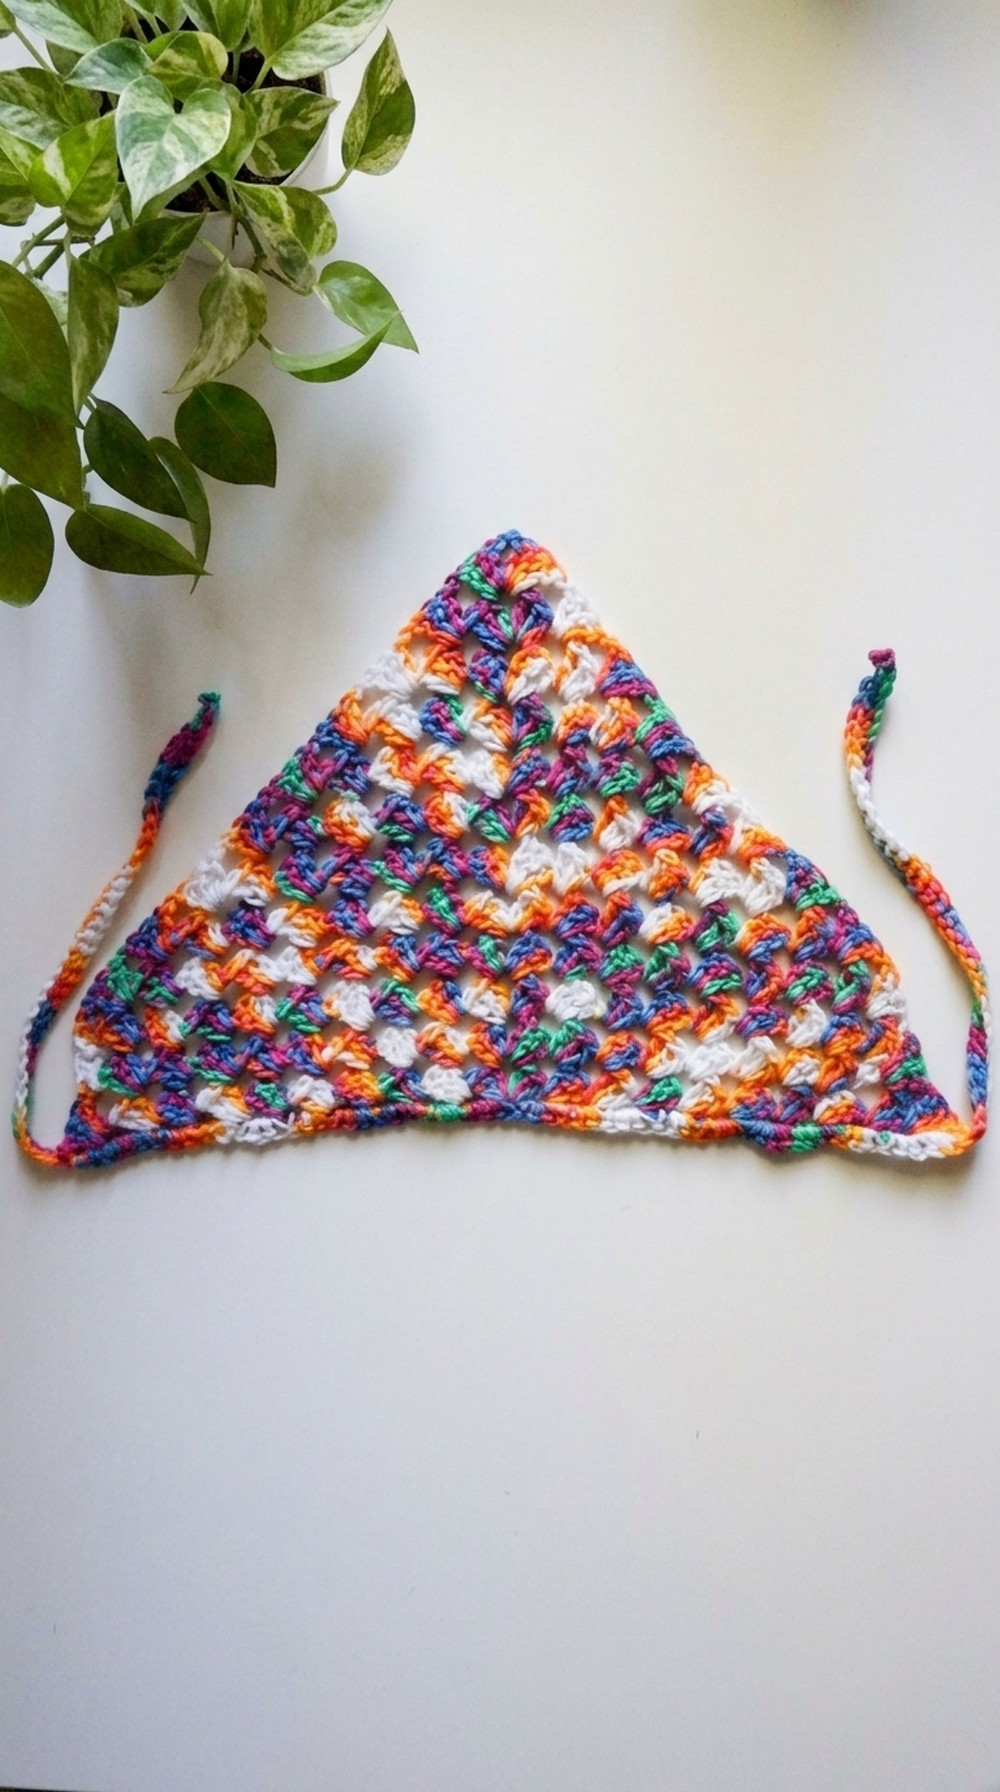
Crochet Granny Square Bandana Pattern You’ll Absolutely Love
Learn this trendy Free Crochet Granny Square Bandana Pattern to crochet versatile, beginner-friendly headscarves with ease and creativity.
Crocheting has long been a relaxing pastime, bringing both creativity and practicality. The granny square bandana pattern is a fresh twist on lasting crochet techniques, offering a stylish yet functional accessory perfect for any wardrobe. Whether worn as a hairband, neck scarf, or chic accessory, this lightweight pattern is adaptable to various styles and occasions. What makes it stand out is not just its simplicity but its versatility, adjust the size, colors, and straps to suit individual preferences.
Free Crochet Granny Square Bandana Pattern Try for All Skill Levels

This pattern is beginner-friendly, quick to work up, and ideal for using leftover yarn from previous projects. The triangular pattern offers a modern take on the classic granny square motif, providing an easy-to-follow format that can be customized for personal style. Practical yet fashionable, this bandana pattern is perfect for keeping hair out of your face during warm days or adding flair to cool-weather outfits.
Beyond its function, crocheting the bandana helps with relaxation and focus while offering a rewarding experience. With the perfect balance of simplicity and charm, this project is not only fun to work on but also a beautiful, handmade accessory that can complement your everyday look with ease and individuality.
Skill Level:
- Beginner-friendly
- Ideal for those familiar with basic stitches (magic ring, double crochet, chain, single crochet) but detailed enough for true beginners to follow with some practice.
Special Features:
- Worked up quickly in just 30 minutes to an hour for most crafters.
- Customizable for size and color.
- Uses only basic crochet stitches.
- Features an integrated strap design, eliminating multiple yarn ends to weave in.
Supplies Needed:
- Yarn:
- “I Love This Yarn” or any medium-weight yarn (#4), though lighter-weight yarn is recommended for a less stiff, more flexible drape.
- You’ll need less than a skein for this project.
- Hook:
- 5 mm Crochet Hook. For a tighter fabric, go down a hook size; for a looser fabric, go up a hook size.
- Darning Needle: Ideal for weaving in ends.
- Scissors: For cutting yarn tails.
The Pattern
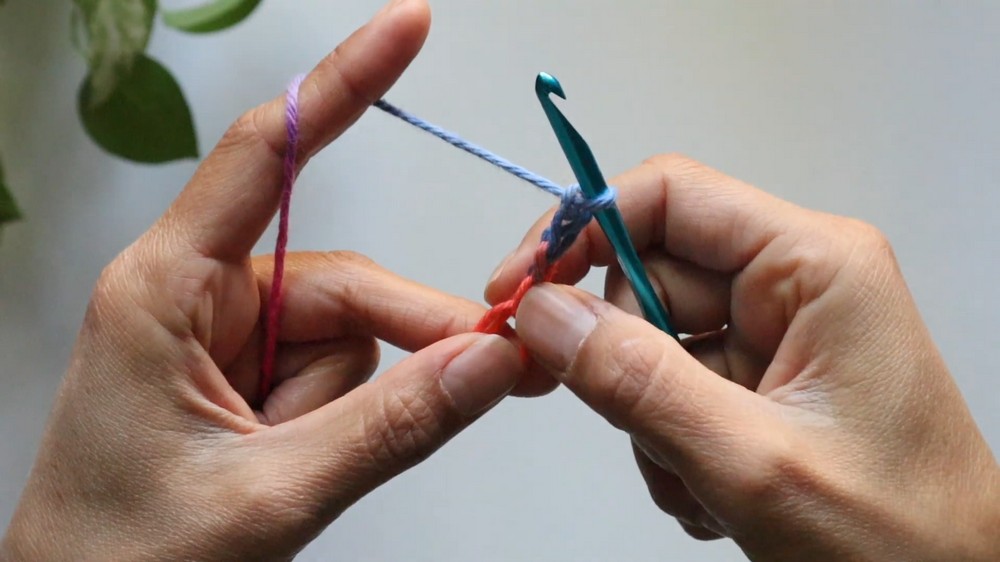
Step 1: Start with the Magic Ring
- Position the yarn and create a ring:
- Hold the yarn tail facing you with your hand upward. Wrap the working yarn around your fingers to form an X shape.
- Insert the hook and create a chain:
- Insert the hook under the first loop and grab the second loop. Pull through and twist your hook upward.
- Grab the working yarn with your hook and pull it through to form a chain 1, securing your magic ring.
- Adjust the ring:
- Pull the yarn tail lightly to adjust the size of the magic ring.
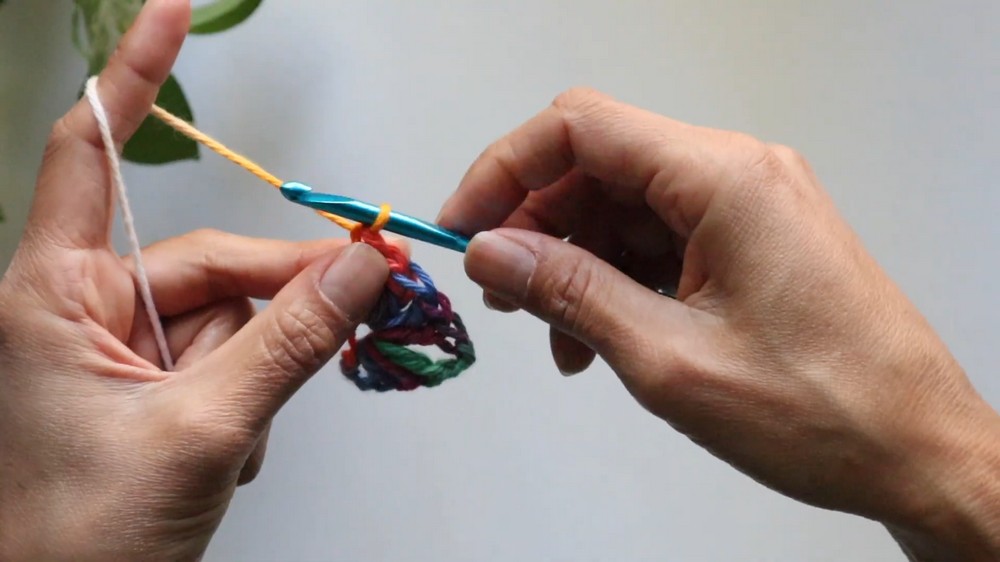
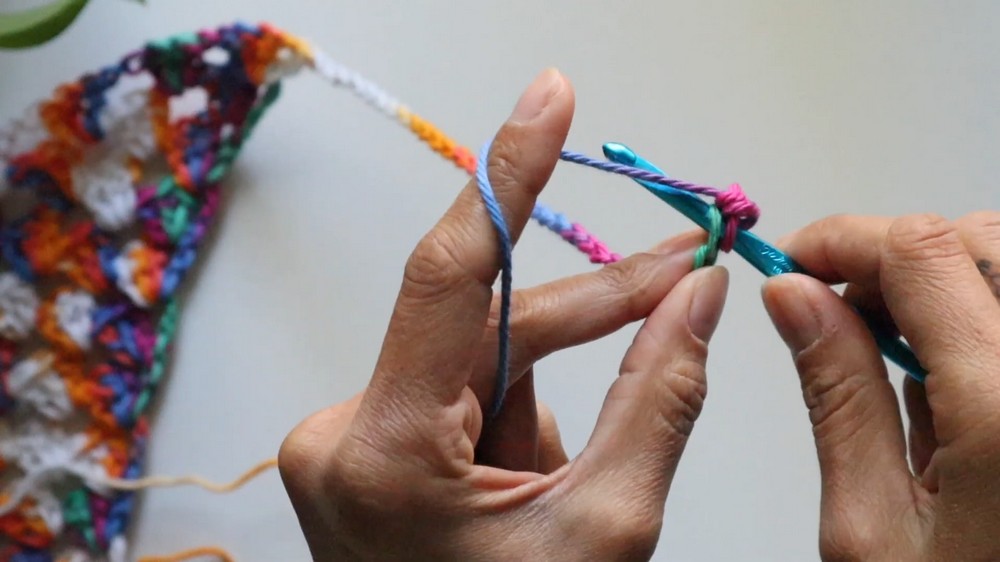
2: Create the First Row of the Triangle
- Chain 4:
- This acts as your first double crochet plus chain space.
- Make a Cluster of 3 Double Crochet (DC):
- Yarn over, insert your hook into the magic ring, yarn over again, and pull through (you should have 3 loops on your hook).
- Yarn over, pull through 2 loops. Yarn over again, and pull through the last 2 loops.
- Repeat this 2 more times into the magic ring to make a cluster of 3 DC.
- Chain 2:
- This forms the corner of your triangle.
- Make Another 3 DC Cluster:
- Into the magic ring, make another cluster of 3 DC.
- Chain 1 and Double Crochet:
- Chain 1 and work 1 additional DC into the magic ring to mirror the other side.
- Adjust the tension by pulling the yarn tail on your magic ring to close the center circle.
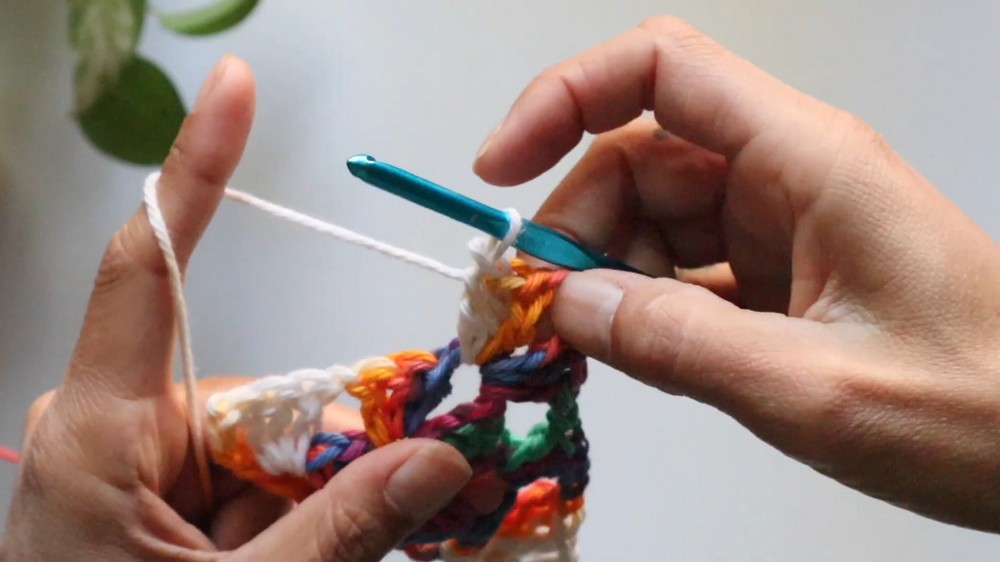
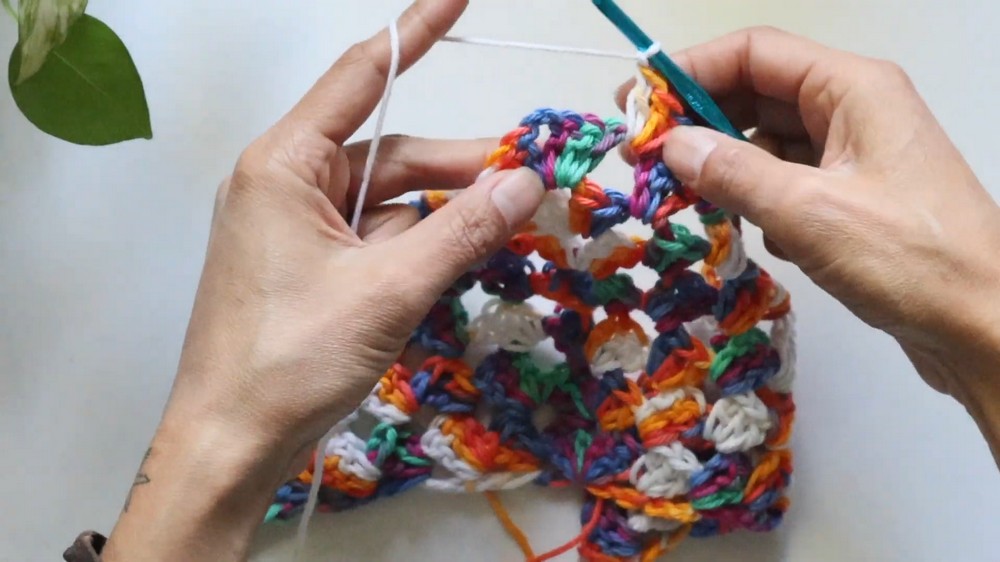
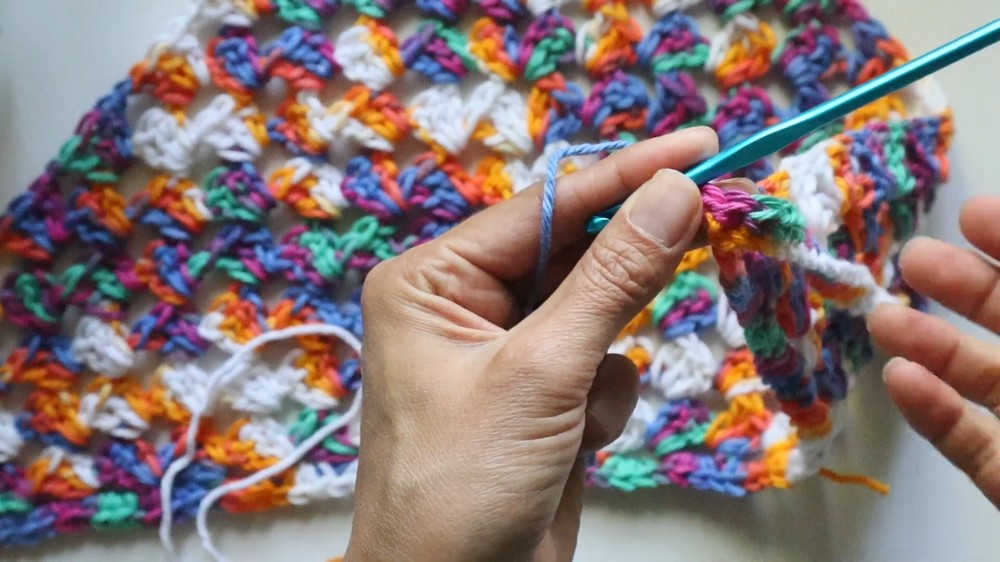
3: Build the Triangle in Rounds
- Chain 4, Turn Work:
- Chain 4 at the end of the row and turn your work to begin the next round.
- Work into the Open Spaces:
- In each space across the triangle’s edge, create clusters of 3 DC. Between clusters, chain 1.
- Corner Spaces:
In the top corner space of the triangle:- Work 3 DC, chain 2, 3 DC into the same space to retain the triangular shape.
- Continue Along the Edges:
- Make clusters of 3 DC with chain 1 in between each cluster along the edges.
- At the end of each row, repeat chain 4, turn your work, and begin the next row.
- Repeat Steps:
- Continue working in this pattern of 3 DC clusters, increasing the triangle size until you reach the desired number of rows or triangle size.
4: Add the Straps
- Create the First Strap:
- Begin on one of the triangle’s bottom corners.
- Chain 35 (or adjust for your desired strap length).
- Single Crochet Down the Chain:
- Insert your hook into the 2nd chain from the hook and work single crochets (SC) all the way back down the chain.
- Continue Along the Triangle’s Bottom Edge:
- Work 3 single crochets into each space along the bottom edge of the triangle to give it a clean, polished look.
- Create the Second Strap:
- Once you reach the opposite bottom corner, chain 35 (or match your first strap’s length) and repeat the single crochet steps.
- Fasten Off:
- After finishing the second strap, slip stitch to the base of the triangle and fasten off the yarn.
5: Weave in Ends
- Using the darning needle, weave in all loose yarn ends. For best results:
- Weave in the tail in multiple directions to secure.
- Snip the excess yarn carefully.
Tutor’s Suggestions:
- Yarn Choice Matters: Using a softer, thinner yarn creates a more flexible piece for better drape and comfort. Avoid stiff yarns for this project.
- Experimentation: Feel free to try different color combinations or variegated yarns for a gradient effect.
- Custom Sizing: Create larger triangles for neckerchiefs or smaller ones for baby accessories.
Uses
- Wear as a stylish headband or headscarf.
- Use it as a decorative neck accessory or tie it around the handle of a bag for a boho look.
- Perfect handmade gifts for friends and family.
Tip for Success:
To ensure your edges are neat and straight, keep consistent tension while chaining and working your stitches.
Conclusion:
Congratulations! You’ve just completed your very own Granny Square Bandana. This project is a fantastic way to hone your crochet skills while crocheting something stylish and practical. Whether you’re a beginner or an experienced crocheter, this pattern is a delightful addition to your collection.