Crochet Cosmetic Pouch With ZIP Pattern for Stylish Organization
Enhance everyday convenience with this Free Crochet Cosmetic Pouch With ZIP Pattern featuring durability, elegance, and easy customization.
Begin your next crochet adventure with a stylish solution for your everyday essentials. This zippered pouch pattern brings together function and flair, offering the perfect storage option for cosmetics, small accessories, or travel necessities. Its design balances practicality and personality, featuring a textured crochet pattern that stands out while remaining easy to customize. With a secure zipper closure and the option to add a lining for extra durability, this pattern is built to keep your items organized and protected.
Free Crochet Cosmetic Pouch With ZIP Pattern for Everyday Needs
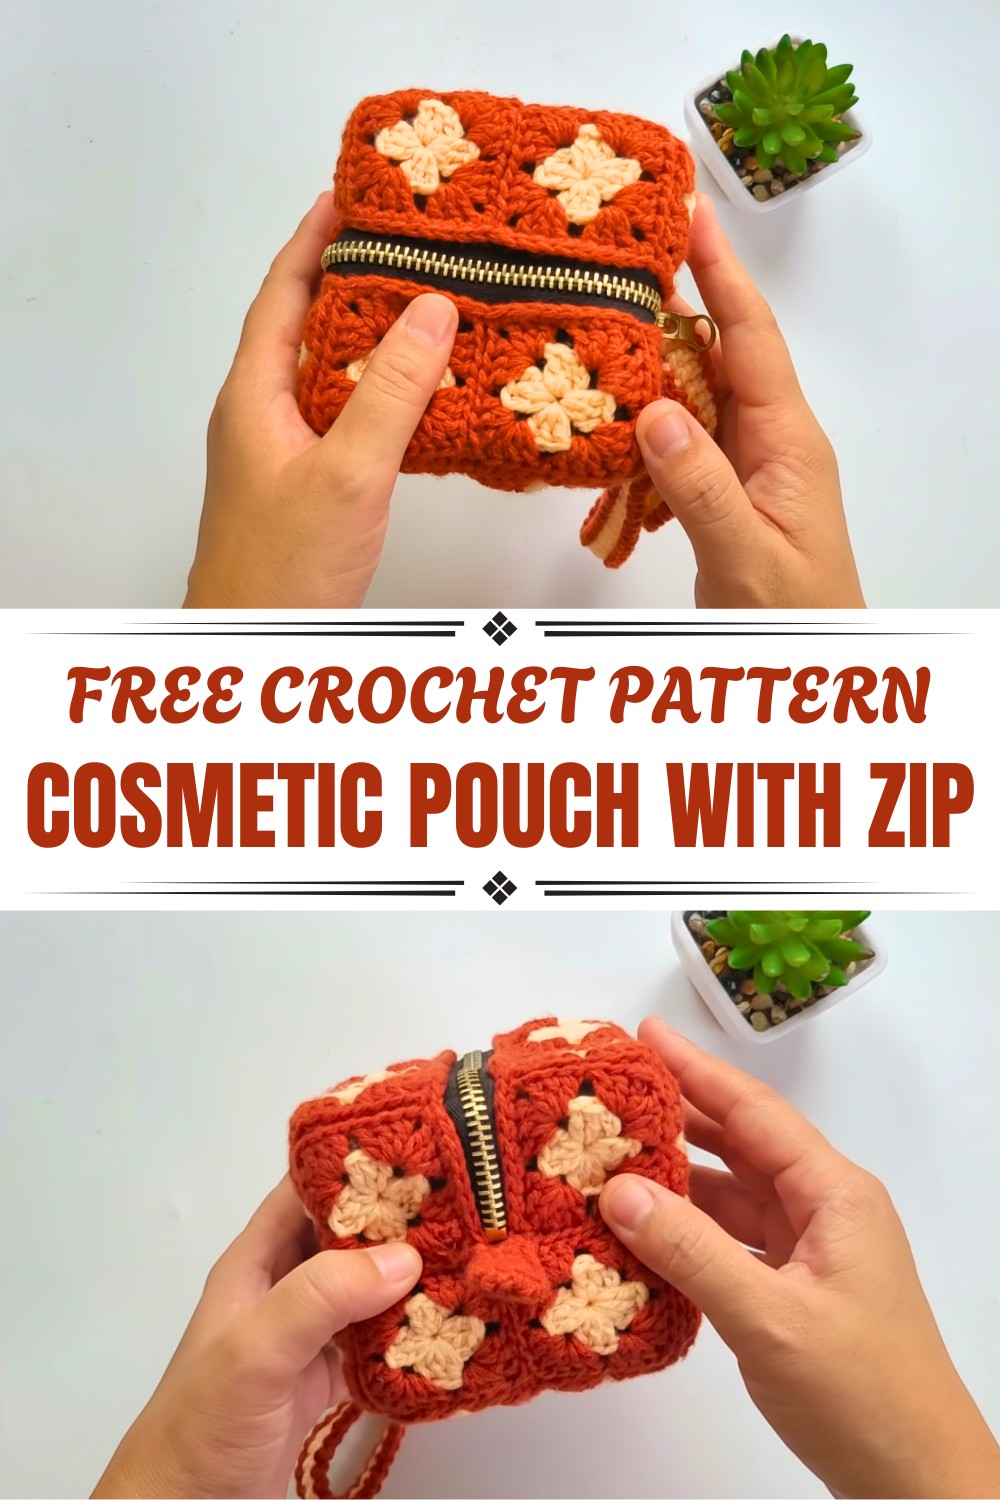
Choose your favorite color combinations to match your style or gift it to loved ones—this classic pattern is as versatile as it is charming. Whether you need a compact travel organizer or an elegant everyday accessory, this pattern offers endless possibilities. Ideal for beginners, the pattern is straightforward, yet the outcome is undeniably chic.
Plus, its lightweight pattern makes it easy to carry wherever life takes you. With the added benefit of being reusable and eco-friendly, you can feel good knowing this handmade pattern also supports sustainable living. Perfect for anyone looking to combine style with utility, this free crochet pattern is your gateway to practical handmade beauty. So grab your materials and enjoy the satisfaction of completing a delightful, functional piece.

Special Features
- Cube Shape: Made with 24 mini granny squares for a structured design.
- Zipper Enclosure: Keeps items secure and adds a professional touch.
- Lining: Uses felt fabric for structure and durability (optional but recommended).
- Versatile Design: Can be customized in size, color, and strap style.
Level of Difficulty
Beginner to Intermediate: Basic crochet techniques are used, such as granny squares and slip stitches. The sewing for the zipper and lining may provide a slight challenge for beginners, but is manageable with patience.
Materials Needed:
- Yarn: 4-ply yarn (DK weight), two colors. Pattern used Terracotta (Rusty Brown) and Peach.
- Crochet Hook: 3.25 mm.
- Zipper: 10 to 12 inches (adjust based on zipper area).
- Felt Cloth: For lining (cut to size for a snug fit).
- Sewing Needle and Thread: For attaching the zipper and lining.
- D-Ring: For the wrist strap attachment.
- Optional: Scissors and pins for securing materials.
Step-by-Step Instructions
Step 1: Crochet Mini Granny Squares
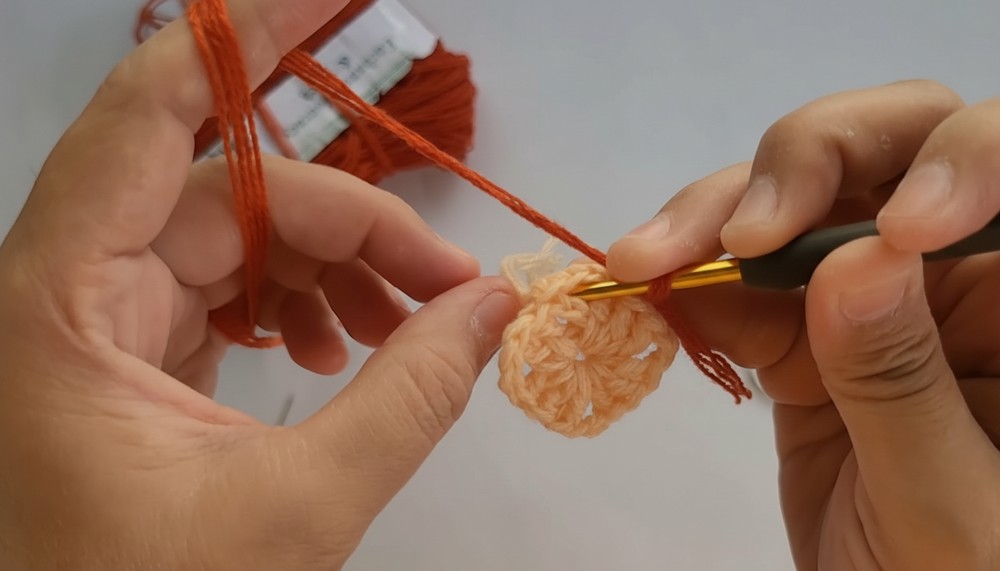
- Start with a slip knot:
- Wrap the yarn around your finger. Insert the hook, grab the yarn, and pull through to create a slip knot.
- Create a foundation chain:
- Chain 4 and join into a ring by inserting the hook into the first chain and slip stitching to form a circle.
- Round 1 (Start the Mini Granny Square):
- Chain 3 (counts as 1 double crochet).
- Work 2 more double crochets into the ring.
- Chain 2 for the corner, then repeat the sequence (3 double crochets, chain 2) until you have 4 groups of 3 double crochets.
- Close the round with a slip stitch on top of the starting chain 3.
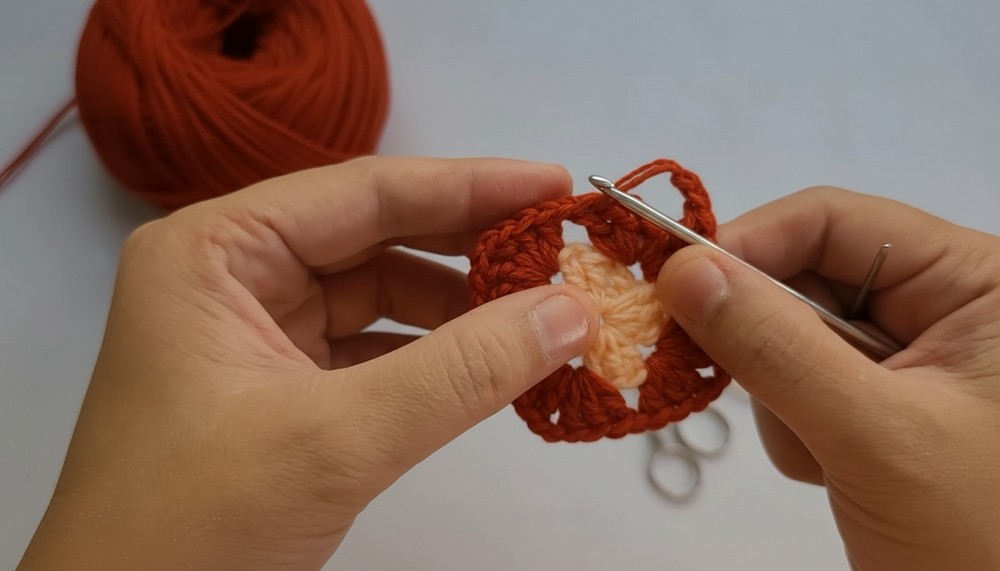
- Round 2 (Form the Corners):
- Chain 3 (counts as 1 double crochet), work 2 more double crochets into a corner space.
- Chain 2, work another set of 3 double crochets into the same corner space.
- For the next corner, chain 1, then repeat the same pattern in each corner space: 3 double crochets, chain 2, 3 double crochets. Chain 1 between each corner section.
- Slip stitch into the top of the starting chain to close the round.
- Finish and Fasten Off:
- Cut the yarn (3-4 inch tail) and weave in the ends using a yarn needle for a polished look.
- Repeat steps 1-5 for a total of 24 mini granny squares.

2: Joining Granny Squares
- Lay Out the Squares:
Arrange your squares into a cross shape. This will allow you to join three sides to form the cube’s sides and base. - Joining with Slip Stitches:
- Align two squares with their front sides facing inward.
- Insert the hook into the outer loops of the edge stitches of both squares. Work slip stitches along the edge to join them.
- Continue this method to join 4 sets of pairs for one side. Repeat for all cube sides.
- Final Assembly:
- Once you’ve made two cube halves, join them together using slip stitches along the edges.
- Leave one side open for the zipper area.


3: Adding the Zipper and Lining (Optional but Recommended)
- Prepare the Zipper:
- Use a zipper at least 10 inches long. Trim it to fit the opening of the cube if needed.
- Sew the Zipper:
- Pin the zipper in place along the inner edge of the open side.
- Use a sewing needle and thread to hand-stitch the zipper securely to the crochet fabric.
- Create the Lining:
- Cut felt cloth to match the cube’s dimensions. Use the finished cube as a size guide.
- Sew the edges of the felt to create a cube-shaped lining.
- Insert the lining into the crochet cube and hand sew to attach it around the zipper area.
4: Adding the Strap and Finishing Touches
- Attach a Wrist Strap:
Use a D-ring and crochet or sew a wrist strap for easy carrying. - Add a Loop for the Zipper:
Optional but helpful for pulling the zipper. Crochet or attach a fabric loop opposite the wrist strap.
Tutor’s Suggestions
- If you prefer a stiffer bag, always include a felt lining. Without the lining, the bag will be softer and lack structure.
- Experiment with the number of granny squares to create a longer or shorter pouch.
Uses
- Perfect as a cosmetic purse, event bag, or unique gift.
- Its small size and cube shape make it ideal for carrying small, everyday items with style.
Conclusion
Congratulations! You’ve completed your beautiful crochet Box Purse with Mini Granny Squares. This eye-catching accessory is not only stylish but also practical. Have fun customizing it with different colors or embellishments to match your style.
Bonus Tip
To ensure your granny squares align perfectly, block them before assembling the bag. This will make the squares lie flat and create neater joins.