
Stylish Crochet Newborn Baby Hat Pattern for Cute & Cozy Results
Find warmth and charm in this Free Crochet Newborn Baby Hat Pattern, designed for delicate little heads with beginner-friendly instructions.
There’s something truly special about crocheting a tiny treasure for the littlest members of our world. A soft, handmade newborn baby hat pattern not only keeps delicate newborn heads warm but also carries a touch of love and care that no store-bought item can replicate. This adorable pattern is the perfect blend of style and comfort, designed specifically for newborns and premature babies. With its gentle stretch and snug fit, it’s both practical and heartwarming, a thoughtful addition to any baby’s wardrobe.
Learn Free Crochet Newborn Baby Hat Pattern for Charming Handmade Gifts
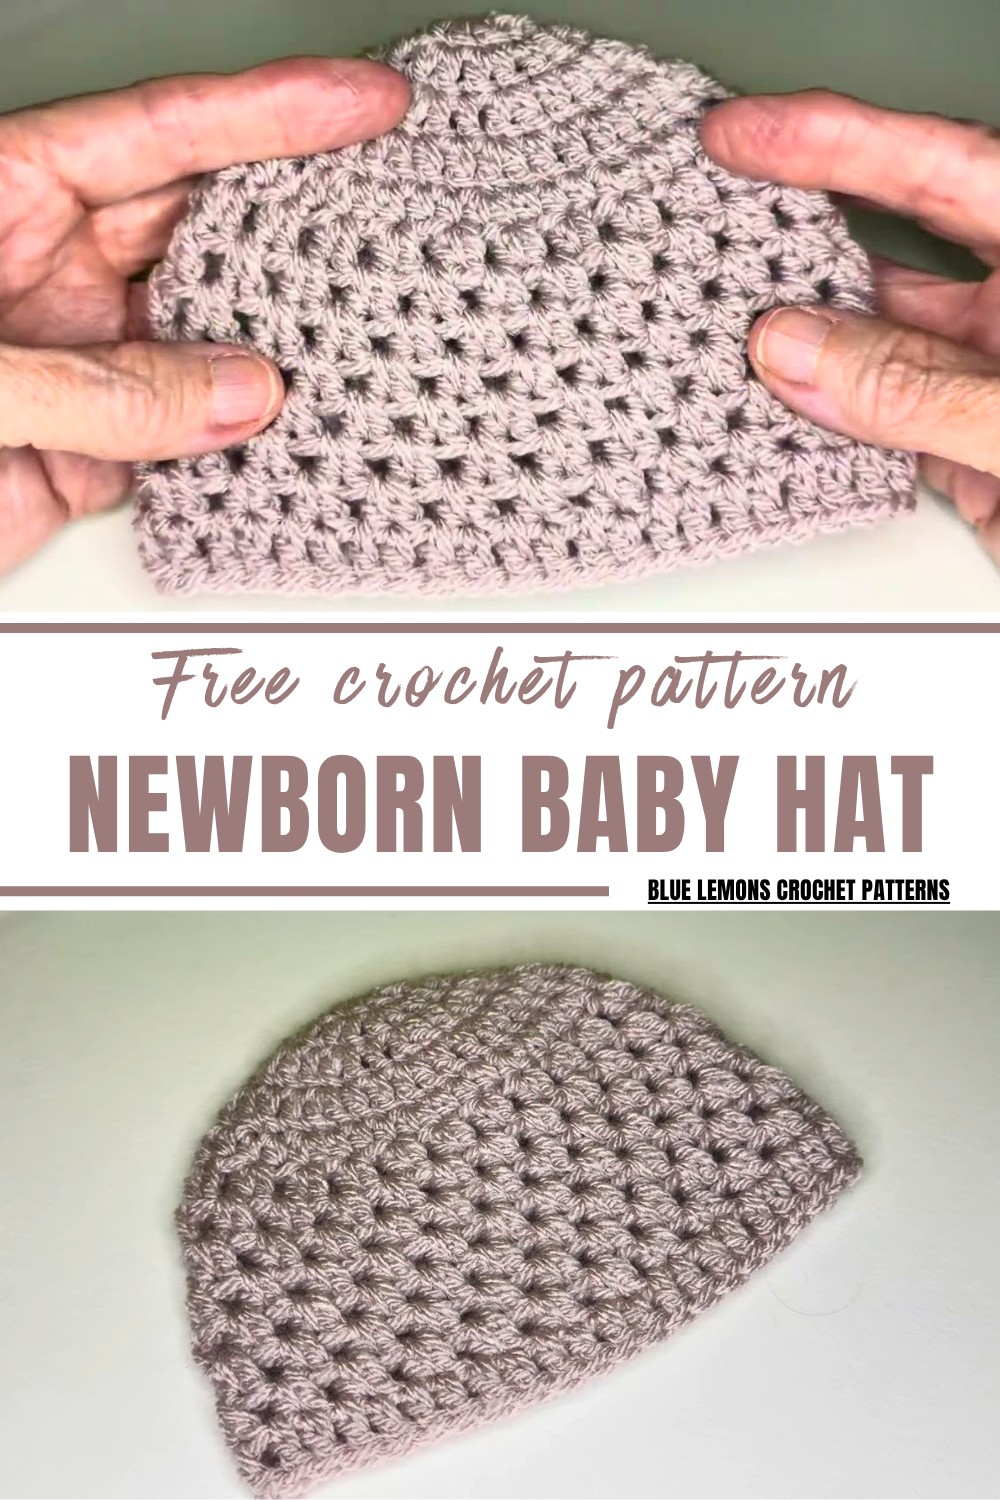
This beginner-friendly project is quick to complete, requiring only a small amount of yarn, yet the results are stunningly rewarding. Whether you’re gifting it to a new parent, donating to a NICU, or preparing your own little one’s first wardrobe, the benefits are endless.
The newborn baby hat pattern offers customization opportunities, letting you personalize each hat with different colors or special details. Its simplicity and lasting pattern make it suitable for casual wear, photo shoots, or even a cherished keepsake. It’s a small gesture with a lasting impact, stitched with love in every thread.

Special Features
- Two sizes: Premature and newborn
- Pretty texture: Formed by alternating half double crochet (hdc) and double crochet (dc) “mini clusters”
- Gentle stretch: Comfortable on baby’s head, not tight
- Top-down crochet: Easy to check size as you go
- Simple stitches: Ideal for confident beginners and up
Difficulty Level
Confident Beginner / Easy
You should know how to:
- Make a slip knot
- Chain (ch)
- Work single crochet (sc), half double crochet (hdc), and double crochet (dc)
- Slip stitch (sl st) to join rounds
Materials
- Yarn: Double knit (DK), weight 3 yarn
- Hook: 3.5 mm crochet hook
- Notions:
- Scissors
- Yarn/tapestry needle (blunt) for weaving in ends
- Measuring tape or ruler
Gauge / Measurements (Approx.)
- Preemie crown diameter after Round 4: ~8.5 cm / 3.5 in
- Newborn crown diameter after Round 5: Just under 10 cm / 4 in
- Finished height (newborn): About 11–11.5 cm (with natural stretch)
Abbreviations (US Terms)
- ch – chain
- sl st – slip stitch
- sc – single crochet
- hdc – half double crochet
- dc – double crochet
- st(s) – stitch(es)
- rep – repeat
All rounds are worked in joined rounds, not continuous spirals.
Pattern Notes
- The starting chain at the beginning of the round does not count as a stitch unless otherwise stated.
- Always join with a sl st into the top of the first actual stitch of the round, not into the starting chain.
- For the preemie size, stop crown increases after Round 4, then go straight into the textured sides.
- For the newborn size, work Round 5 (hdc increase round) before starting the sides.
Pattern: Crown (Top of Hat)
Round 1
- Make a slip knot (so the tail tightens the knot and the working yarn loosens it).
- Ch 3.
- Work 9 dc into the 3rd ch from the hook (this is the first chain you made).
- Join to the top of the first dc with a sl st, ignoring the starting chains.
- Gently pull the starting tail to close the center hole.

Stitch count: 9 dc
Round 2
- Ch 2 (does not count as a st).
- Work 2 dc in the first st at the base of the ch-2.
- Work 2 dc in each st around.
- Join with a sl st to the top of the first dc, ignoring the ch-2.

Stitch count: 18 dc
Round 3
- Ch 2 (does not count as a st).
- In the first st at the base of the ch-2, work 2 dc.
- In the next st, work 1 dc.
- Repeat around:
- 2 dc in next st, 1 dc in next st
- At the end, your last st should be 2 dc in the final st (after having done 1 dc in the previous st).
- Join with a sl st to the top of the first dc, ignoring the ch-2.
Stitch count: 26 dc
Round 4 (Preemie crown size completed here)
- Ch 2 (does not count as a st).
- In the first st at the base of the ch-2, work 2 dc.
- Work 1 dc in each of the next 2 sts.
- Repeat around:
- 2 dc in next st, 1 dc in each of the next 2 sts (this is “2,1,1”).
- At the end, you will finish with 2 dc in one st and 1 dc in the final st.
- Join with a sl st to the top of the first dc.

Stitch count: 35 dc
At this point, the circle measures about 8.5 cm / 3.5 in, suitable as the crown size for a premature baby.
- For Preemie Size: Skip to “Sides of the Hat – Textured Pattern” (do NOT work Round 5).
- For Newborn Size: Continue to Round 5.
Round 5 (Newborn only – hdc increase round)
- Ch 1 (does not count as a st).
- Work 2 hdc in the first st.
- Work 1 hdc in each of the next 3 sts.
- Repeat around:
- 2 hdc in next st, 1 hdc in each of the next 3 sts (this is “2,1,1,1”).
- At the end, you’ll have just 2 sts left:
- Work 2 hdc in the first of those and 1 hdc in each of the last 2 sts.
- Join with a sl st to the top of the first hdc.

Stitch count: 44 hdc
Now your crown measures just under 10 cm / 4 in, the correct size for a newborn.
Sides of the Hat – Textured Pattern
From here on, no more increases. The rounds build the sides of the hat using a little “mini cluster” of one hdc and one dc in the same stitch (or space).
Textured Round 1 (applies to both sizes)
- Ch 1.
- In the first st, work:
- 1 hdc, then 1 dc in the same st.
- Skip next st.
- In the following st, work:
- 1 hdc and 1 dc in the same st.
- Repeat around:
- (hdc, dc) in one st, skip 1 st
- At the end, skip the last st and join with a sl st to the top of the first hdc of the round.

You’ve just formed small textured “mini clusters” around the hat.
Textured Round 2 and All Following Textured Rounds
From now on you work into the gaps between the mini clusters, not into individual stitches.
- Ch 1.
- Into the space between the two dc/hdc of the previous mini cluster pairs (the gap between clusters), work:
- 1 hdc and 1 dc in the same gap.
- Move to the next gap between mini clusters, and again work:
- 1 hdc and 1 dc in that gap.
- Repeat all the way around, always working into the spaces between mini clusters.
- Join with a sl st to the top of the first hdc of the round.
Work this textured round repeatedly until you reach the desired length:
- In the tutorial, 7 rounds of the textured pattern were worked for the newborn size (and a corresponding length for the preemie).
- For newborn, this brings the total height (including crown) to around 11–11.5 cm, accounting for the extra round we added (Round 5).
You can adjust the number of textured rounds slightly for a longer or shorter hat, as long as it still looks in proportion.
Final Edge / Brim Round
This edge uses single crochet worked into a special spot to give a neat, slightly stretchy finish.
- Without chaining, insert your hook into the stitch where you just joined with a sl st.
- Work 1 sc into that st.
Now you will work around, inserting the hook into part of the stitch “bars”:
- Identify the two vertical bars running down the stitch; insert your hook into the left-hand side bar:
- Yarn over, pull up a loop (2 loops on hook)
- Yarn over, pull through both loops (this essentially gives a neat sc-like finish).
- Continue to work one sc into each stitch around, entering through that left-hand side of the vertical bars for a consistent look.
- Keep your tension loose, so the edge is not tight on baby’s head.
- When you reach the end of the round, finish with one last sc in the final st.
Finishing
- Cut the yarn, leaving a tail.
- Pull the yarn tail through the last loop on your hook to fasten off.
- Thread the tail onto a blunt yarn needle.
Neatening the final join (the tutor’s preferred method):
- Locate the top of the first st of the edging round and the top of the second st.
- From back to front (away from you), insert the needle under both loops of the “V” of the first st and pull through gently.
- Then insert the needle into the back loop of the last stitch you made (the loop furthest from you), and pull through again.
- Gently adjust (pull and snug) until you have a smooth, invisible join that looks like another stitch in the round.
- Weave the tail into the inside of the hat securely, then trim the excess.
- Weave in the starting tail at the crown as well.

Your tiny, textured baby hat is ready.
Uses
- Perfect for newborn photo shoots and hospital going-home outfits
- A thoughtful gift for new parents
- Wonderful charity or NICU donation project (both preemie and newborn sizes)
- Great small project to practice working in the round and managing neat joins
Tutor’s Suggestions
- Don’t worry about minor imperfections—this hat was designed in the middle of the night; it’s meant to be relaxed and approachable, not fussy.
- Remember that the starting chains at the beginning of rounds do not count as stitches. Always join in the top of the first real stitch.
- Keep the edging loose, so the hat is comfortable and not tight on baby’s head.
- Use the measurements as a guide: stitch counts and size checks help you know you’re on track, especially if your tension is slightly different.
Conclusion
This Free Crochet Newborn Baby Hat Pattern gives you a delicate, textured hat that’s easy to work up, sized precisely for tiny heads, and practical for everyday use or special moments. With simple stitches and a tidy finish, it’s ideal for confident beginners and a soothing, quick project for more experienced crocheters.
Tip
For the best fit, measure your flat hat’s diameter midway through the crown rounds and compare it to the target measurements (about 8.5 cm for preemie, just under 10 cm for newborn). Adjust hook size slightly (up or down) if you’re consistently getting a smaller or larger circle.


