Step-by-Step Free Crochet Fingerless Gloves Pattern You’ll Love
Need practical gloves, this Free Crochet Fingerless Gloves Pattern is designed to keep hands warm while staying functional & stylish.
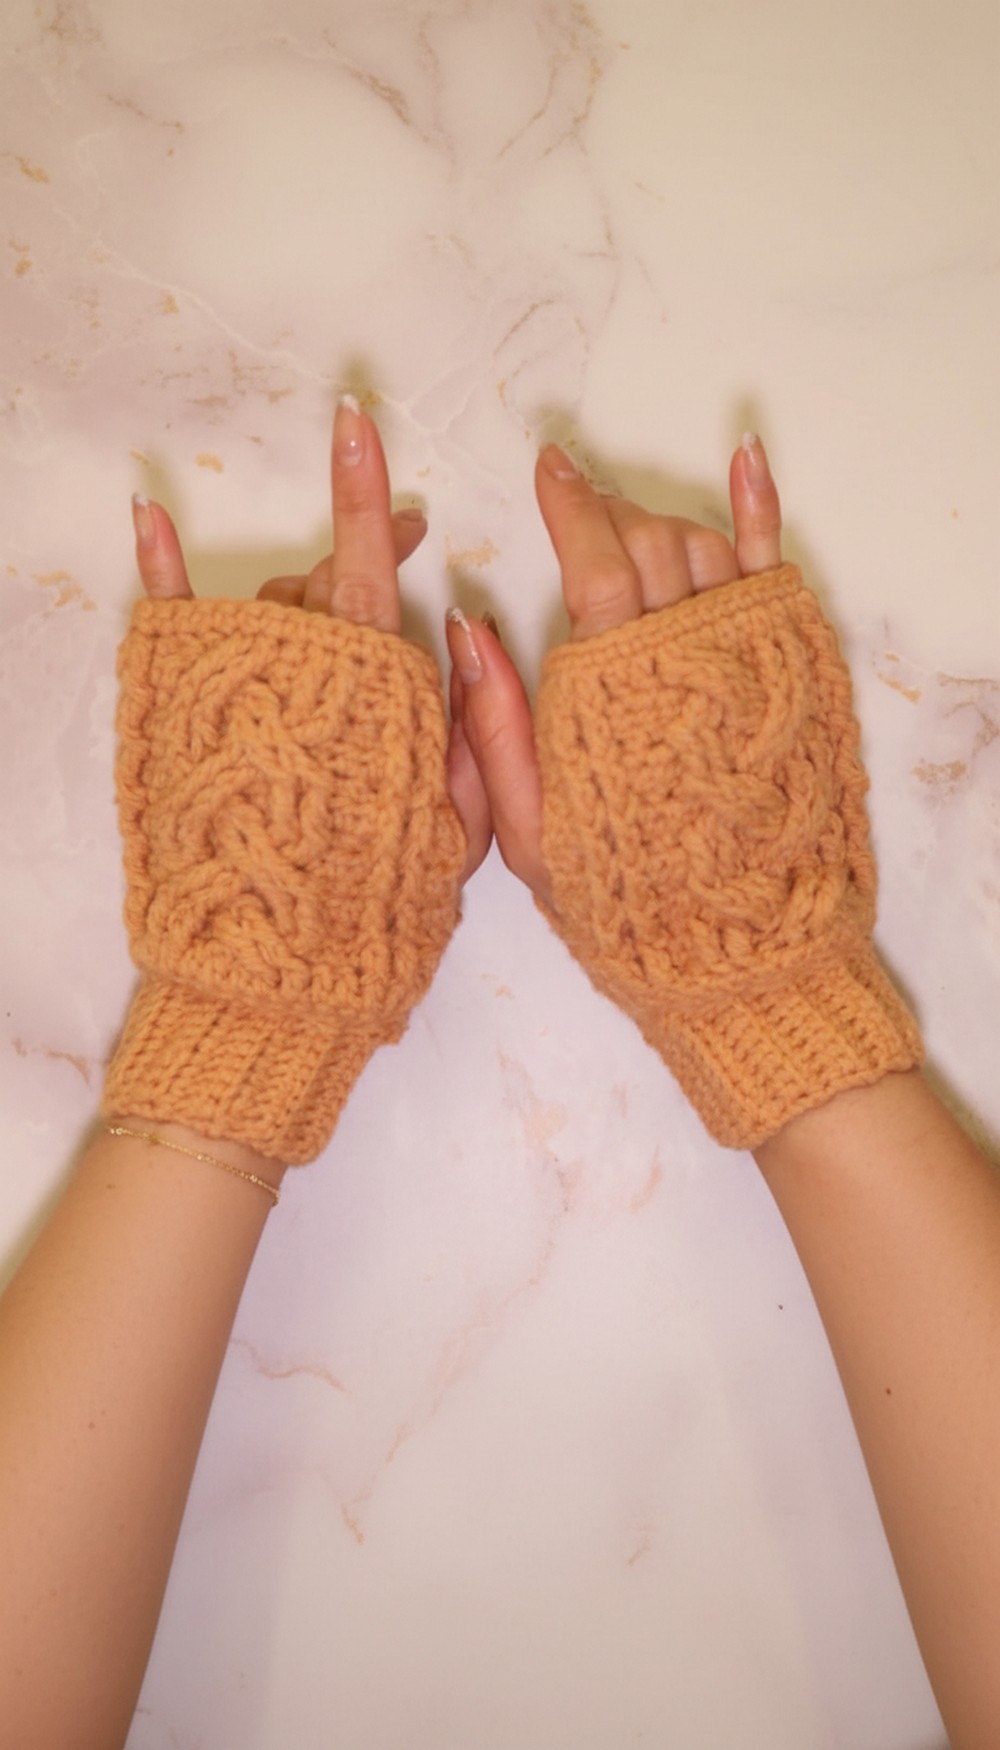
Seeking cozy elegance and practicality this winter? Fingerless gloves Pattern offers the ideal solution for keeping your hands warm while maintaining full mobility. Perfect for texting, driving, or enjoying your favorite beverage, this pattern combines comfort with function effortlessly. Featuring a stunning braided cable design, they provide a touch of sophistication to your cold-weather wardrobe. Whether customizing for yourself or crocheting a thoughtful handmade gift, this pattern meets the need for both style and individuality.
Warm, Chic, and Easy to Follow Free Crochet Fingerless Gloves Pattern

The flexibility of these gloves makes them great for all ages—simply adjust the size or choose colors that reflect your personality. While the intricate cable pattern adds a professional flair, the pattern is simple enough for intermediate crocheters to follow with ease.
Plus, the addition of ribbed cuffs gives the illusion of polished elegance while ensuring a snug and comfortable fit. Whether you’re preparing for winter or looking for a unique crochet project, fingerless gloves make the perfect accessory for merging warmth and flair into one.
Materials Needed
- Yarn: Weight 4 acrylic yarn
- Hook Size: 4 mm crochet hook
- Stitch Markers (optional)
- Scissors
- Tapestry needle
Special Features
- Braided cable design adds elegance and a professional look.
- Customizable sizing by adjusting the chain length.
- Perfect balance of function and style.
Skill Level
Intermediate: Requires knowledge of stitches like single crochet (sc), half double crochet (hdc), double crochet (dc), treble crochet (tr), and front post stitches.
Step-by-Step Pattern
1. Create the Foundation Chain
- Start: Create a slipknot and make a chain long enough to wrap around the width of your hand.
Tip: When checking the chain against your hand, ensure it fits comfortably around the widest part.- Example: 32 chains (adjust based on hand size).
- Chain 1 (for turning) at the end.

2. Row 1: Single Crochet (sc)
- Work: Starting in the second chain from your hook, single crochet (sc) across the chain.
- Result: You should have a neat row of single crochets.
3. Row 2: Double Crochet (dc)
- Chain 2, turn your work.
- Place a double crochet (dc) into each stitch across the row.
- Result: The gloves start building height.
4. Row 3: Half Double Crochet (hdc)
- Chain 1, turn your work.
- Insert half double crochet (hdc) into every stitch across the row.
- Result: This row adds density and structure to the glove.
5. Row 4: Start the Braided Cables
- Start with Base:
- Chain 1, turn your work, and work 2 hdc stitches in the first two stitches.
- Treble Crochets (tr):
- Yarn over twice and create 2 treble crochets (tr) as front post stitches (working around the indicated posts from two rows below).
- Half Double Crochet (hdc):
- Return to Row: Place 1 hdc into the third stitch at the top of the current row.
- Double Treble Crochet (dtr):
- Work double treble crochets by yarning over three times and crisscrossing to skipped posts from the braid design.
- Continue alternating front post treble/double treble crochets to complete the cable pattern.

Tutor’s Suggestion: Be patient during this step — the post stitches can be tricky but create the standout design!
6. Row 5: Back-Side Half Double Crochet
Every time you’re working on the back of the glove, simply:
- Work half double crochets (hdc) across each stitch.
- This creates smooth texture on the interior of the glove.

7. Repeat Rows 6 to 9
- Alternate Rows: Repeat rows 6 to 9 until you reach the desired length for the glove
- End Measurement: From wrist to knuckles (or adjust to preference).

8. Final Row: Single Crochet (sc)
- Finish with a return pass of single crochets (sc) for cleaner edging.
- Cut your yarn and secure it with a chain knot.
Finishing Steps
1. Creating the Thumb Hole
- Fold the glove in half (inside out).
- Using a stitch marker, mark the space for the thumb hole (eyeball or measure stitches).
- Example: Leave 2–3 inches open.
- Using single crochet, seam the glove together from edge to thumb marker.
- Repeat on the opposite side, leaving the thumb hole open.

2. Adding the Ribbed Cuff
- Start:
- Attach yarn to the opening at the wrist area.
- Chain 10 (or preferred length for cuff width).
- Work Back Loops:
- Work single crochet (sc) back down the chain in back loops only.
- Slip stitch into the next 3 stitches along the base of the glove.
- Repeat:
- Continue working the cuff all the way around the wrist opening.
- Seam the cuff edges together using single crochet stitches.
- Cut and weave in any loose ends.
Conclusion
Your fingerless gloves are now complete! Featuring a stunning braided cable design and snug ribbed cuffs, these gloves are as stylish as they are functional. They make wonderful gifts that are both cozy and chic.
The Tutor’s Suggestions
- Customizations: Adjust the chain length and rows to fit different hand sizes.
- Pair It Right: Use solid-colored yarns for a sleek look or variegated yarns for added personality.
Tips for Success
Blocking: Lightly block your finished gloves to smooth any uneven stitches and give the cables a polished look.
Uses
- Perfect for cold weather while using gadgets.
- Thoughtful handmade gifts for holidays and birthdays.