
10 DIY Night Light To Match Any Home Decor
DIY night lights offer a fun, creative, and budget-friendly way to add a touch of charm to your nighttime ambiance. These cozy homemade lights can be designed to match your room decor, amplify the theme of a child’s bedroom, or even serve as a tranquil aid for peaceful sleep. They involve the creativity of using various materials like glass, paper, wood, or even recyclables. To inspire you, here’s a list of 10 DIY Night Light Ideas that are simple, easy and will surely match your needs and budget.

Create beautiful and unique night lights with these simple yet exquisite DIY projects. Whether you want a decorative accent for a Holiday, something for your cartoon-obsessed child’s room, or one for your bedroom, our collection has everything you need. Our DIY collection also includes a moonlight that provides cozy comfort and peace. These DIY crafts are easy and use accessible materials you might already have in your home. So, explore the entire collection, gather your materials, and prepare to add a magical charm to your sleep time.
How do you make a night light safe?
To ensure night light safety, follow these guidelines:
- Choose low-wattage, cool-to-touch LED bulbs to reduce heat production and electricity usage.
- Select a UL-certified night light and bulb to guarantee safe electrical standards.
- Position the night light away from flammable materials and opt for a stable surface to avoid accidents.
- Periodically inspect the night light for any damage or wear, promptly replacing bulbs or faulty parts.
Following these tips will help create a safe, comforting environment.
DIY Night Light
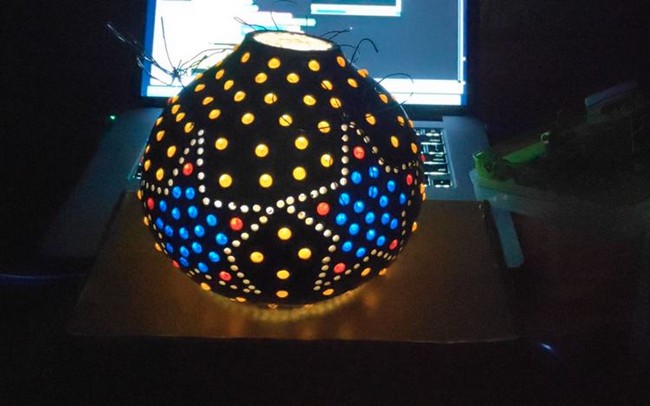
The Shiny Ball Night Light from Instructables is a simple DIY project that adds beauty to your room. Like a small star cluster within a sphere, its bright glow makes it a wonderful night-view. The ‘Ball Night Light’ can be used both as a decoration and a light source, making it flexible for various environments.
Prepare the lampshade components and cut 4 equal-sized sides to create the night light. Assemble the sides by gluing them together while ensuring they fit firmly. After the shade has dried, prepare the LED strip by soldering the ends and attaching a 3-pin JST connector. Proceed to insert the LED strip into the lampshade and secure it in place with hot glue. Finally, connect the strip to a controller and power source and close all connections in a proper enclosure.
Materials:
- Arduino Leonardo
- Breadboard
- Some wires
- 8 led lights
- 9 resistance
- Photoresistor
- Box
DIY Paper Night Light

This DIY Paper Night Light is an imaginative creation that transforms the typical night light into an illuminative work of art. It’s made from simple cut-out cardstock and hung over an LED plug-in night light, ensuring safety. You can add colored tissue paper to give it a warm, colored shine, making the night light more personalized.
Start by cutting the night light design using the color-coded lines indicating where to cut or score lines. Create 3D details on the paper design by gently curling it at cut lines and folding it along the score lines. Glue the two corresponding numbered tabs on the folded edges and let them dry to form a half cylinder. Once complete, safely position the paper shade over your plugged-in night light, securing it with a clear pushpin or a tiny nail to create the final appearance.
Materials:
- Led plug-in night light
- Card stock
- Xacto knife
- Color tissue paper for a colorful glow
DIY Night Lights From A Cup
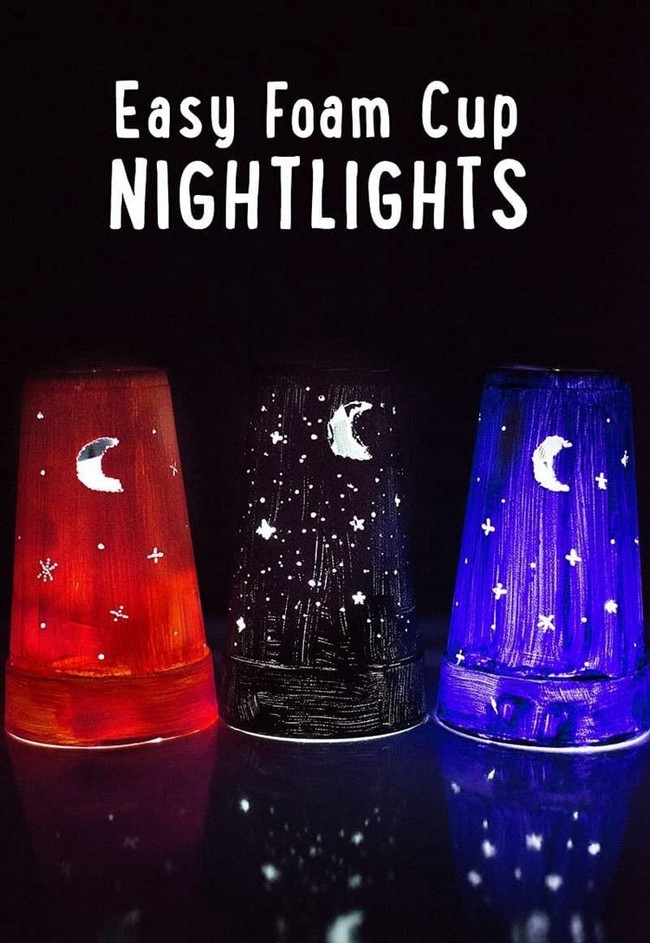
This DIY Cup Night Lights is an easy craft where foam cups and small torches are transformed into playful nightlights. You can make different designs by poking holes in the cups with toothpicks. This fun DIY project is useful and lets you express your creativity.
You can get this DIY craft by painting the cups and allowing them to dry. Next, use toothpicks to create holes for light to shine through, letting your creativity guide you. The more holes, the more light will emit from the night light. Once you’ve made all the holes, poke a hole in the bottom of the cup. Turn on the flashlight, slide the jump ring of the flashlight through the hole, and secure it with a toothpick. If needed, wrap the jump ring with a needle and thread or garbage tie to guide it through the hole. And you’re done!
Materials:
- Foam cups
- Paint/paintbrush
- Toothpicks
- Fresh Rayovac batteries
- Mini flashlights
DIY Moon Night Light
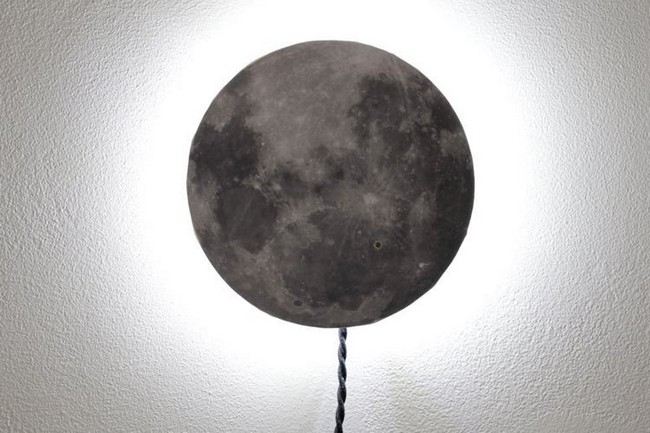
Whenever we think about calm and peace, the first thing that comes to mind is the moon. So, why not bring this source of peace and comfort right into your home with this DIY project? This DIY wall art gives a soft glow to your room, allowing you to enjoy a good night’s sleep and dream big!
To create the Moon Night Light, start by drilling holes in the wooden “O” and then attaching it to the wooden disc with glue. Attach the LED strip around the wooden O and solder wires to it. Wire the power jack and apply the moon decal to the wooden surface. Drill a hole in the moon, insert the wires, and build a transistor circuit on a PCB. Attach the photocell, wire the power, and mount the PCB using adhesive-backed Velcro. Insert the photocell into the hole, and finish by hanging and plugging in the night light.
Materials:
- TIP31 transistor, TIP42 transistor
- Photocell, 1M resistor, 10K resistor
- PCB, Power jack, White LED strip
- Moon decal, 8″ wooden disc, 6″ letter “O”
- 10′ twisted pair fabric cord
- Adhesive-backed Velcro squares
DIY Faucet Night Light
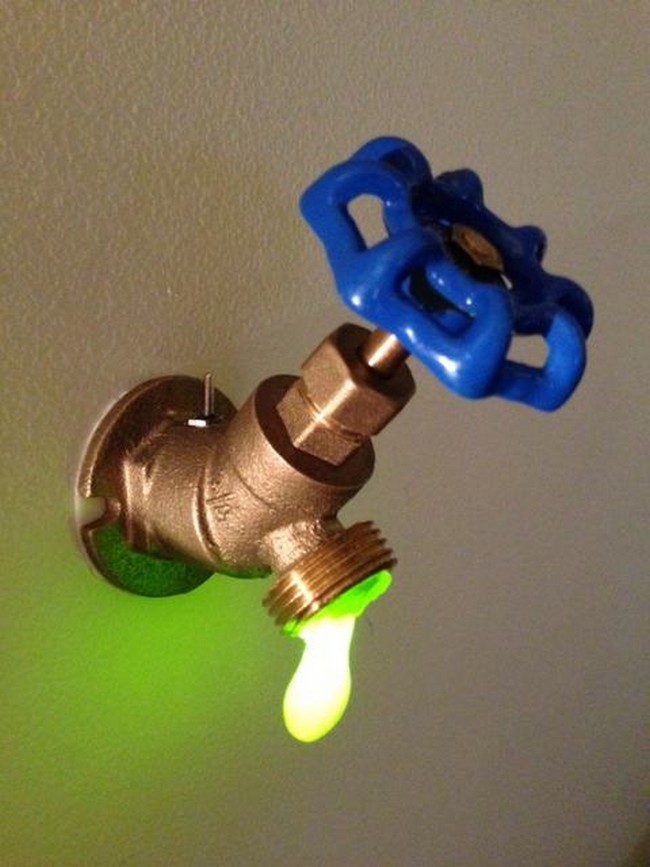
Let’s create a playful addition to your room that will surely amaze your guests. Using the faucet and an LED light; it appears like a drop of nuclear liquid is emitted from the tap. This unique decor could be a quirky touch to your room’s Halloween decorations.
First, take apart a pacifier and put the LED into the changed top using a strong adhesive to make a tap-like night light. Extend the connections using a special wire and put holes in the faucet knob for a switch. Make a pile of batteries and link a wire to the single-pole, single-throw (SPST) switch. Incorporate the LED drop into the faucet knob and then complete the soldering. Link the battery wire to the LED using the switch, and secure any open wires with a special tube or tape. At last, put all parts into the knob and lock the switch with a nut. Attach sticky pieces to the back for easy fixing on the wall.
Materials:
- Faucet/Hose Value 3/4
- Small G10-A 1.5V batteries
- Micro SPST Switch
- Green Rectangular LED
- Electrical Tap
- Hot Glue Gun + Hot Glue
- Soldering Iron
- Heat Shrink Tubing
- Wire Stripper/Cutter
DIY Night Light

This charming DIY project transforms ordinary jars into decent fairy glow jars, perfect as unique night lights for your kids’ rooms. The glow sticks in various colors allow you to customize the jar’s glow to your child’s preference. However, since glow sticks can be potentially dangerous, it’s important to supervise children throughout the process.
Making this DIY night light is quite easy and satisfying. Start with the search for suitable jars. Carefully fill these jars with a particular kind of liquid. Procure special sticks that have glow properties. Please remember to exercise caution as these sticks can be dangerous; ensure they are broken safely and their contents blended into your filled jars. After completing these steps, you’ll have enchanting night lights ready for use.
Materials:
- Water
- Jars
- Glow sticks
DIY Pokeball Night Light

Create this DIY Night Light for your Pokémon-obsessed child to encourage an earlier bedtime. This project encompasses everything a Pokémon enthusiast could ask for simplicity, affordability, and, most importantly, extraordinary uniqueness!
Start by taping half of an IKEA FADO table lamp, covering the side you want to remain white. Next, use a bag to mask the untaped part securely. Spray paint the exposed half with red enamel and let it dry before removing the tape and bag. Apply black duct tape around the center, leaving space for a circle. Use a spray can as a template for the black circle outline. Punch out a 1.25-inch circle and fit it in the center. Lastly, reassemble the lamp.
Materials:
- Masking Tape
- Duct Tape
- Bag
- 1.25″ Circle
- Blade
How To Make Graffiti NightLight
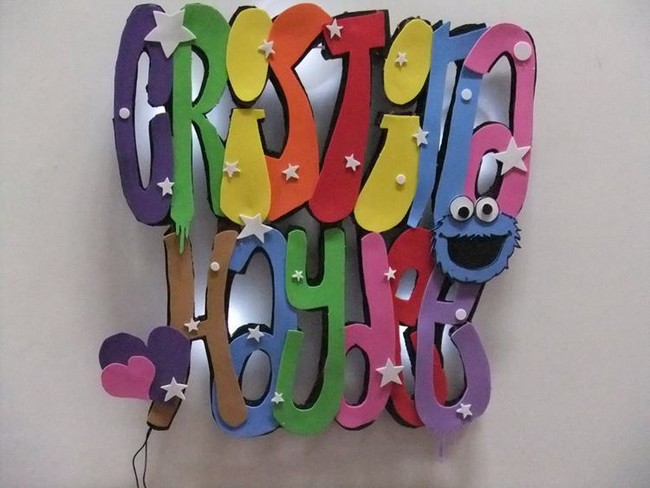
If you love to DIY projects at home and make things with your own hands, here’s a perfect idea to bring a smile to your face. You can create a graffiti night light in less than 20 minutes and easily decorate your kid’s room! A perfect combination of stylish style and function is displayed in this night light.
You can get this DIY project by drafting your design on cardboard and then covering it in paint. Once dry, construct a parallel circuit for the LEDs, decide on their positions, make holes, and glue them there. Create layers in the stand by cutting cardboard rectangles and gluing them together, repeating this for another floor. Cut cardboard the size of your design and glue it to the columns. Craft designs from foam and attach them. Draw, cut, and attach your Cookie Monster design to complete your Graffiti Night Stand.
Materials:
- Cardboard
- Hobby Knife
- Scissors
- Ruler
- Hot-glue Gun
- Black acrylic paint
- Foamy colored sheets
- Leds
- Wire
- 3 v AC – DC adaptorCompass- Cutter
DIY LED Egg Night Light
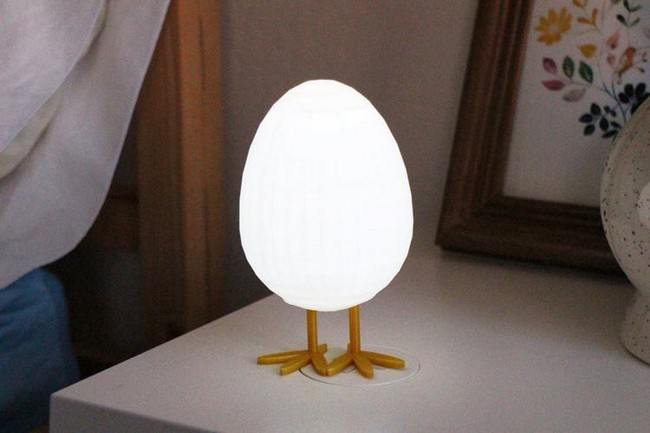
Illuminate your space with the soft, warm glow of the LED Egg Night Light. This charming accessory utilizes 3D printing technology and inexpensive electronic components to create a comfortable ambiance. With its inviting luminosity and ample room for creativity, this night light is a simple, fun, and economical DIY project suitable for all levels of crafting experience.
Begin by modeling an egg shape with a 3D modeling program, such as Tinkercad. Divide the egg into two parts and shell the top part so that you end up with a very thin wall through which the LED light can shine. An extra thickness of the egg top’s bottom should be added to accommodate the LED holder. Create a holder for the battery and LED on the egg’s bottom and attach it. Finally, create and attach two legs for the night light.
Materials:
- 3D Printer
- PLA filament that matches your printer
- Wide painter’s tape
- Credit card for smoothing out the tape on the print surface
- Rubbing alcohol or an alcohol-based lens cleaner
- Sharp chisel
Fairy House Night Lights
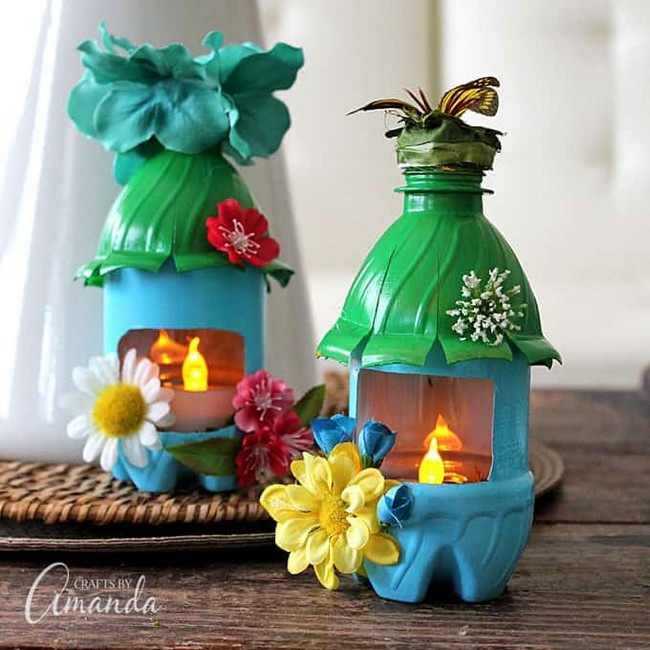
Are you searching for fun and educational activities for your children? Allow your kids to learn about recycling through these amazing fairy house nightlights. Children will enjoy building, painting, and personalizing these fairy house night lights with their creative ideas.
Cut the top portion of a plastic bottle. Paint both halves of the bottle and let it dry. Cut a large window to fit a tea light in the bottom half. Cut slits halfway up the bottle top, bend each end upward. Decorate with flowers and cover the lid with leaves or flowers. Inside the bottom half, glue moss in place and add the tea light. Place the shaped “roof” on top of the “house” to complete your Fairy House Night Light.
Materials:
- Recycled plastic bottle
- Multi-surface craft paint
- LED tea light
- Silk flowers
- Moss
- Hot glue gun
- Craft knife
- Scissors


