
DIY Flamingo Sculpture With Clay
Making a DIY flamingo statue from clay is an easy and enjoyable project for everyone. Once you know the easy steps of managing clay, you’ll create a cute, light, and colorful flamingo. It’s ideal for customizing your home or giving as a special present. It can also brighten up your pool, pond, or garden. So, get your tools ready, gather some clay, and start making your handmade decor with us!

Making your DIY Flamingo sculpture:
Whether you are a crafter or a simple stout man, making this DIY yard project is quite easy and simple. Below, we tried our best help you understand the whole process with step-by-step pictures and concise explanations.
Materials:
- Clay
- Aluminium Foil
- Wire Hanger
- Glue
- Brush
- Paints
Tools:
- Piller
- Glue Gun
- Carving Tools
Making the base using Foil:
Begin by creating a lightweight base for your flamingo sculpture. Use aluminium foil to mold the basic shape of the flamingo’s body, compacting it tightly to ensure stability.

Cutting the Hanger:
Search for a wire hanger that’s no longer in use. Cut pieces from it to serve as the flamingo’s legs and spine. The wire gives your sculpture strength and helps maintain its shape as you build with clay.

Adding the base of limbs and trunk with wire:
Pierce the wire pieces you cut from the hanger in the base and secure them using hot glue. These will function as the basic skeletons for the limbs and body of the flamingo.

Covering the base with clay:
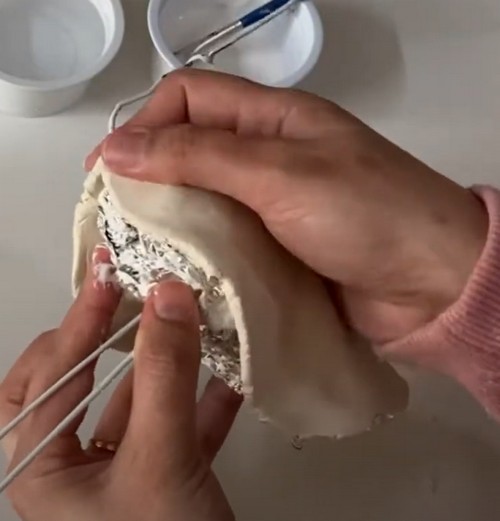
Using glue and a brush, attach the clay to the foil and wire base. Ensure you cover all areas for a smooth surface. This creates a solid clay foundation onto which you can add more details.
Covering the Spine with Clay:
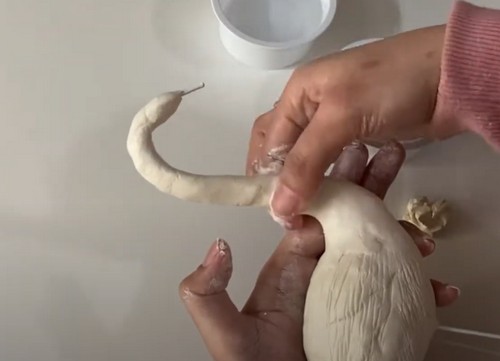
Use more clay and glue to cover the wire that represents the spine of your flamingo. This makes it more robust and ready to take on more detailed features.
Making beak and Adding details:
Now, you can start adding the characteristic features of the flamingo. Use tools to mould the beak and carefully add details such as the eyes and expressive lines around the face and neck.

Making the feathers:
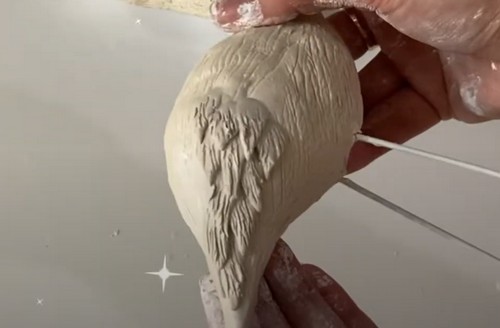
Section out small bits of clay and use a sharp tool, like a toothpick, to mimic the texture of feathers. Place these around the body of the flamingo, paying close attention to layering.
Making the Base to Stand:
To ensure your flamingo can stand on its own, build a base out of a small tub and clay. Be sure this base is heavy enough to support the weight of the flamingo without tipping over.

Adding the Webbed feet :
Cut out the shape of webbed flamingo feet from paper. Attach these to the clay legs and cover them with a thin layer of clay for a unified look. Also, make a thin wire of clay and roll it in the center of the legs to make the knees.

Painting the Flamingo:
Once your clay flamingo is fully dry, it’s time to paint. Paint the beak black, gently apply a blush of pink to the body, and give the base a premium look with a coat of golden paint.

The final look:
After everything has dried properly, you have your very own flamingo sculpture! Display it as a proud testament to your creativity and craftsmanship.


